- Home
- ~ Bunk Bed Yoga (Free Ebook to Download!)
Bunk Bed Yoga Stretches for the End of Your Pilgrimage Day
Every night before you sleep, doing these bunk bed yoga stretches will help you stay healthy! You can do yoga without a yoga mat, if you use your bunk bed instead! What a perfect way to practice yoga on your pilgrimage!
"Stretching after a day of continual walking is mandatory to undo the repetitive motion damage that happens within your tissues on your pilgrimage. A mindful session of stretching improves blood flow, reduces tension, relaxes and elongates your muscles, tendons and ligaments, juices your joints and helps you recover more fully for your next day of walking." ~ Elle Bieling, RN, RYT
Yes, that is me that I am quoting, above! Yes, I am both a Registered Nurse who has worked in occupational health settings, dealing with repetitive motion injuries, and yes, I am also a registered yoga teacher!
Damage from the Repetitive Motion of Walking
I know a bit about repetitive motion injuries and the damage it can do to your body. The pounding that your legs will take on your feet, your shins, your calves, thighs and hips during your pilgrimage travels are significant! If you read my Camino Primitivo articles, you will see how I suffered, especially from shin splints, as I negotiated the ups and downs of all the hills.
Combine the repetitive motion of walking with the pavement pounding and it's a real set-up for problems for your feet and legs! - And I am not even mentioning blisters! Nor have I yet mentioned the aching shoulders and back that you may develop!
One of the ways that I stayed healthy, on my own pilgrimages, was doing the yoga stretches that I show in this article. I fondly call these stretches "bunk bed yoga" as you truly can do the stretches in bed, at night, without having to carry extra gear.
Not only will these yoga stretches improve your physical well-being but they will also help you wind down and relax for a good night's sleep. Stretching brings your body and your mind into a space that is truly healing ~ especially if done in a contemplative fashion, with deep, relaxing, belly breathing.
The type of yoga that I practice is called Yin Yoga and consists of long-held poses of 3-5 minutes, utilizing the breath for releasing and letting go. The deeper, less fluid tissues of the joints, ligaments and tendons (as well as the muscles) are accessed when you do the deeper, longer-held yoga stretches.
Nothing will make the deeper, denser tissues of your joints, ligaments and tendons more malleable, less prone to injury and more fluid like long-held Yin Yoga poses. As we all know, this is vital to increase our mobility as we age.
Finding an interesting and appropriate edge will make your stretching most therapeutic. Never push or pull on your tissues to the extent that you are unable to continue the slow, deep breathing. Go only as far as you can comfortably breathe!
A Bunk Bed Yoga Routine
Shall we begin? I suggest, for your own routine, to pick out at least five to six poses, of the ones I suggest below. That way, you will ensure that you do a short routine every night before bed. If you try to do all these yoga stretches every night, you may not stick with it.
It is much better to do a few poses and hold them longer, than to rush through each and every pose! This is the goal behind Yin Yoga, a more contemplative and mindful way to stretch! You may just stretch more than your body, if you do your bunk bed yoga in a meditative fashion.
For your daily stretching, pick at least one of the following from the poses in the article:
- Ankle openers
- Lower back releases
- Hamstring/inner leg stretches
- Hip openers
- Quadriceps stretches
- Final Resting Pose
If you pick one pose from each category, you will have a nice daily routine. In addition, I would also suggest that you always include the Child's Pose in your daily bunk-bed yoga routine. I scattered the Child's Pose throughout the sections of this article as this is a lovely counter-pose to many of the poses. Plus, it is just a feel-good all over, resting pose!
1. Ankle Openers - Do Every Day, Especially if you Suffer from Shin Splints or Plantar Fasciitis
One of the causes of shin splints and plantar fasciitis problems is tight ankles and tight Achilles tendons at the back of your heels. We often forget to stretch the ankles, and when walking day after day, we suffer because of it.
Yes, indeed, I realize that these ankle openers are not done in bed! Oh well! I thought it very important to include them in my bunk bed yoga article, since our poor ankles are so often forgotten and the cause of so much preventable pain!
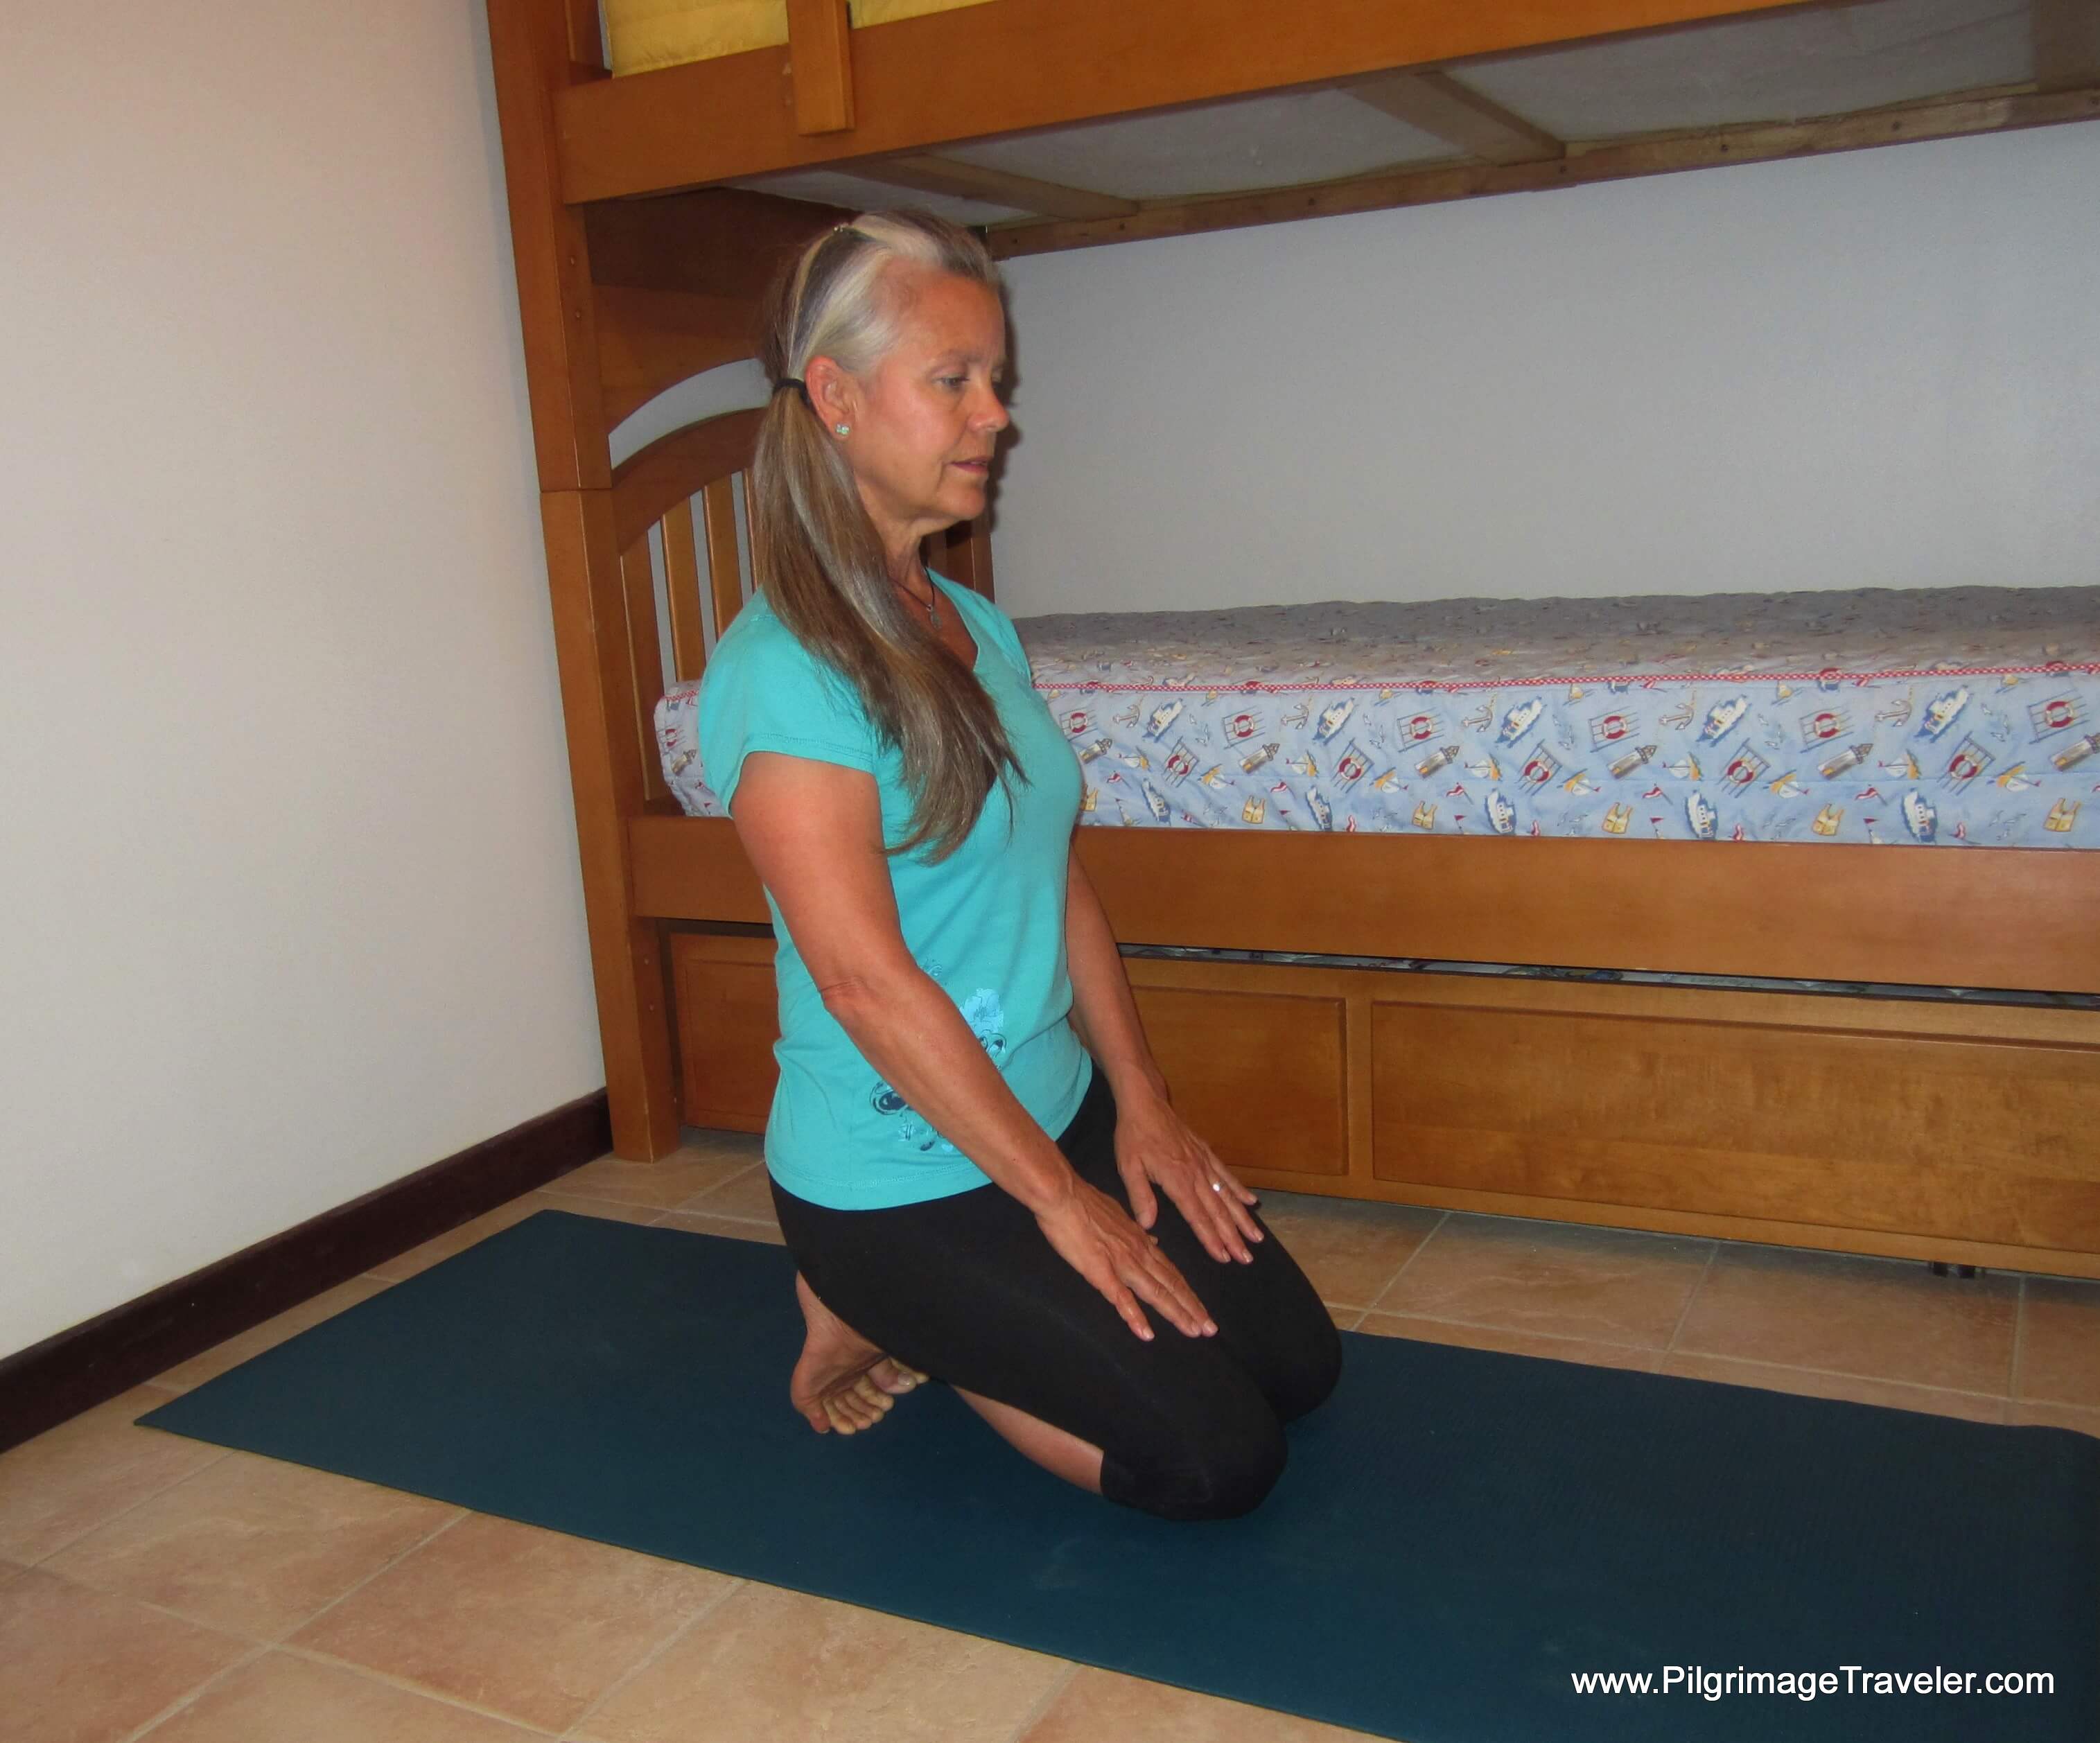
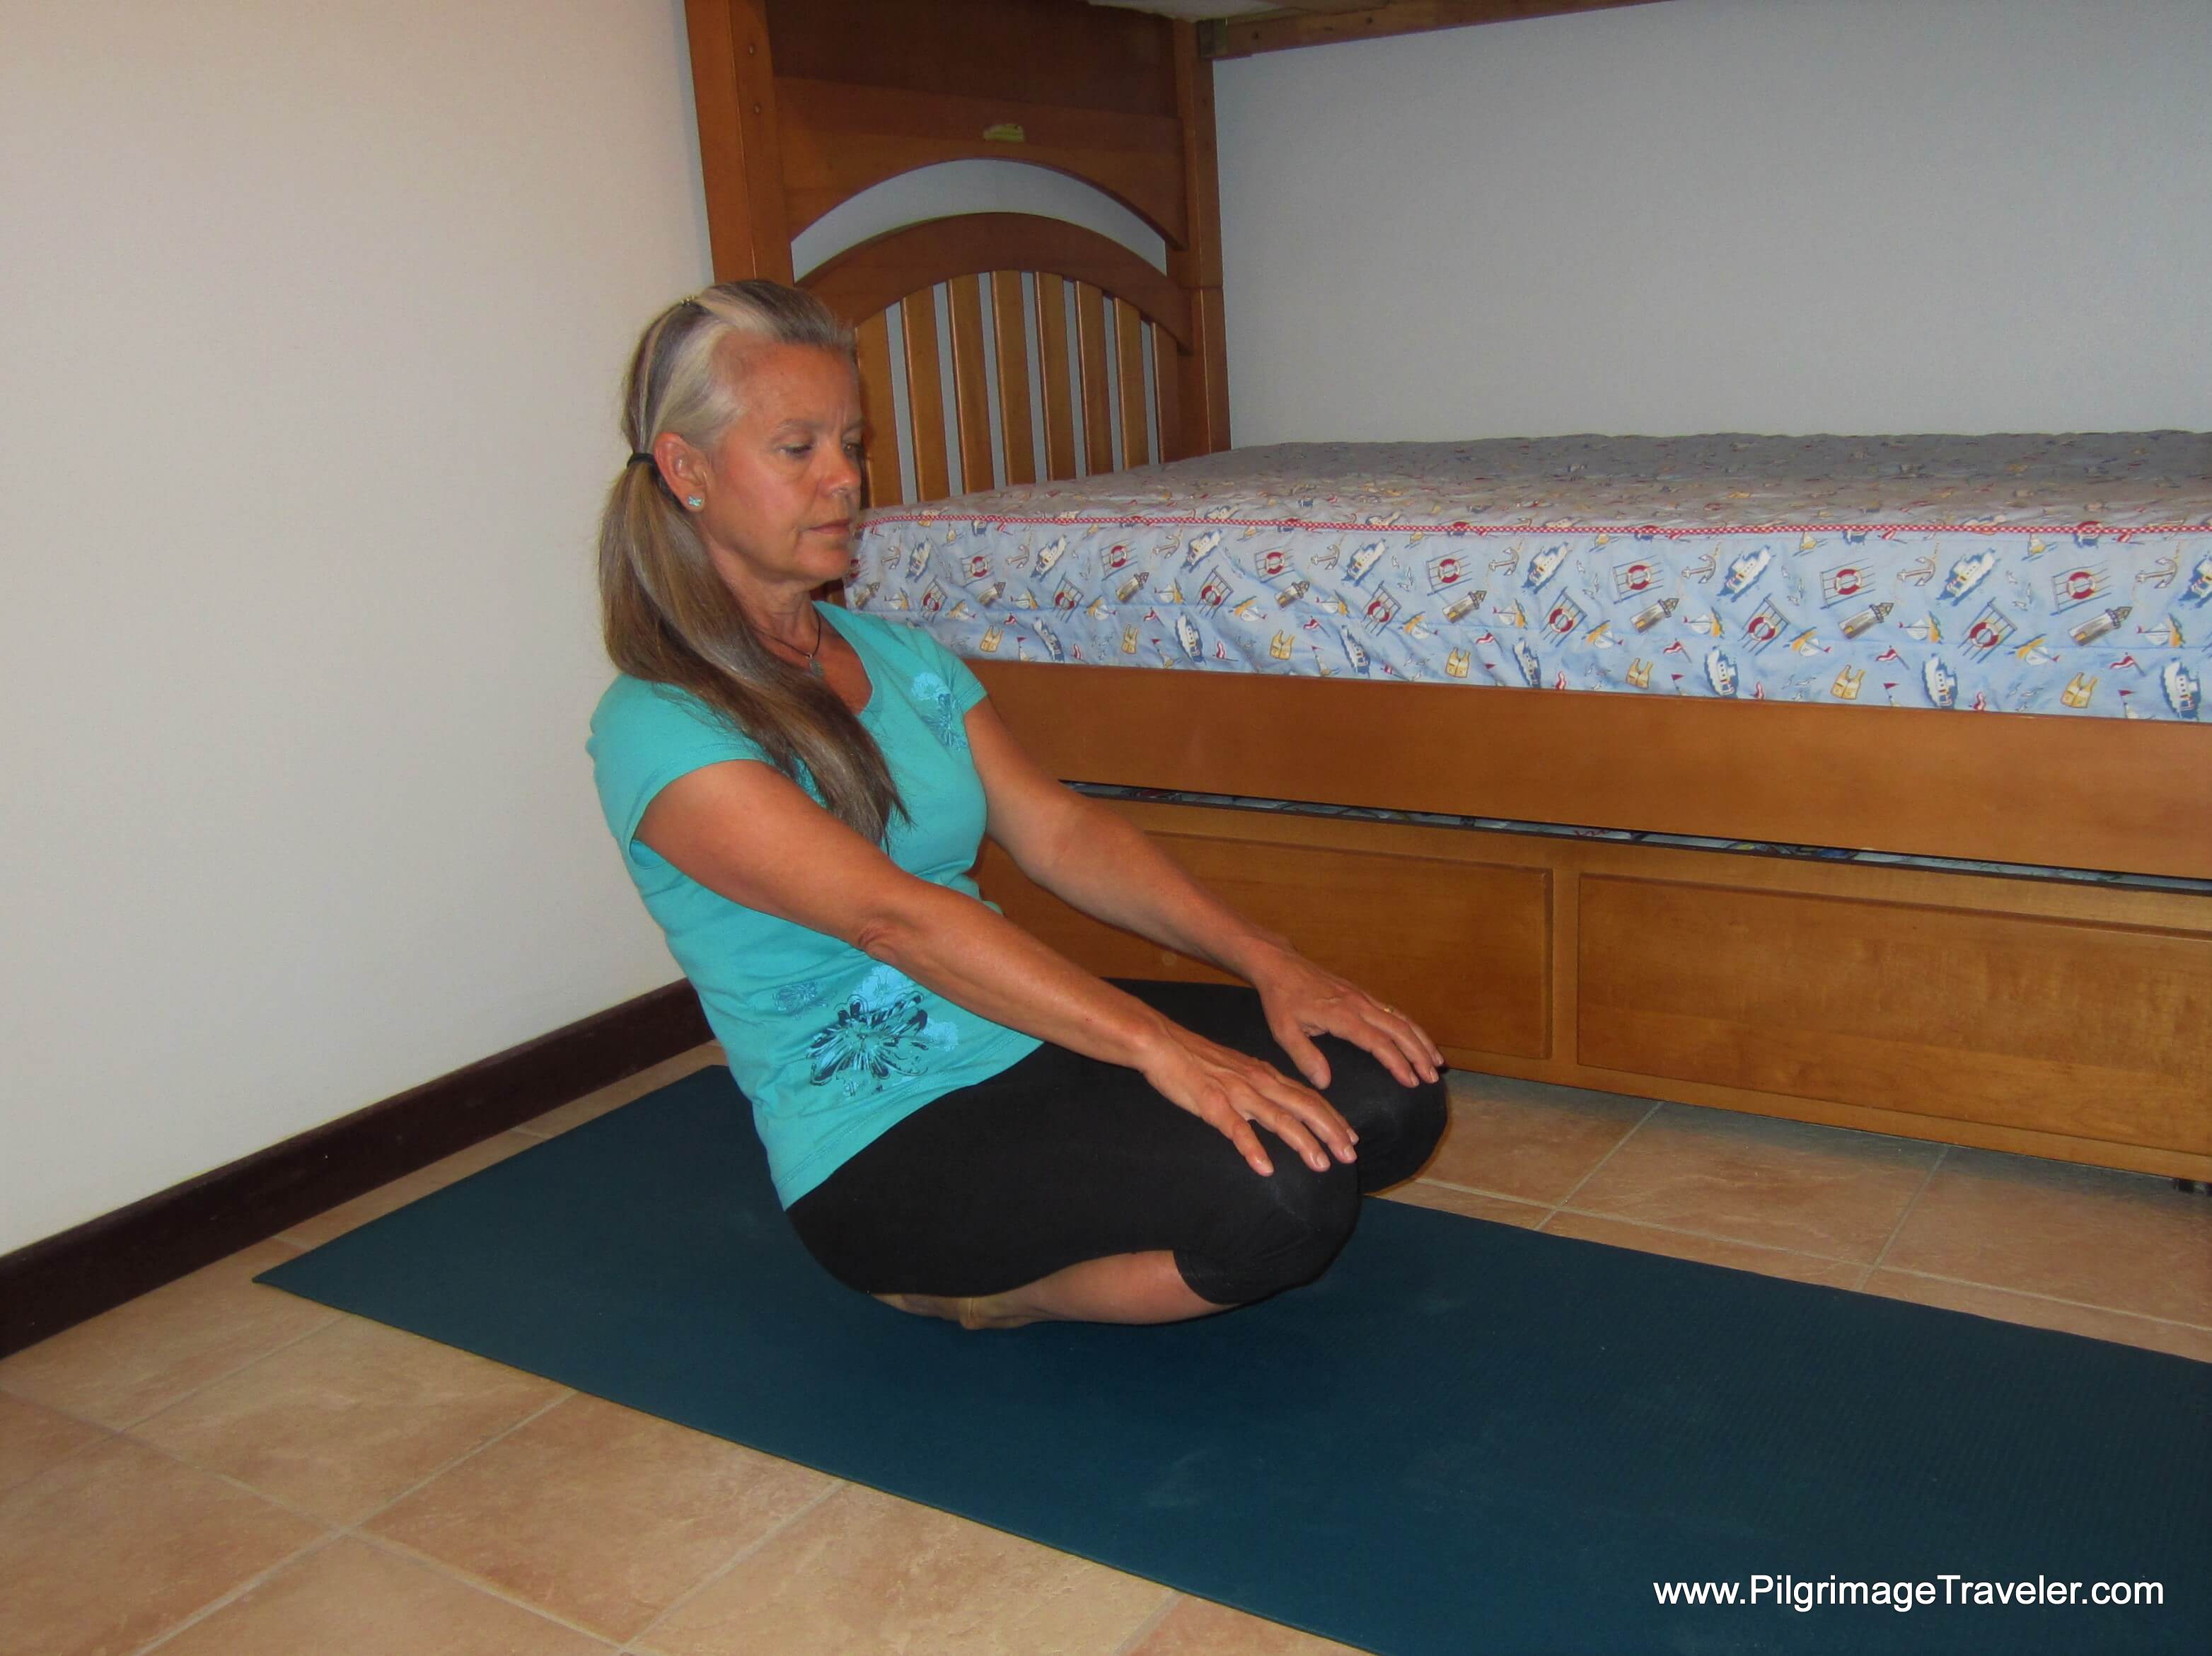
First is the Ankle Dorsiflexion Stretch, in the first photo below. The pose is very easy to set up. Just kneel on the floor (or ground - it's softer outside). You may wish to put a blanket or something soft under your knees to pad them.
Tuck your toes under your heels, and touch them to the floor. You may wish to keep your flip flops or shoes on to do this if you are doing it on the hard ground. Push your upper body up and off the ground and sit back on your ankles, like shown.
This stretch will be ouchy for most of you, especially after a day of walking! Go back towards your ankles cautiously at first to test how you tolerate this yoga stretch. Maybe if you are reading this before your pilgrimage, start stretching your ankles now! It will keep you healthy and pain-free for your upcoming journey!
DO be especially cautious, if you already have the heel pain of plantar fasciitis that is more than mild. If this stretch really hurts, do not push through it! Always consult your health care professional to ensure that you are not injuring yourself further.
You may try modifying the pose, by stretching only one ankle at a time (not shown). You can do this easily by placing one foot on the ground in a kneeling position just on one side. OR you can put your hands down on the floor to reduce the weight from your body to both your heels and Achilles tendons, or find some place in-between kneeling with your toes under your heels, and sitting totally upright like I show in the photo.
Good luck and may you have healthy feet and ankles that are free of plantar fasciitis when you do this yoga stretch!
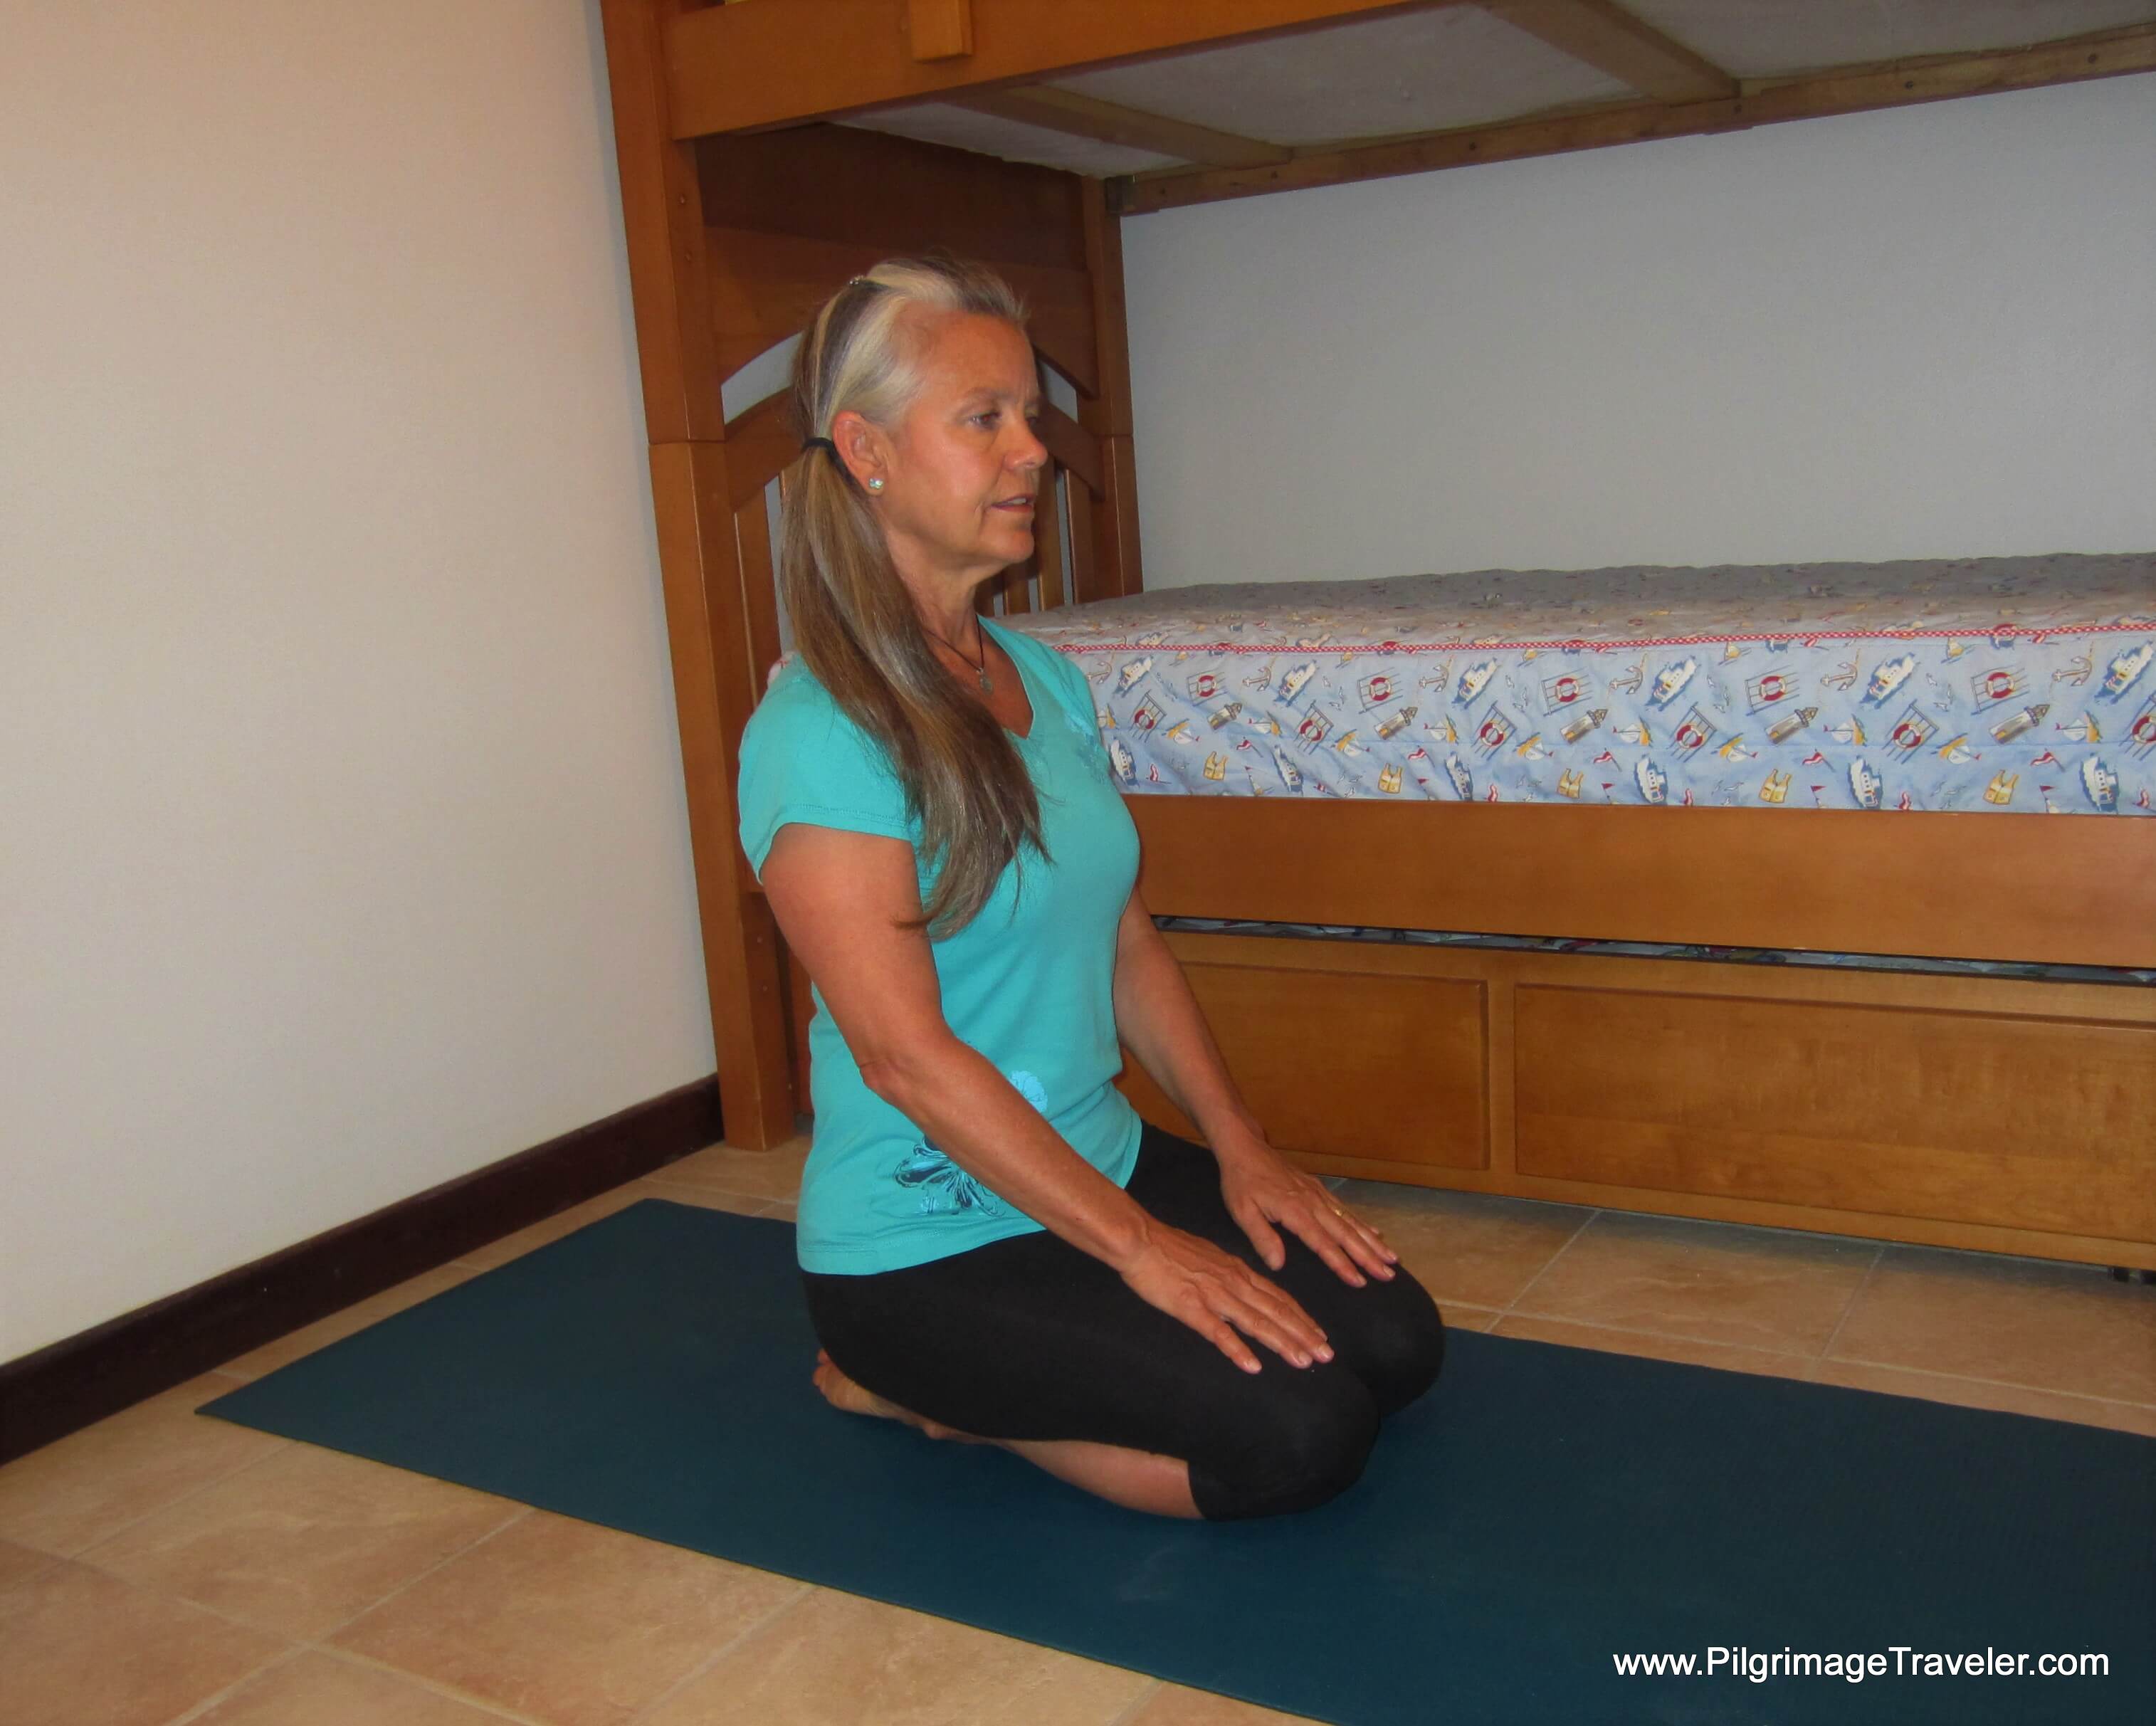
The second ankle opener involves stretching in the opposite direction, for the Ankle Plantar Flexion Stretch. Even though this is not a bed yoga pose, this yoga stretch will help with the prevention and treatment of shin splints. The pose starts in a similar fashion, except now the tops of the feet remain flat on the floor (instead of tucking under the toes).
Below is the step one position :
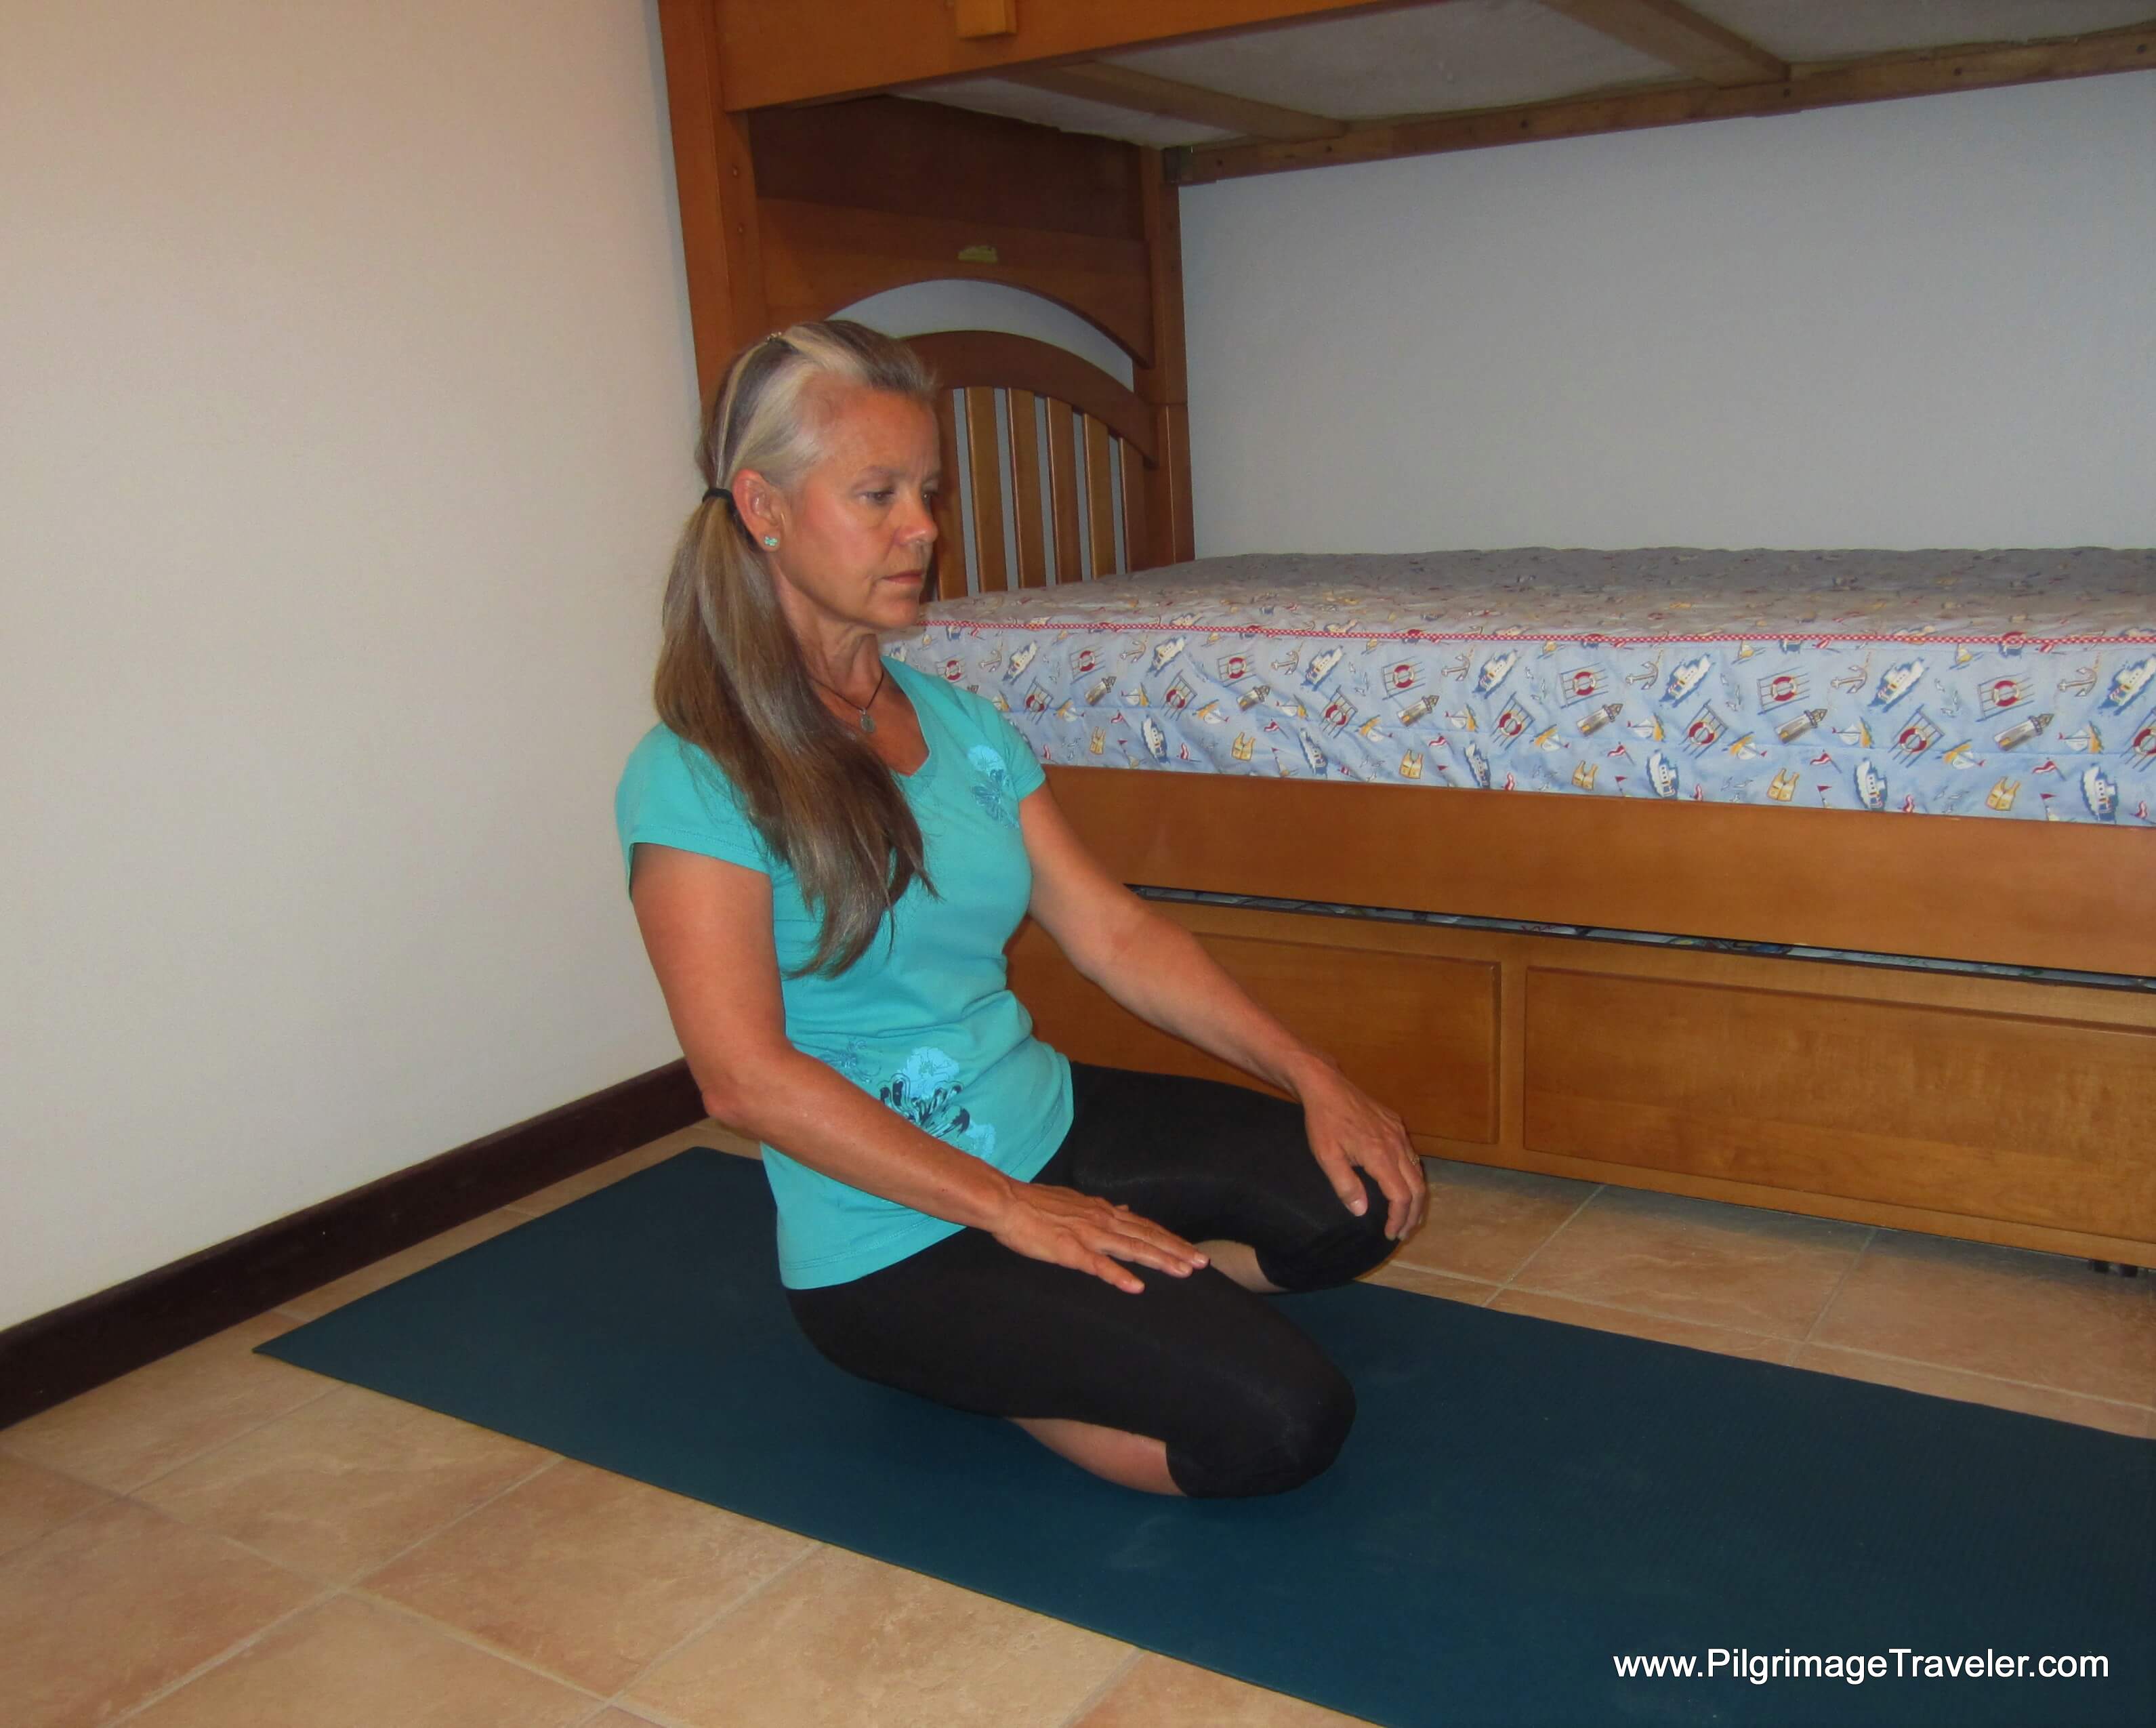
Next, for step two, shown in the photo below, take your left hand and place in on your left knee. Slowly raise your left knee as you lean back until you feel a nice pull on the front of your left ankle. Your weight may try to shift towards your right hip, but continue to focus on keeping the majority of your weight over the left ankle and hip.
You may pad your ankles with a towel or blanket to soften the hard ground, if needed.
Repeat the process on the other side and hold for as long as the left.
Then for fun, try the more balancing act of doing both ankles at the same time, see the photo below. The balance part is tricky.
You could also stretch both ankles at once, by just placing your hands on the floor behind you too (not pictured). It's is much easier!
May you have healthy lower legs, free of shin splints when you do the Ankle Plantar Flexion Stretch!
2. Releasing the Lower Back
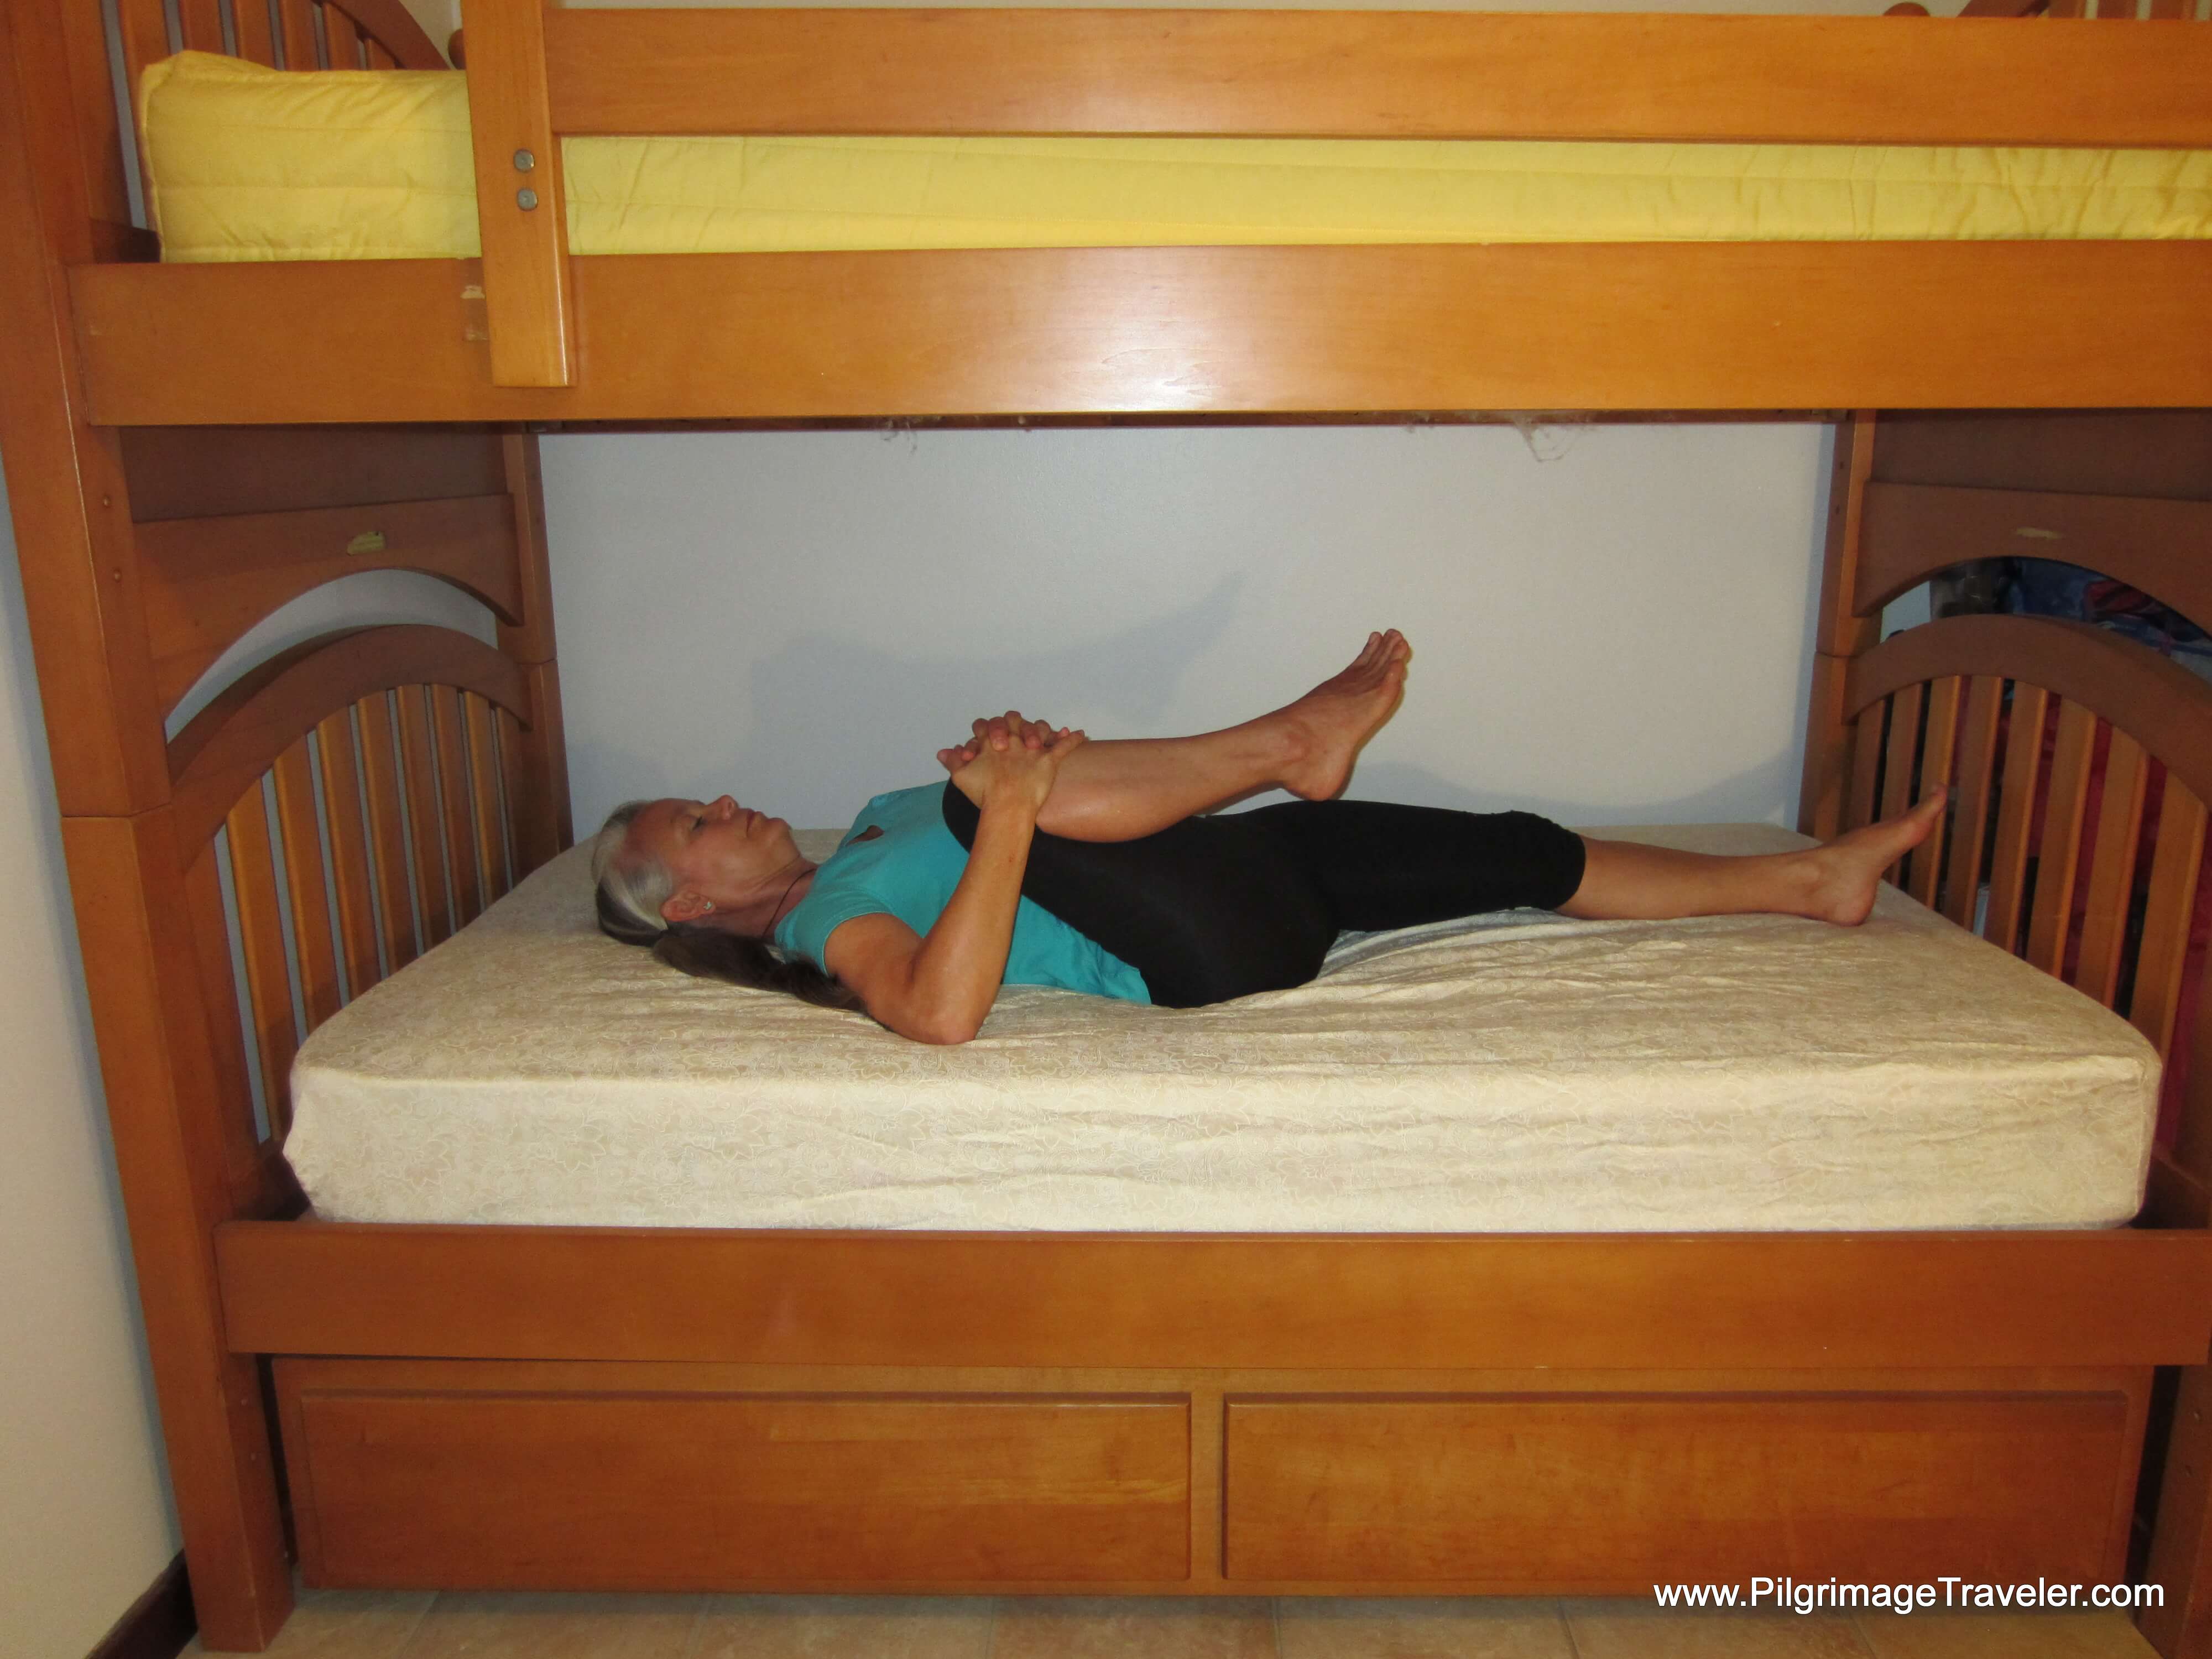
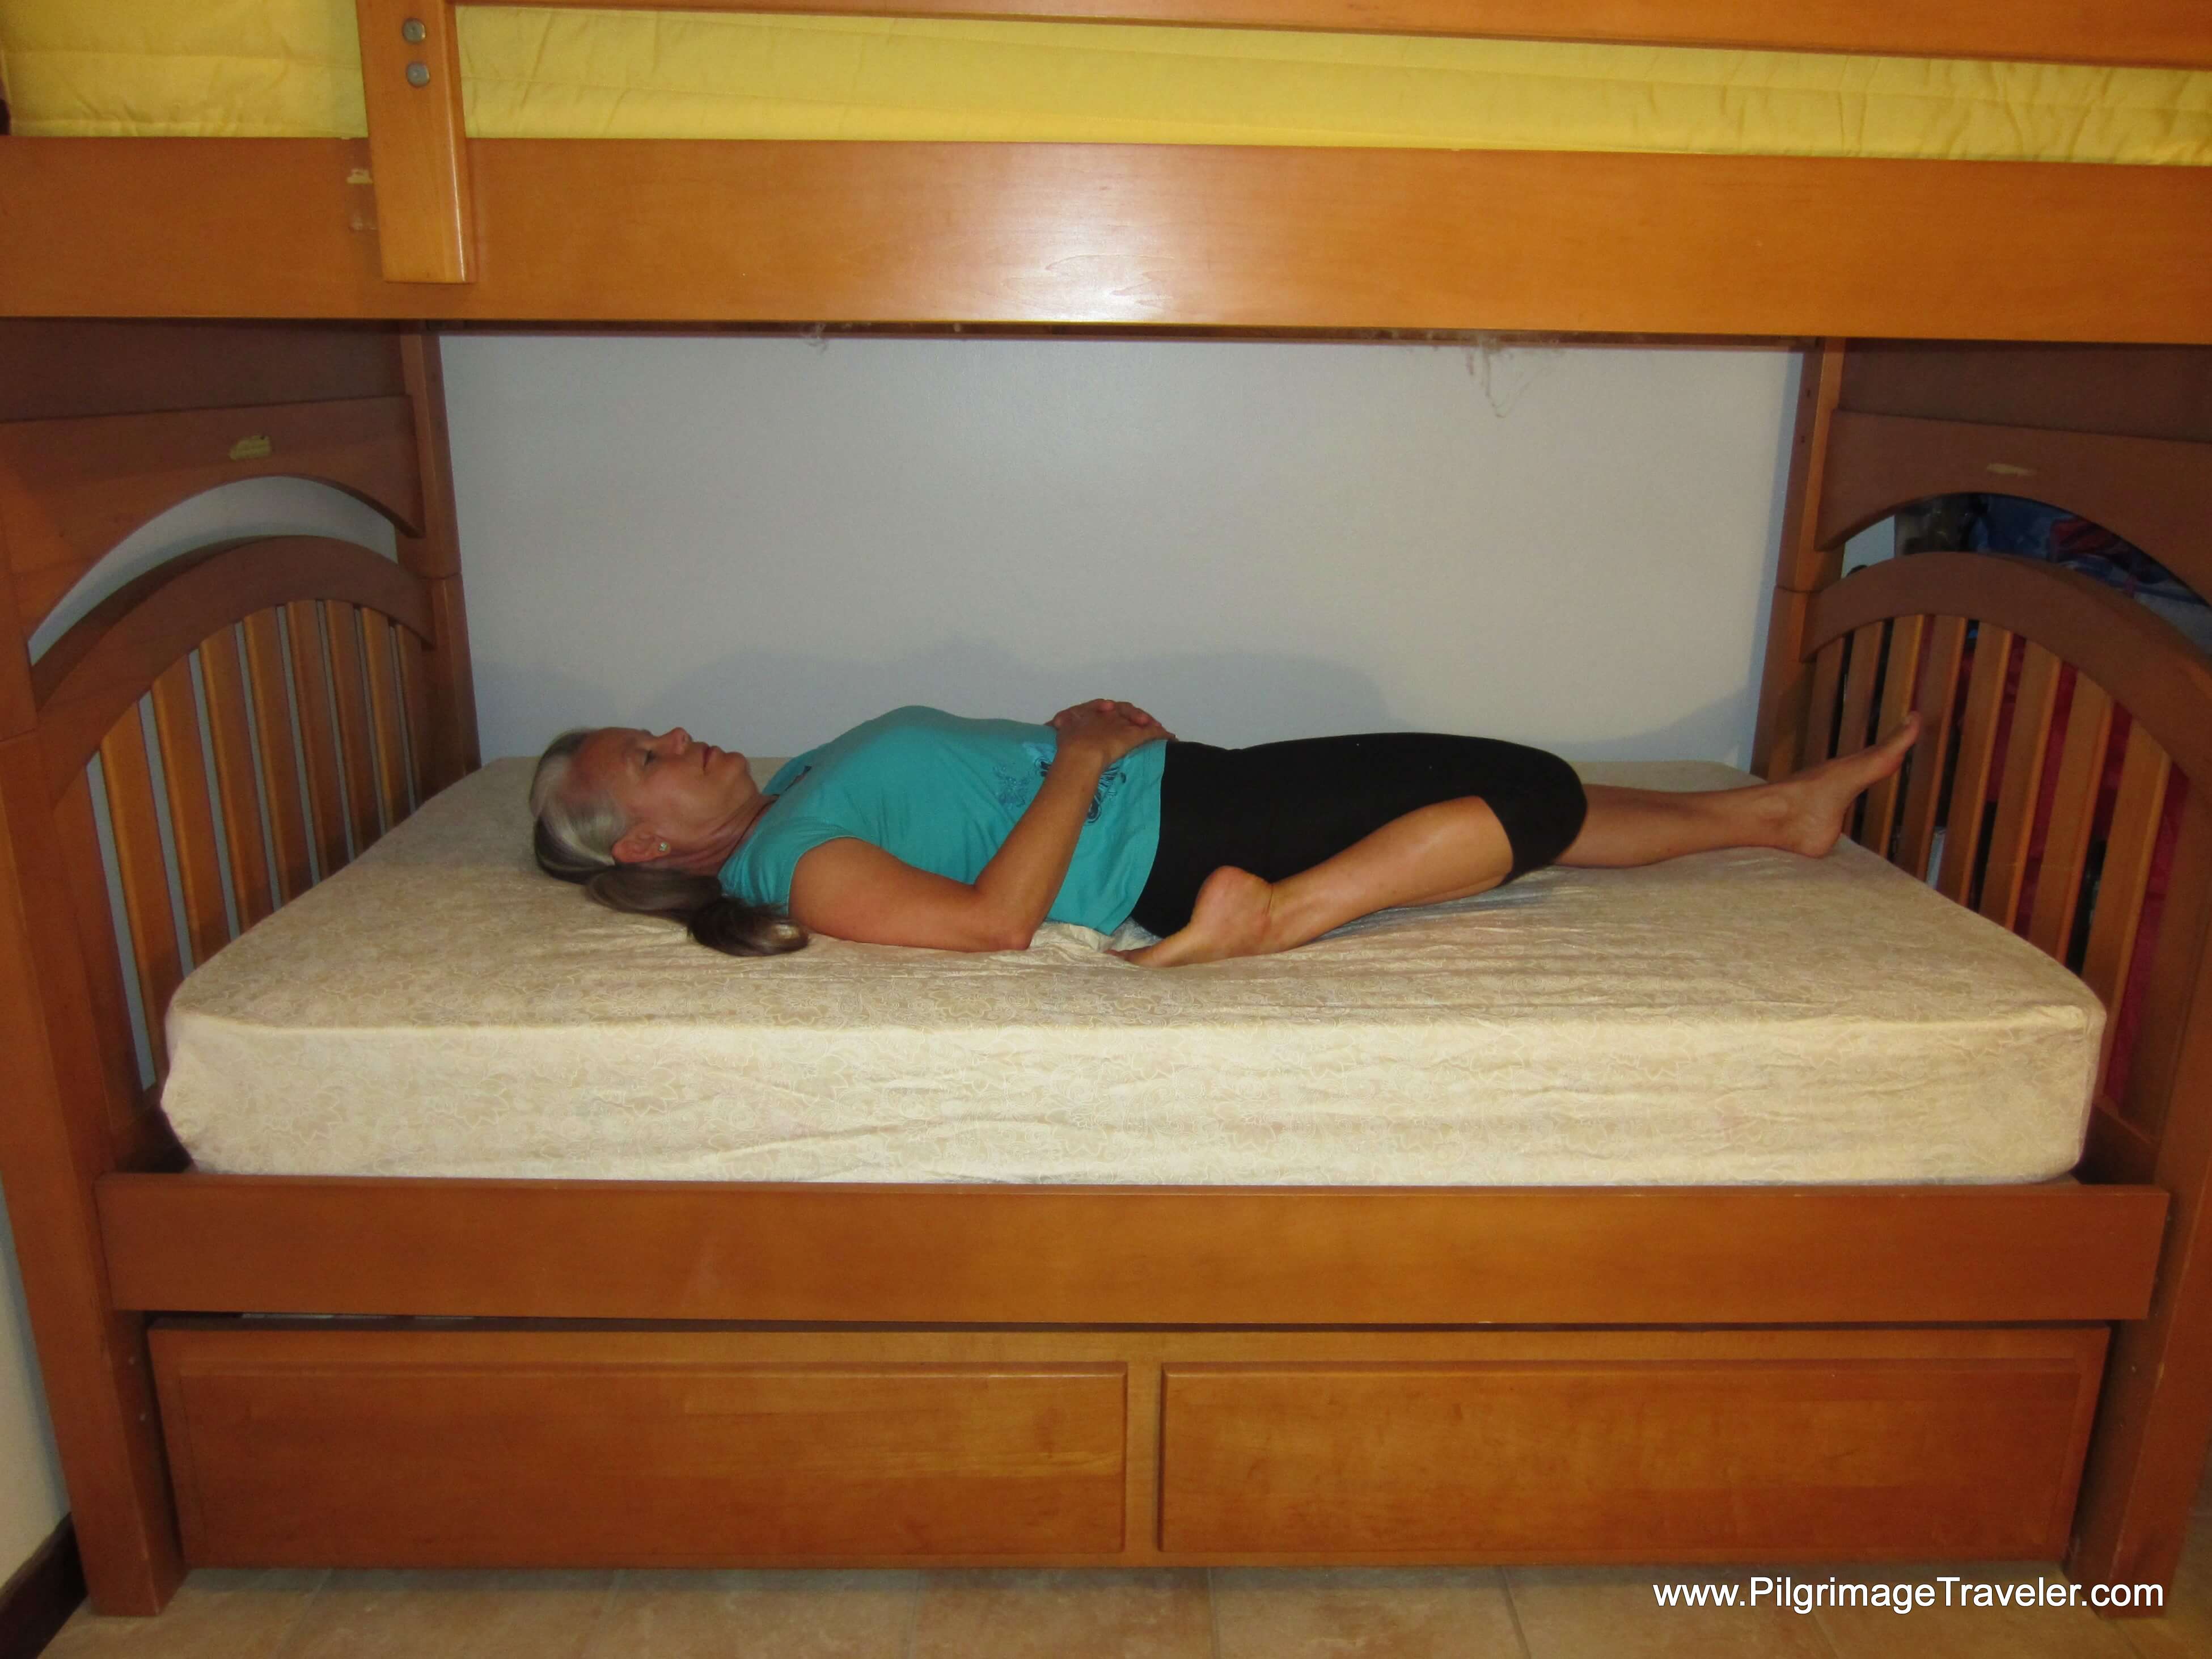
After carrying a heavy pack all day, your back may feel the strain. The first easy stretch for the lower back is the Knee into Chest Pose. Focus on sinking the back of your right hip deep into the mattress, as you bend your right leg into your chest. Also extend your left leg without pointing your toes and focus on pressing the left thigh down and into the mattress, for a nice stretch in the front of the left hip. B-r-e-a-t-h-e.
Change sides and repeat.
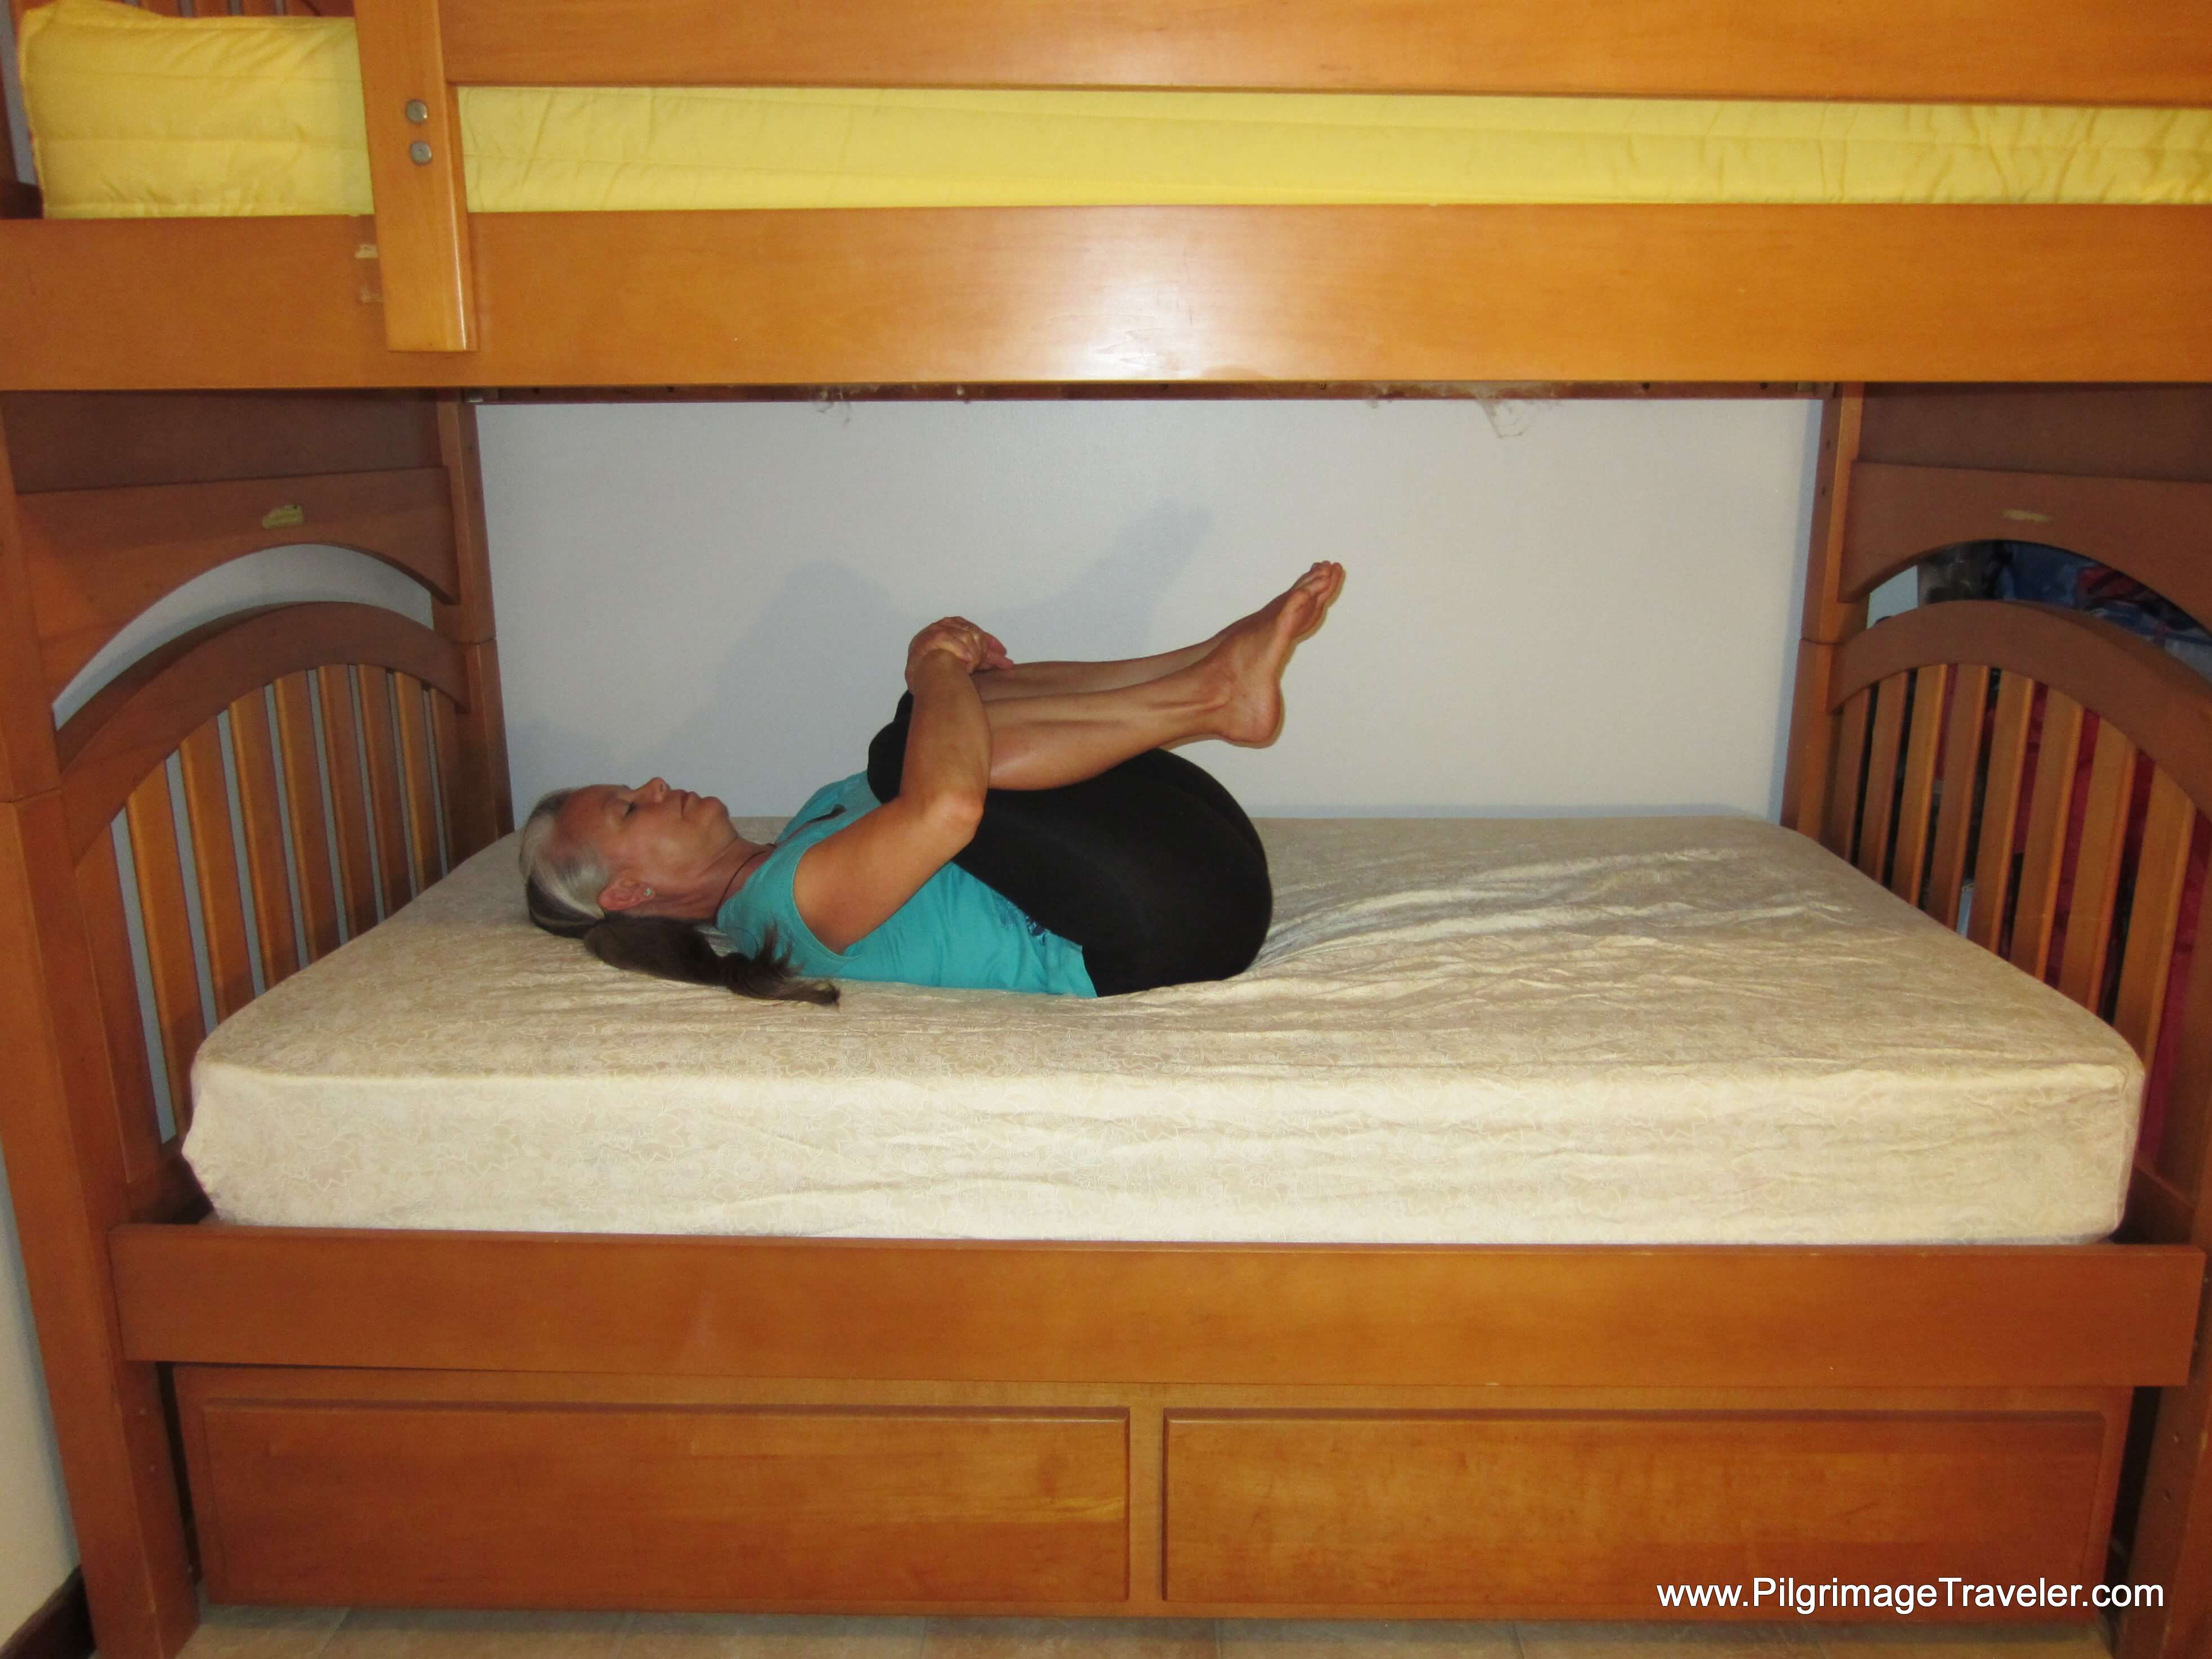
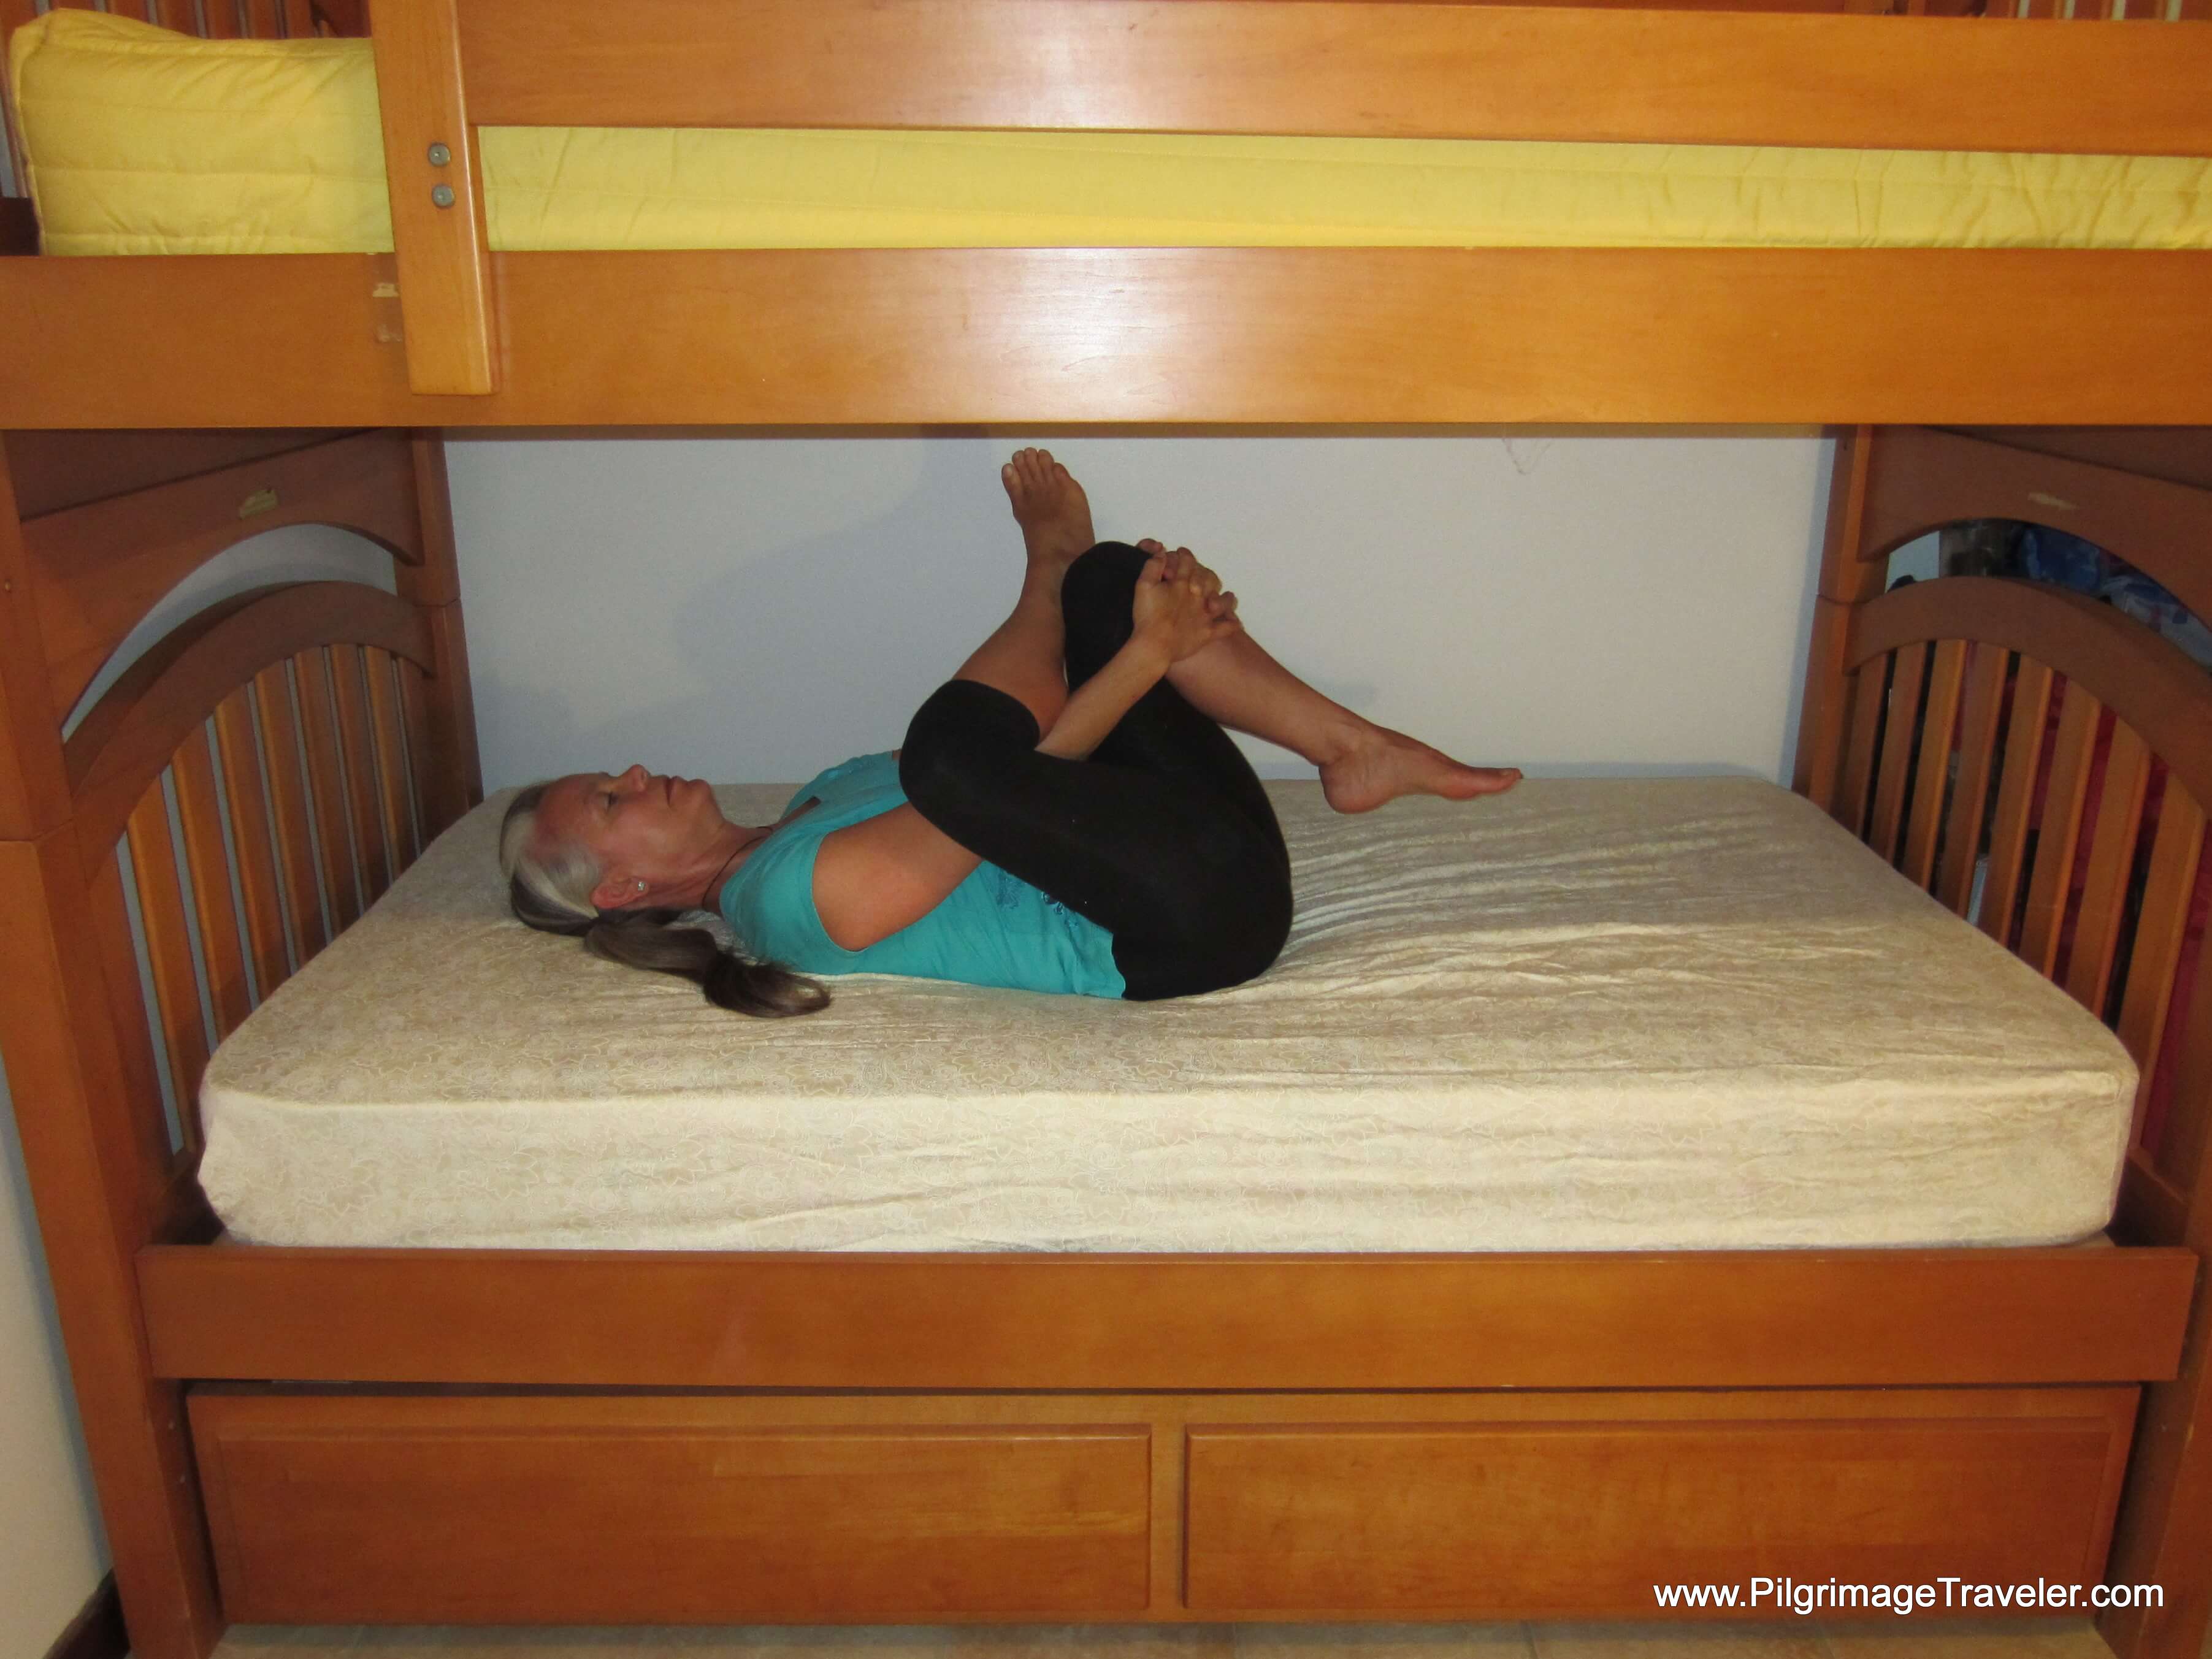
Next, take both knees, wrap your arms around them and pull your knees into your chest. I like doing the Knees into Chest Pose both before and after doing the Eye of the Needle Pose, farther below.
Your chin will have a tendency to pop up in this pose, below. Keep the back of your neck long and pressing into the mattress, as you tuck your chin down. This prevents any arching of your lower back, to lengthen through your back for a better lower back release!
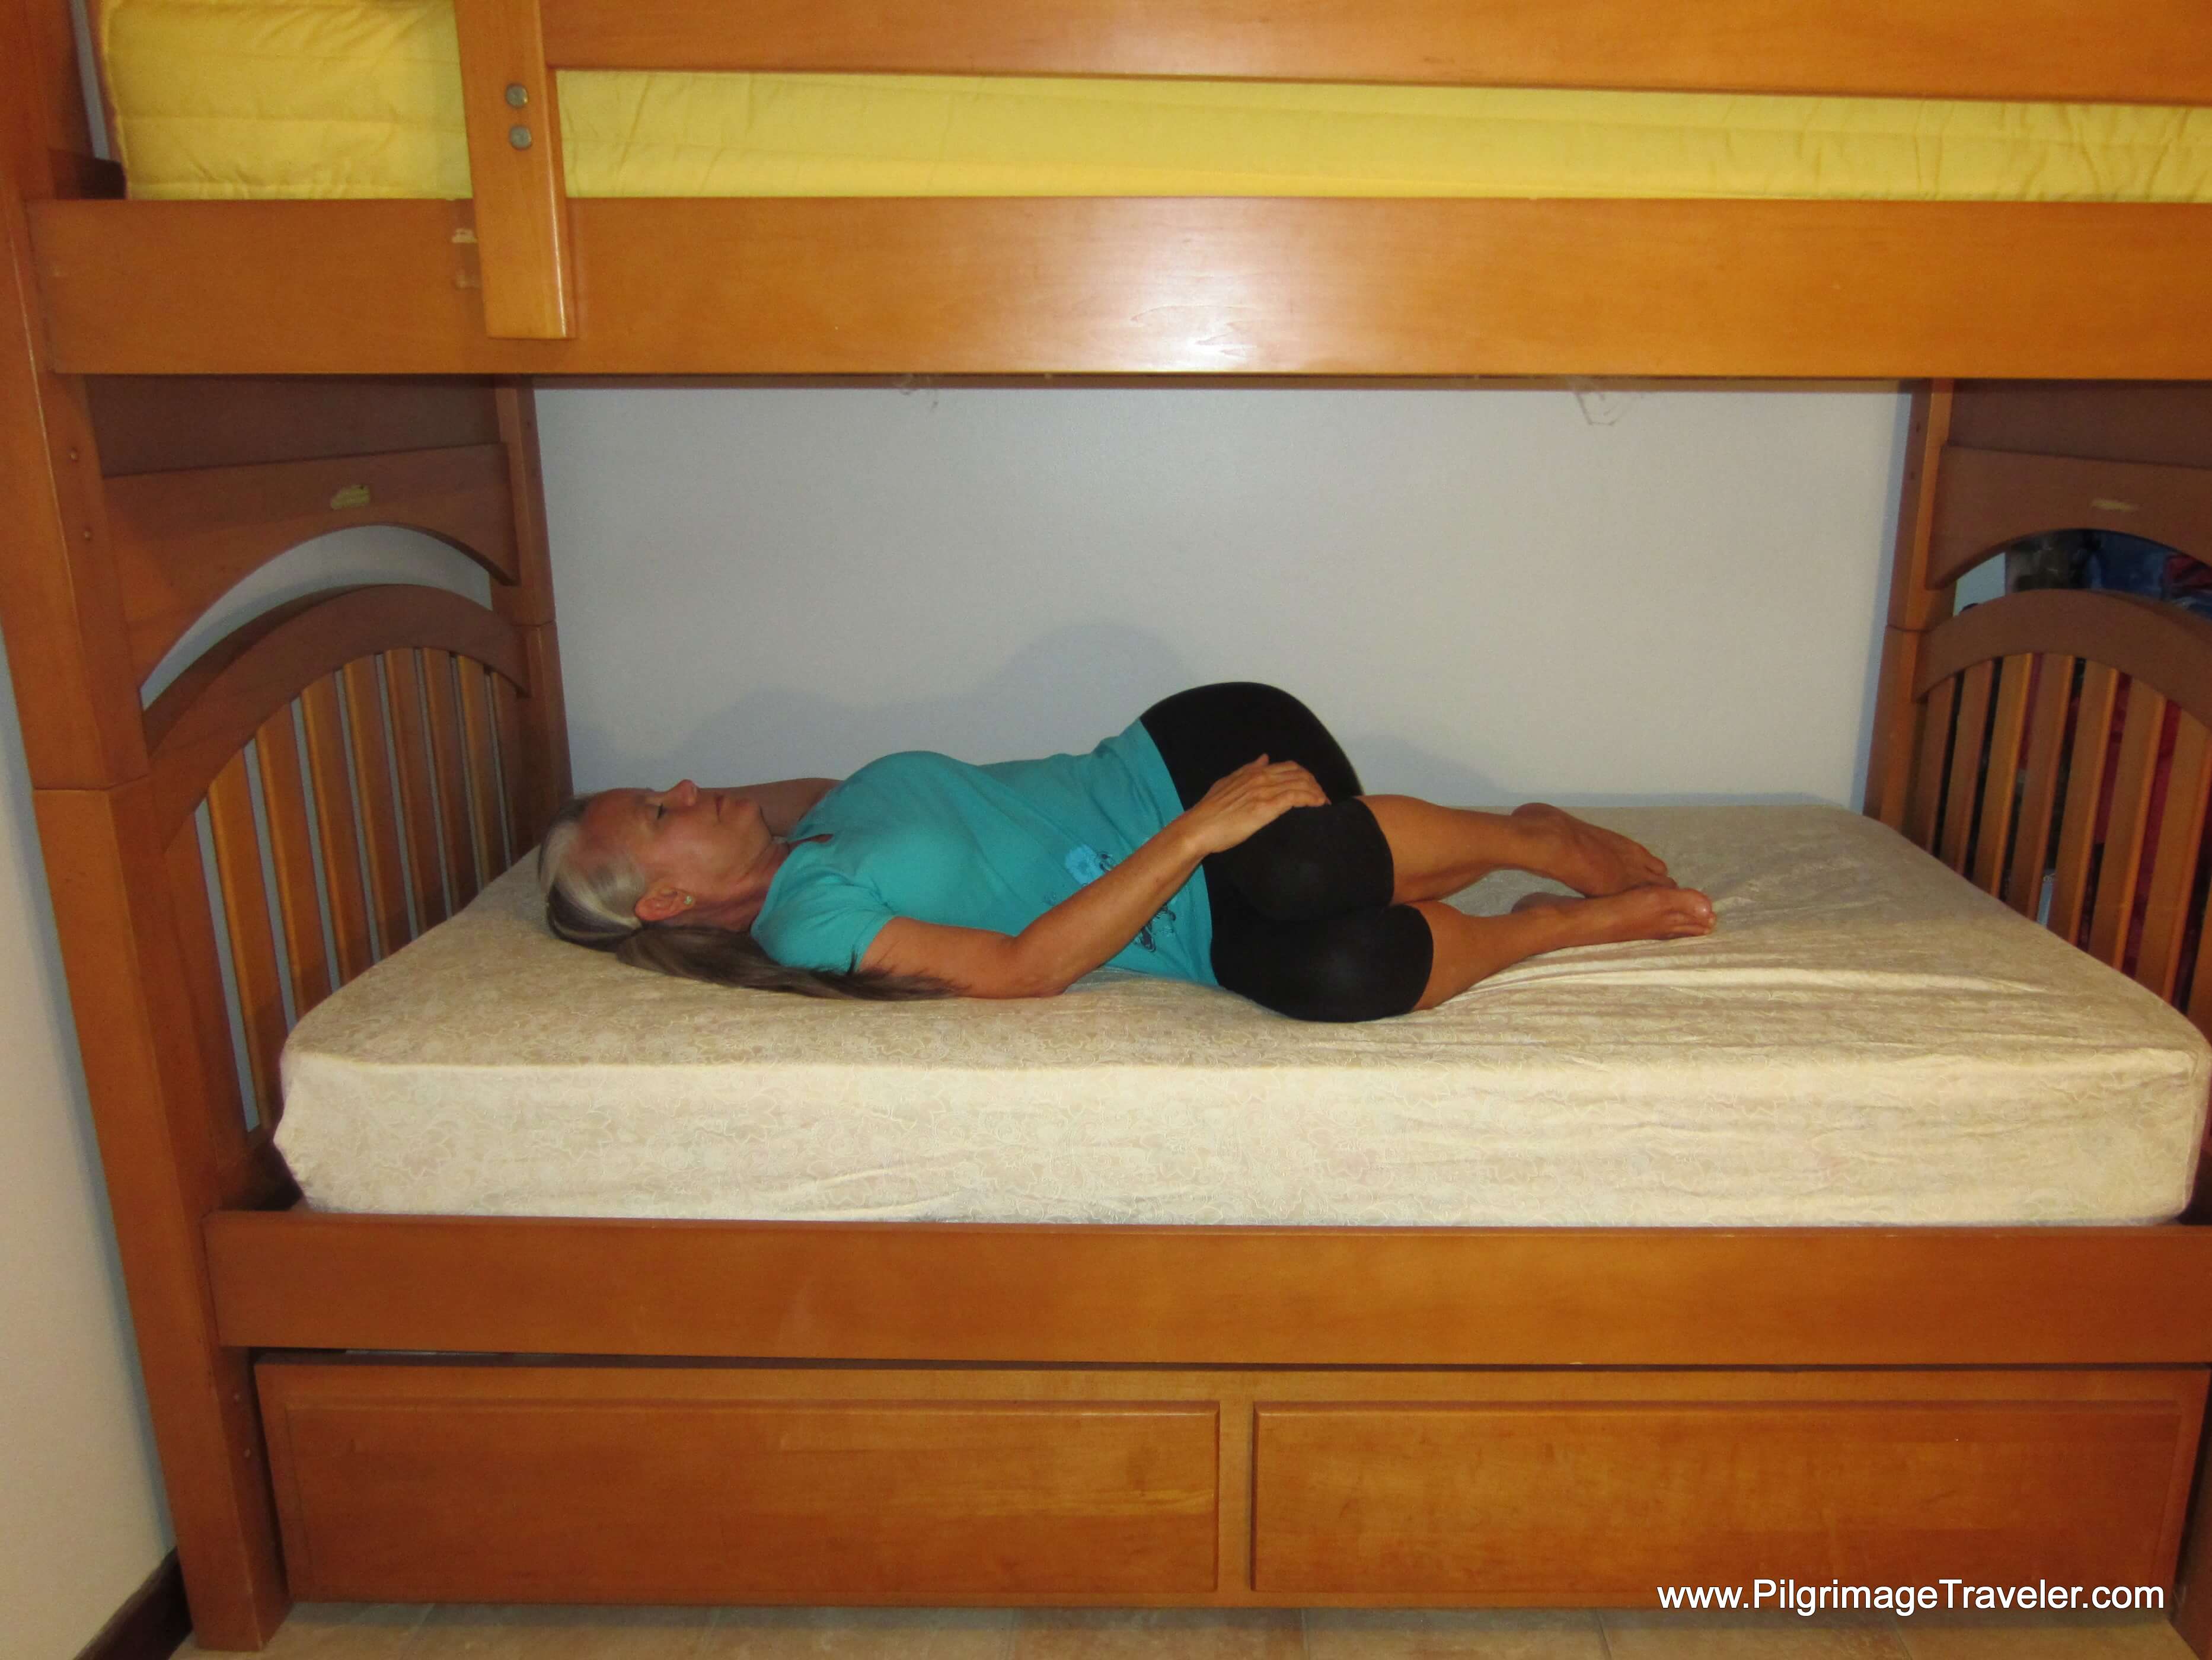
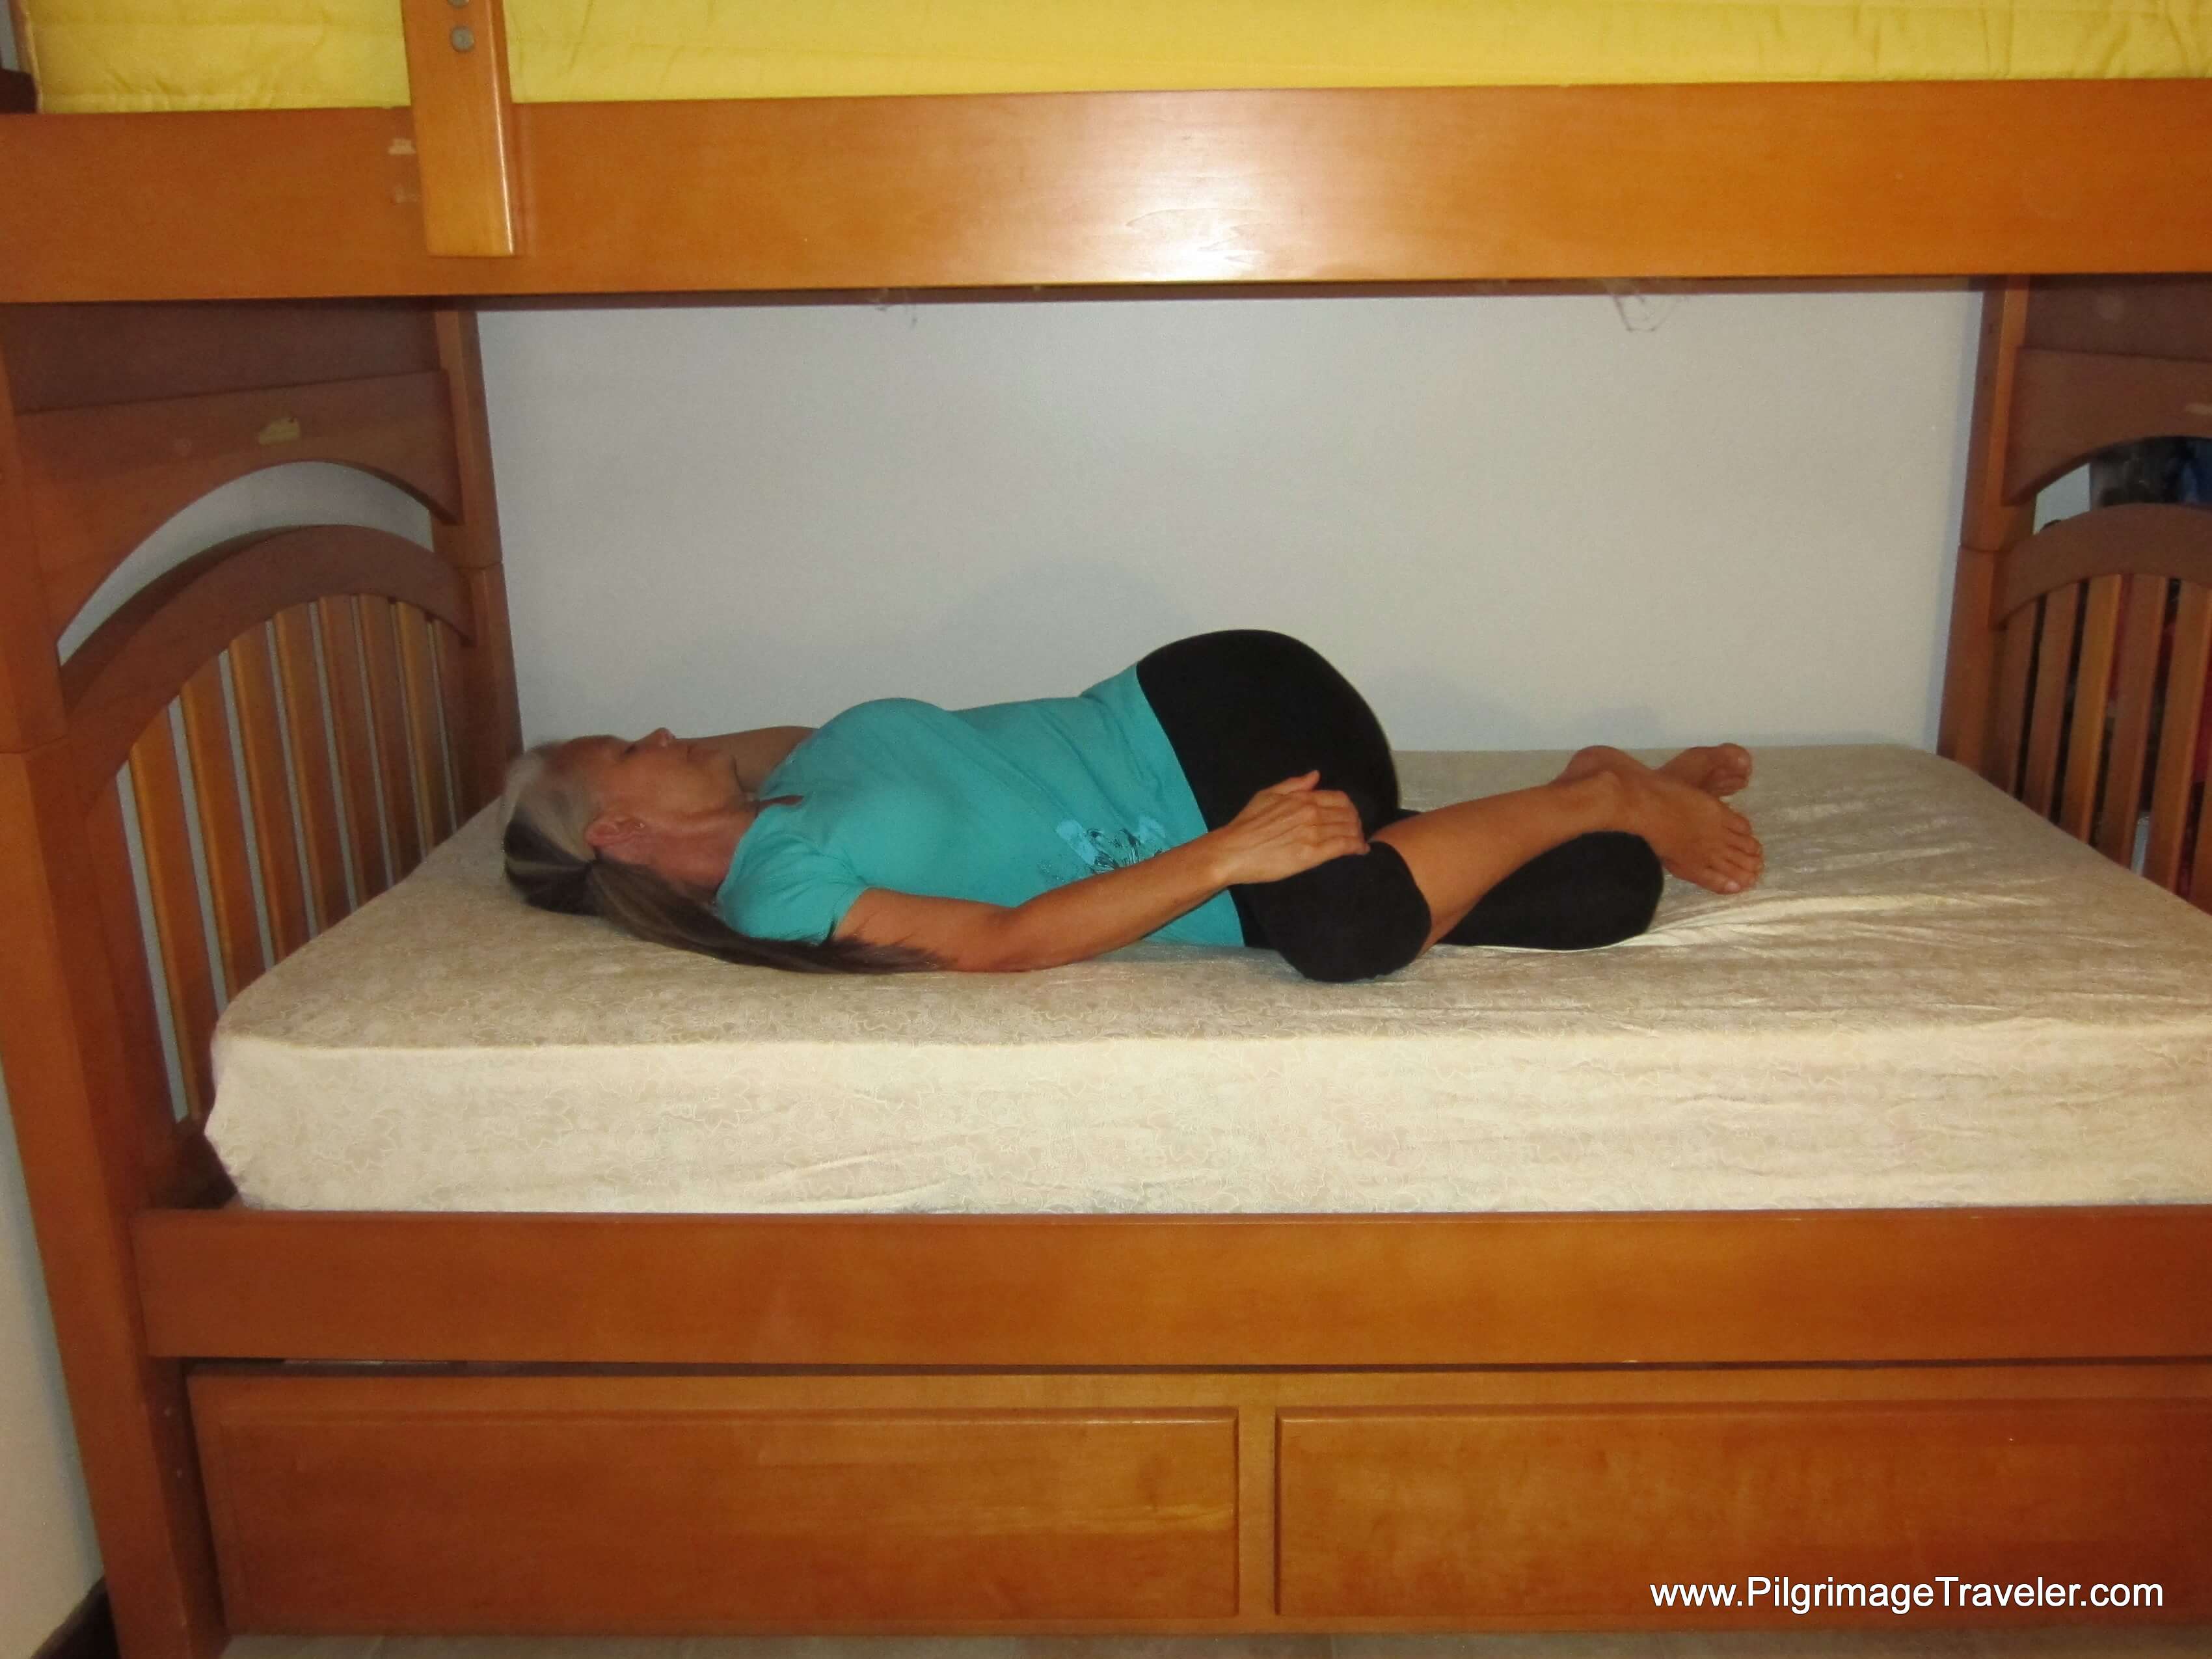
I think my absolute favorite bunk bed yoga pose is the Lying Spinal Twist. Not only will this pose stretch the quadratus lumborum in the lower back, which is the chief cause of lower back pain, if it is tight, but it will open the front of the shoulder and the pectoral muscles.
In Chinese medicine, this pose is known for its ability massage all your inner organs, so doing this pose does much more for you than just stretch your body!
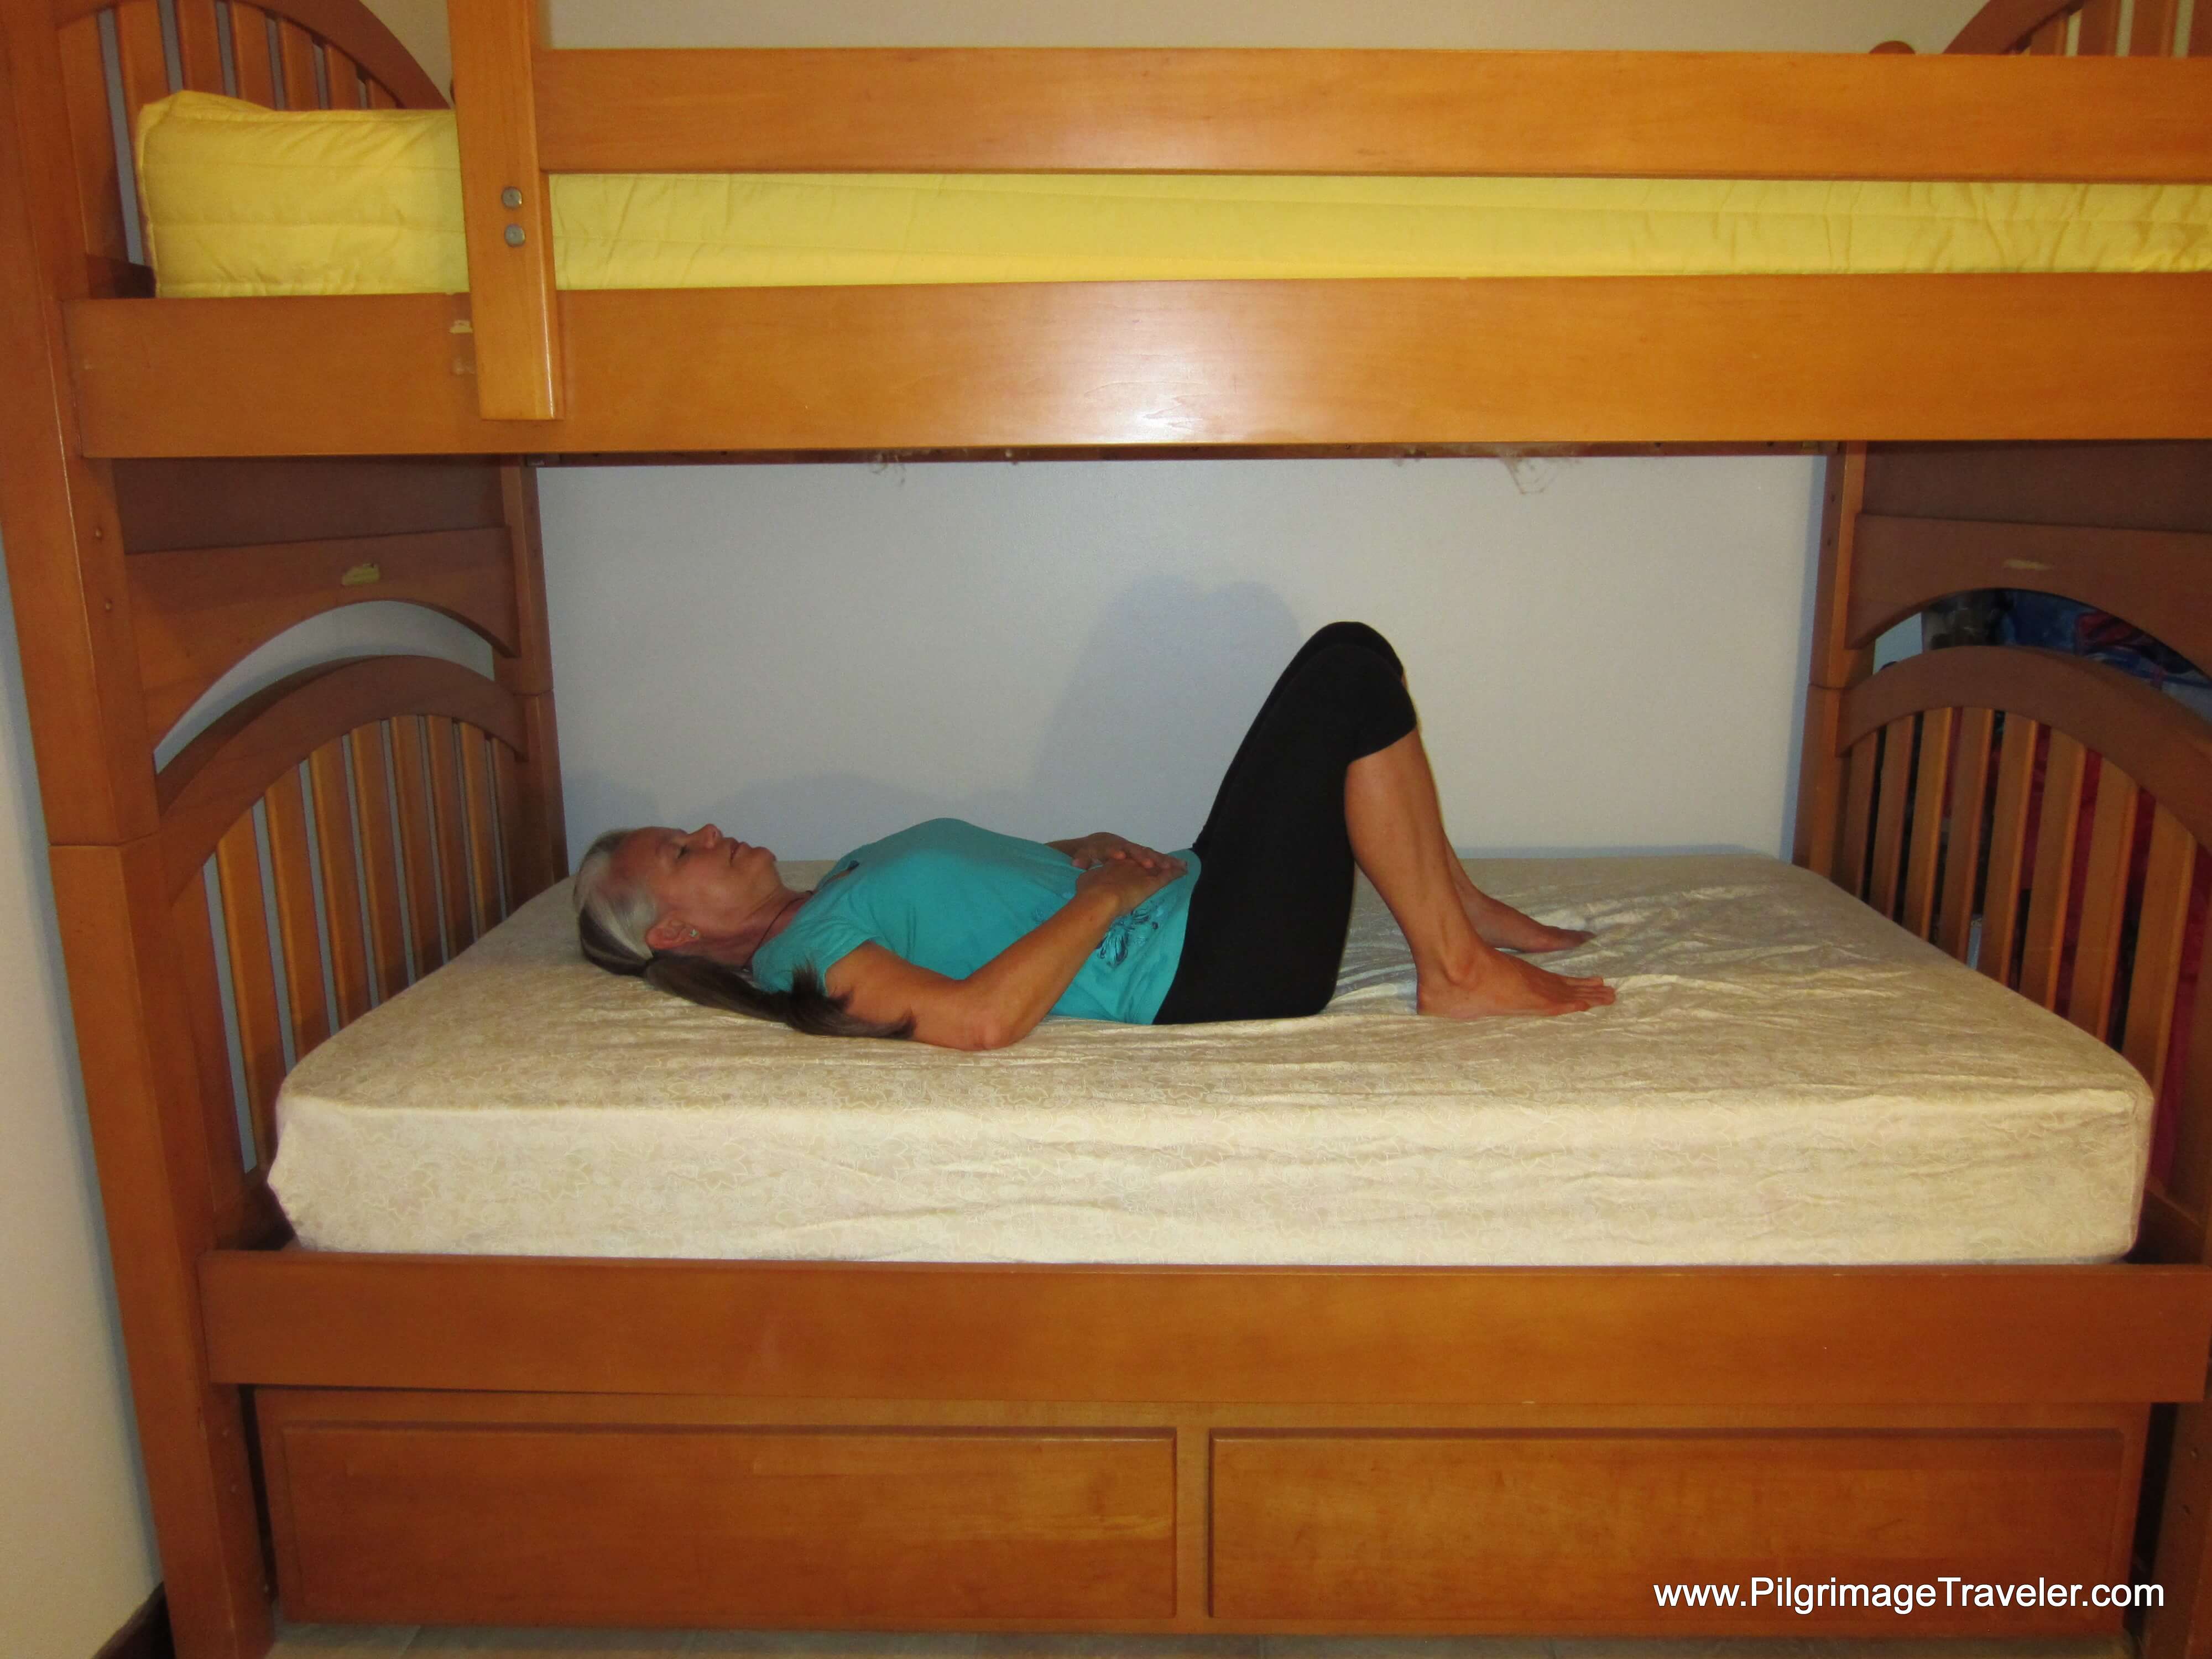
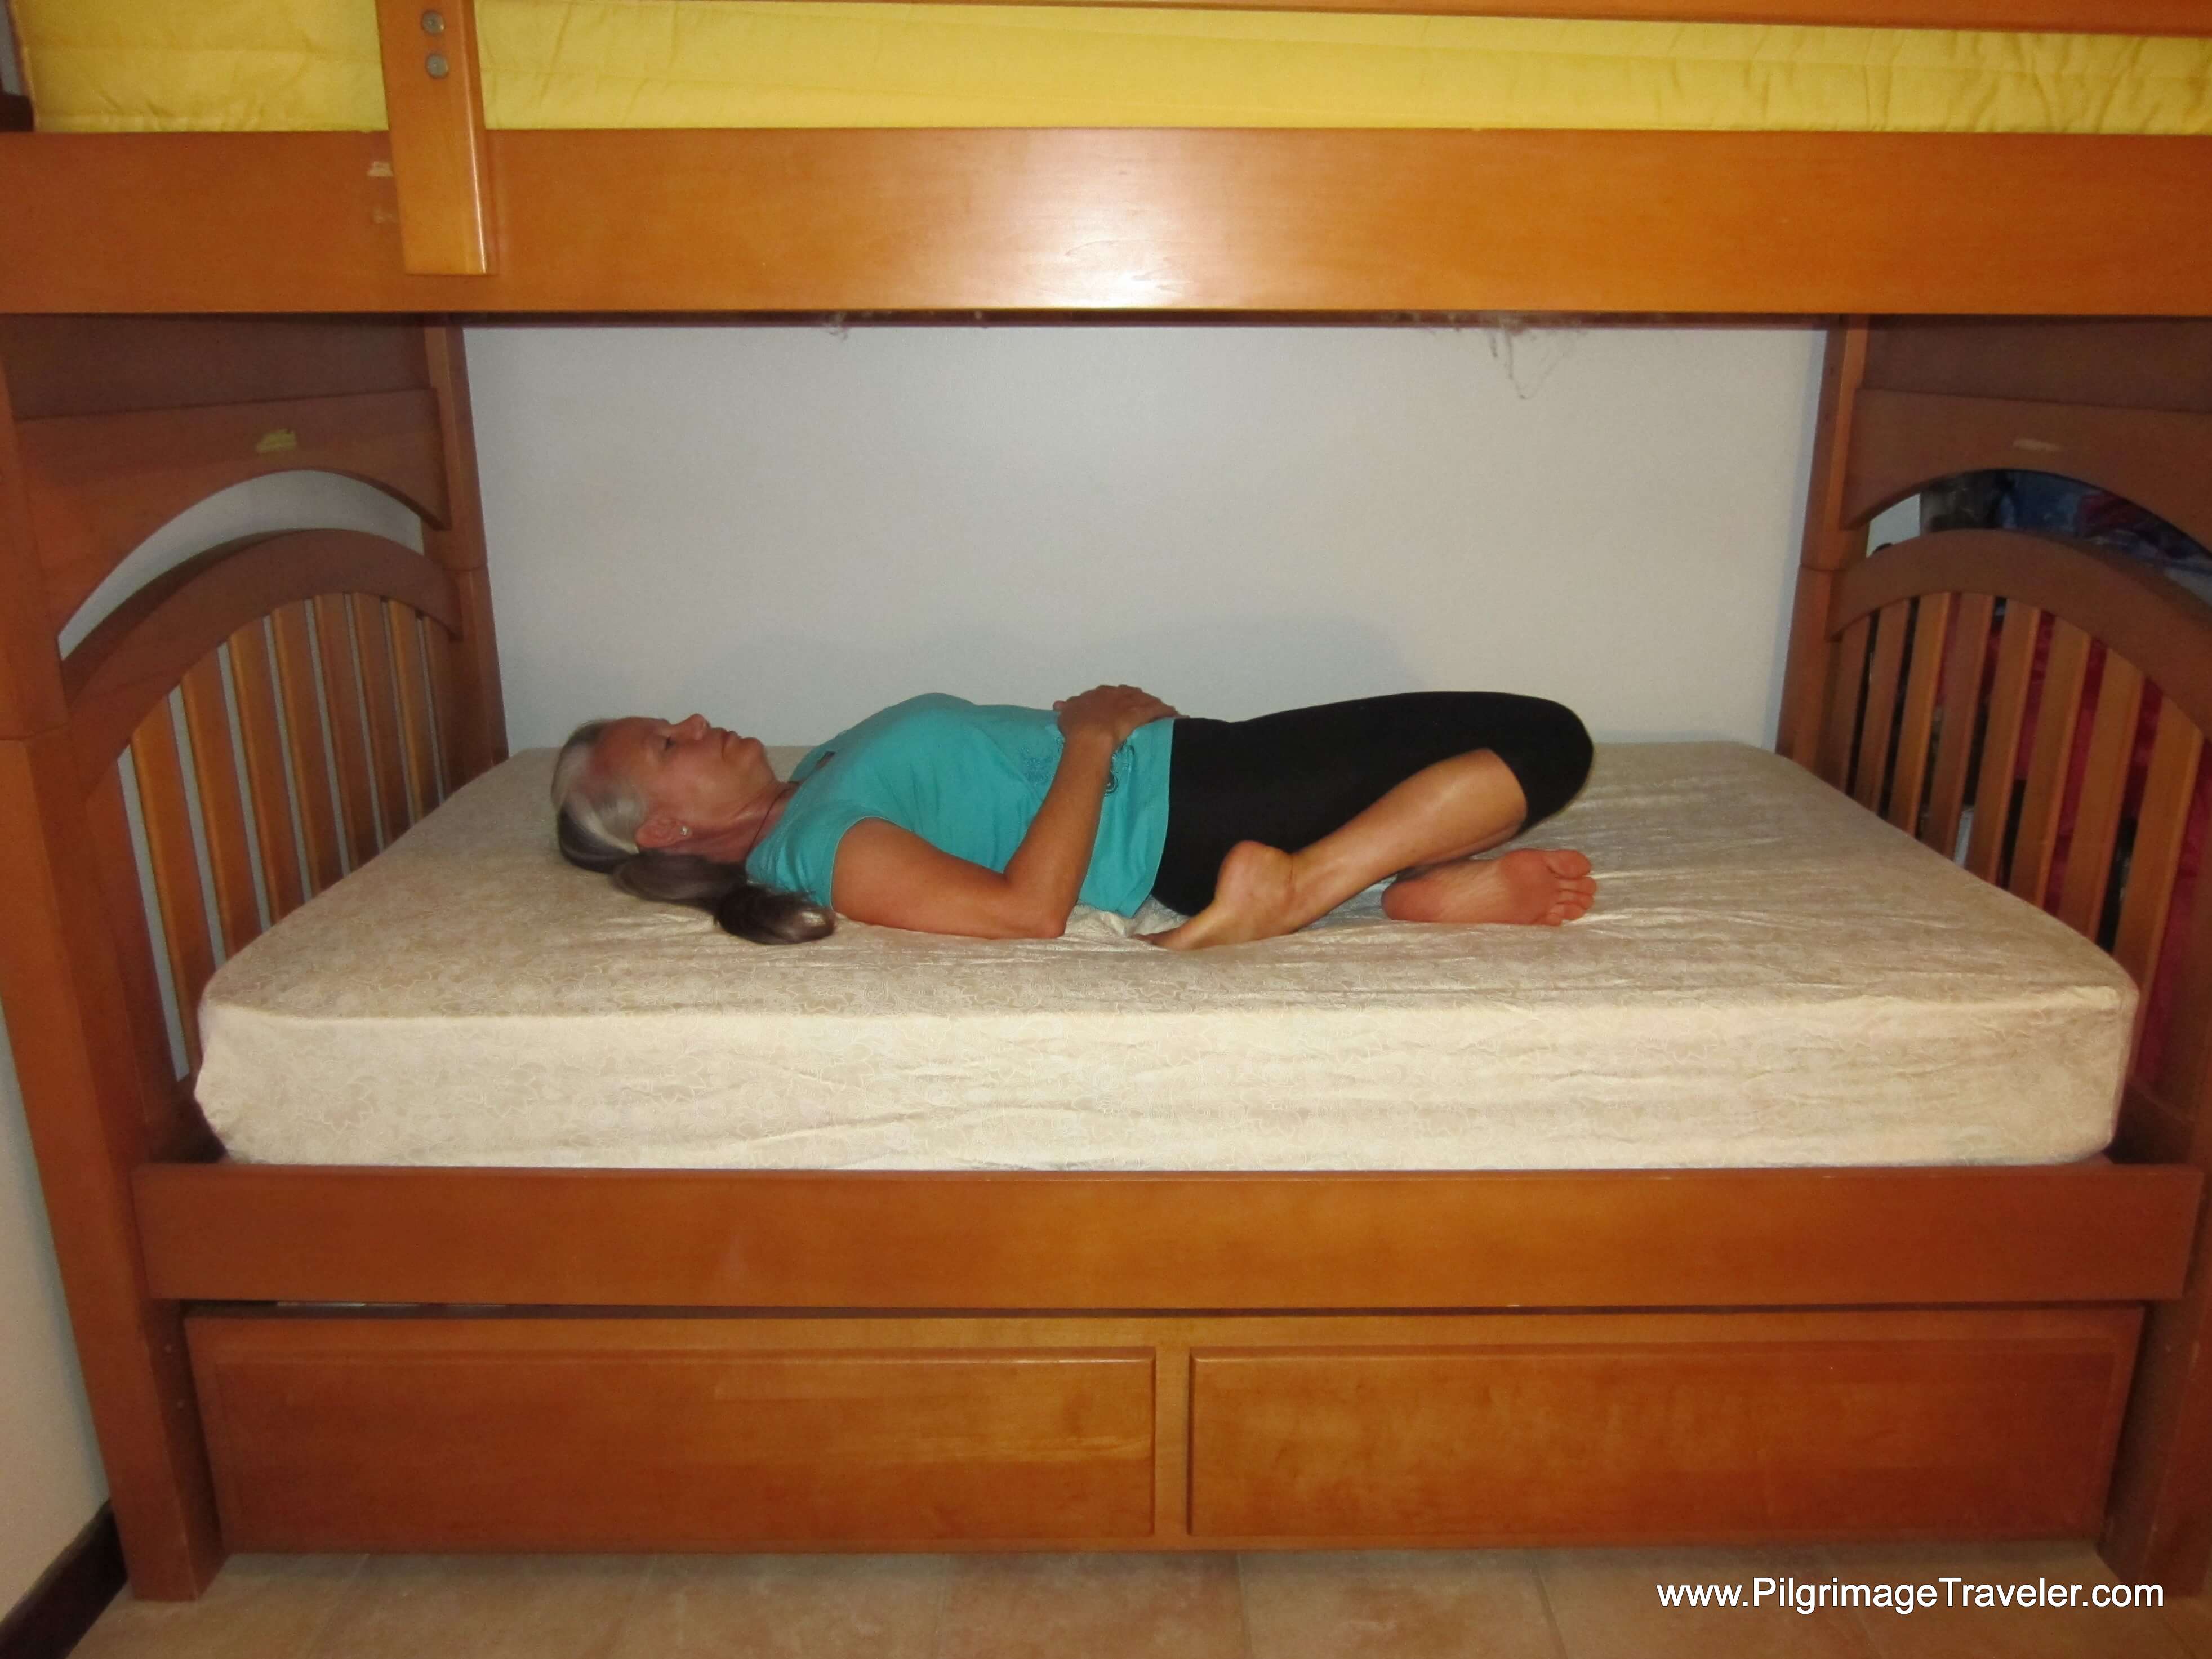
Begin the Lying Spinal Twist in the starting position, with your knees bent and your feet flat on the bed.
Then gently allow both knees to fall to the right side, keeping them bent, with the left leg stacked on top of the right. It feels good to keep your right hand on your left thigh as shown.
Your left shoulder will have a tendency to pop up off the bed. Adjust your legs or the depth of the twist to prevent this from happening. Both shoulders should be flat on the bed. This will elicit a nice pull through the front of your left shoulder and through your chest muscles. I love this bunk bed yoga pose!
If your knees to do not comfortably reach the bed without too strong a twist, you may put a pillow under them to modify the pose. You want a nice pull, but not too strong, through your left lower back and upper hip - this is mostly the quadratus lumborum muscle that you are stretching to alleviate any lower back pain/strain.
You may also have to shift your hips back a bit to keep your spine aligned and to feel more comfortable in the twist. I also like to bend and raise my left arm over my head, since there won't be enough room to extend the left arm out straight, like you may be used to in your yoga class.
If the Lying Spinal Twist is very easy for you, in the photo below you can see that to increase the strength and depth of the twist, you can straighten out the lower leg on the bed. You can even cross your legs, (not shown) left over right to get the deepest stretch, if your body has the space and it feels therapeutic.
You can also add a neck stretch, by turning your head to the left and look down with your chin moving toward your armpit. Hold one side for a good 3-5 minutes.
What an incredible all-around pose! Bring your knees back up to center, and repeat on the other side.
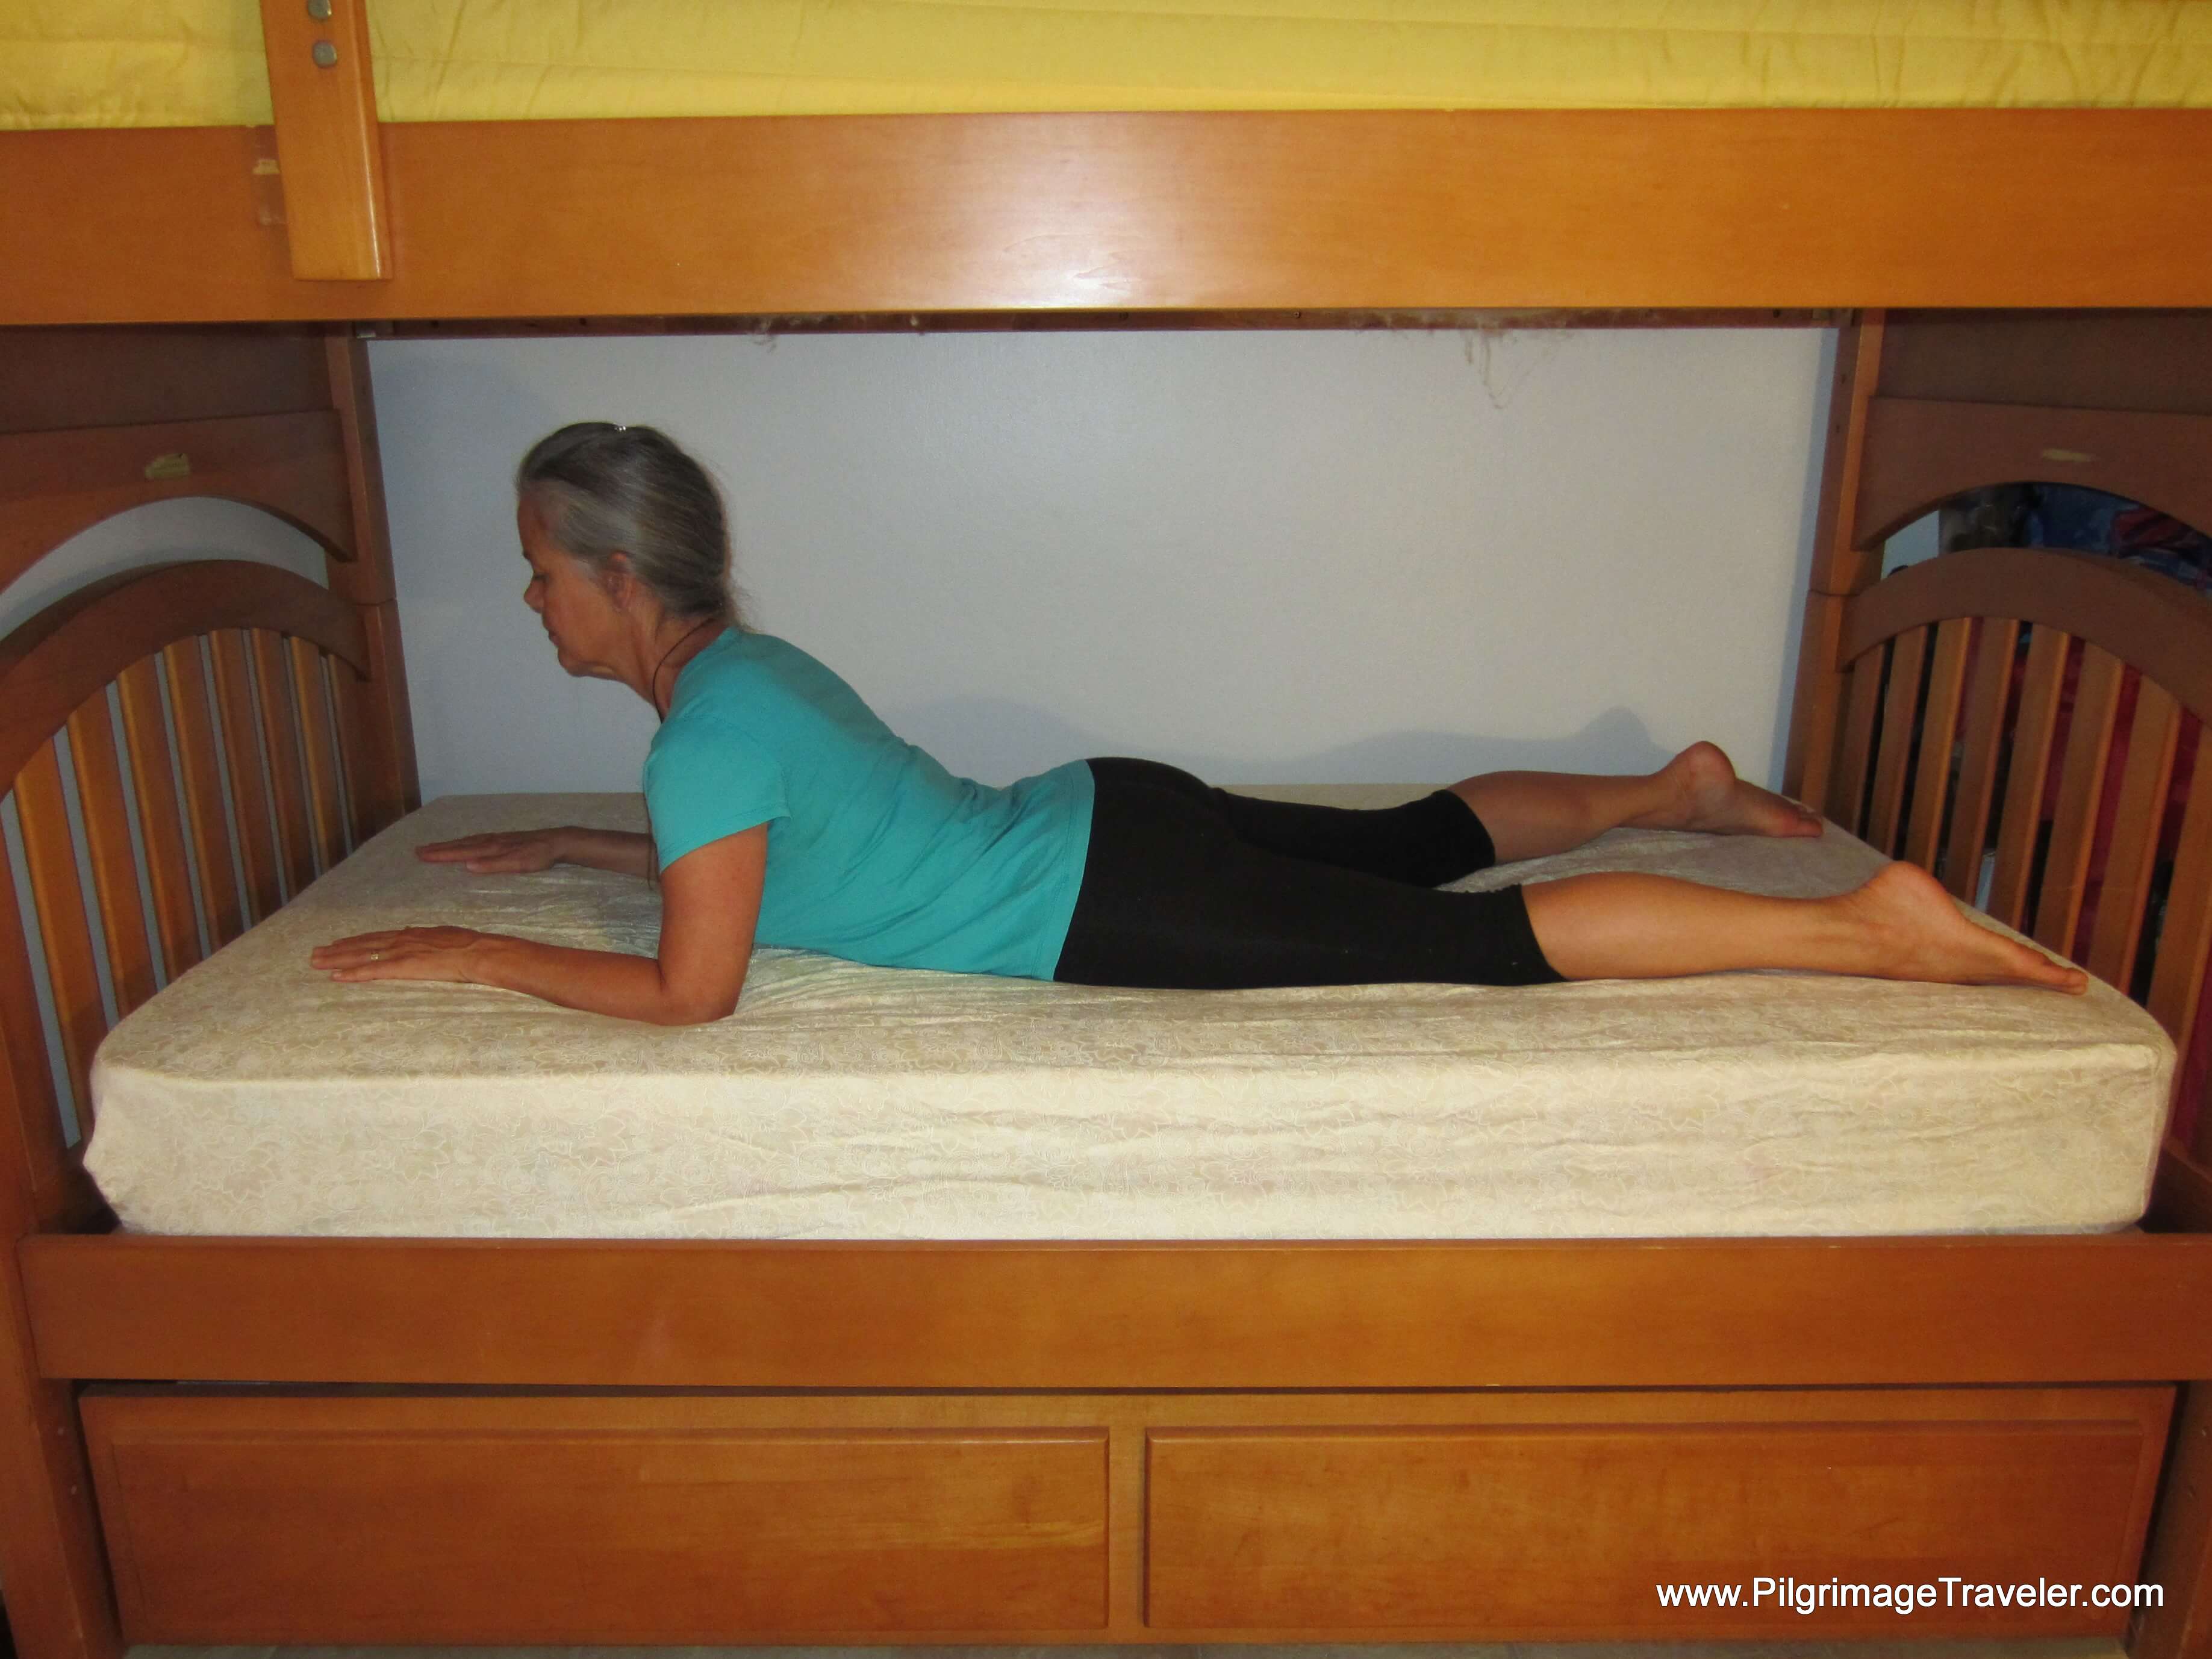
And finally, perhaps the Queen of the lower back releases, is the Sphinx Pose, shown in the next photo.
In order to do this pose as a full lower back release, when you come up on your forearms, notice your buttocks. Are they flexed? It is the natural thing to do as you raise up your torso. Relax and release your buttocks and focus on allowing your hips to sink deeply into the mattress.
If you notice in the photo above, it helps to spread your legs apart, so your buttocks are not working to hold you up. You must relax and release your buttocks for this pose to have the most therapeutic effect on your lower back.
As you sink your hips into this pose, the lower back is able to fully relax and release! What a lovely pose to keep your lower back healthy!
After any long-held back bend, it is incredibly therapeutic to do the Child's Pose, below. When doing bunk bed yoga, because the mattress is softer than the floor, you may find that you sink too deeply to place your forehead on the bed. Try either placing your chin on the bed (shown), or turn your head side to side.
You may take a wide-knee Child's Pose (knees wide but your feet together) or knees together, or somewhere in-between, whichever way feels most therapeutic for you.
The Child's Pose will also stretch your lower back. It is a wonderful resting and releasing pose.
May your lower back stay healthy throughout your pilgrimage travels, when you do these lower back stretches!
3. Releasing the Inner Knee, Leg, Groin and Hamstrings
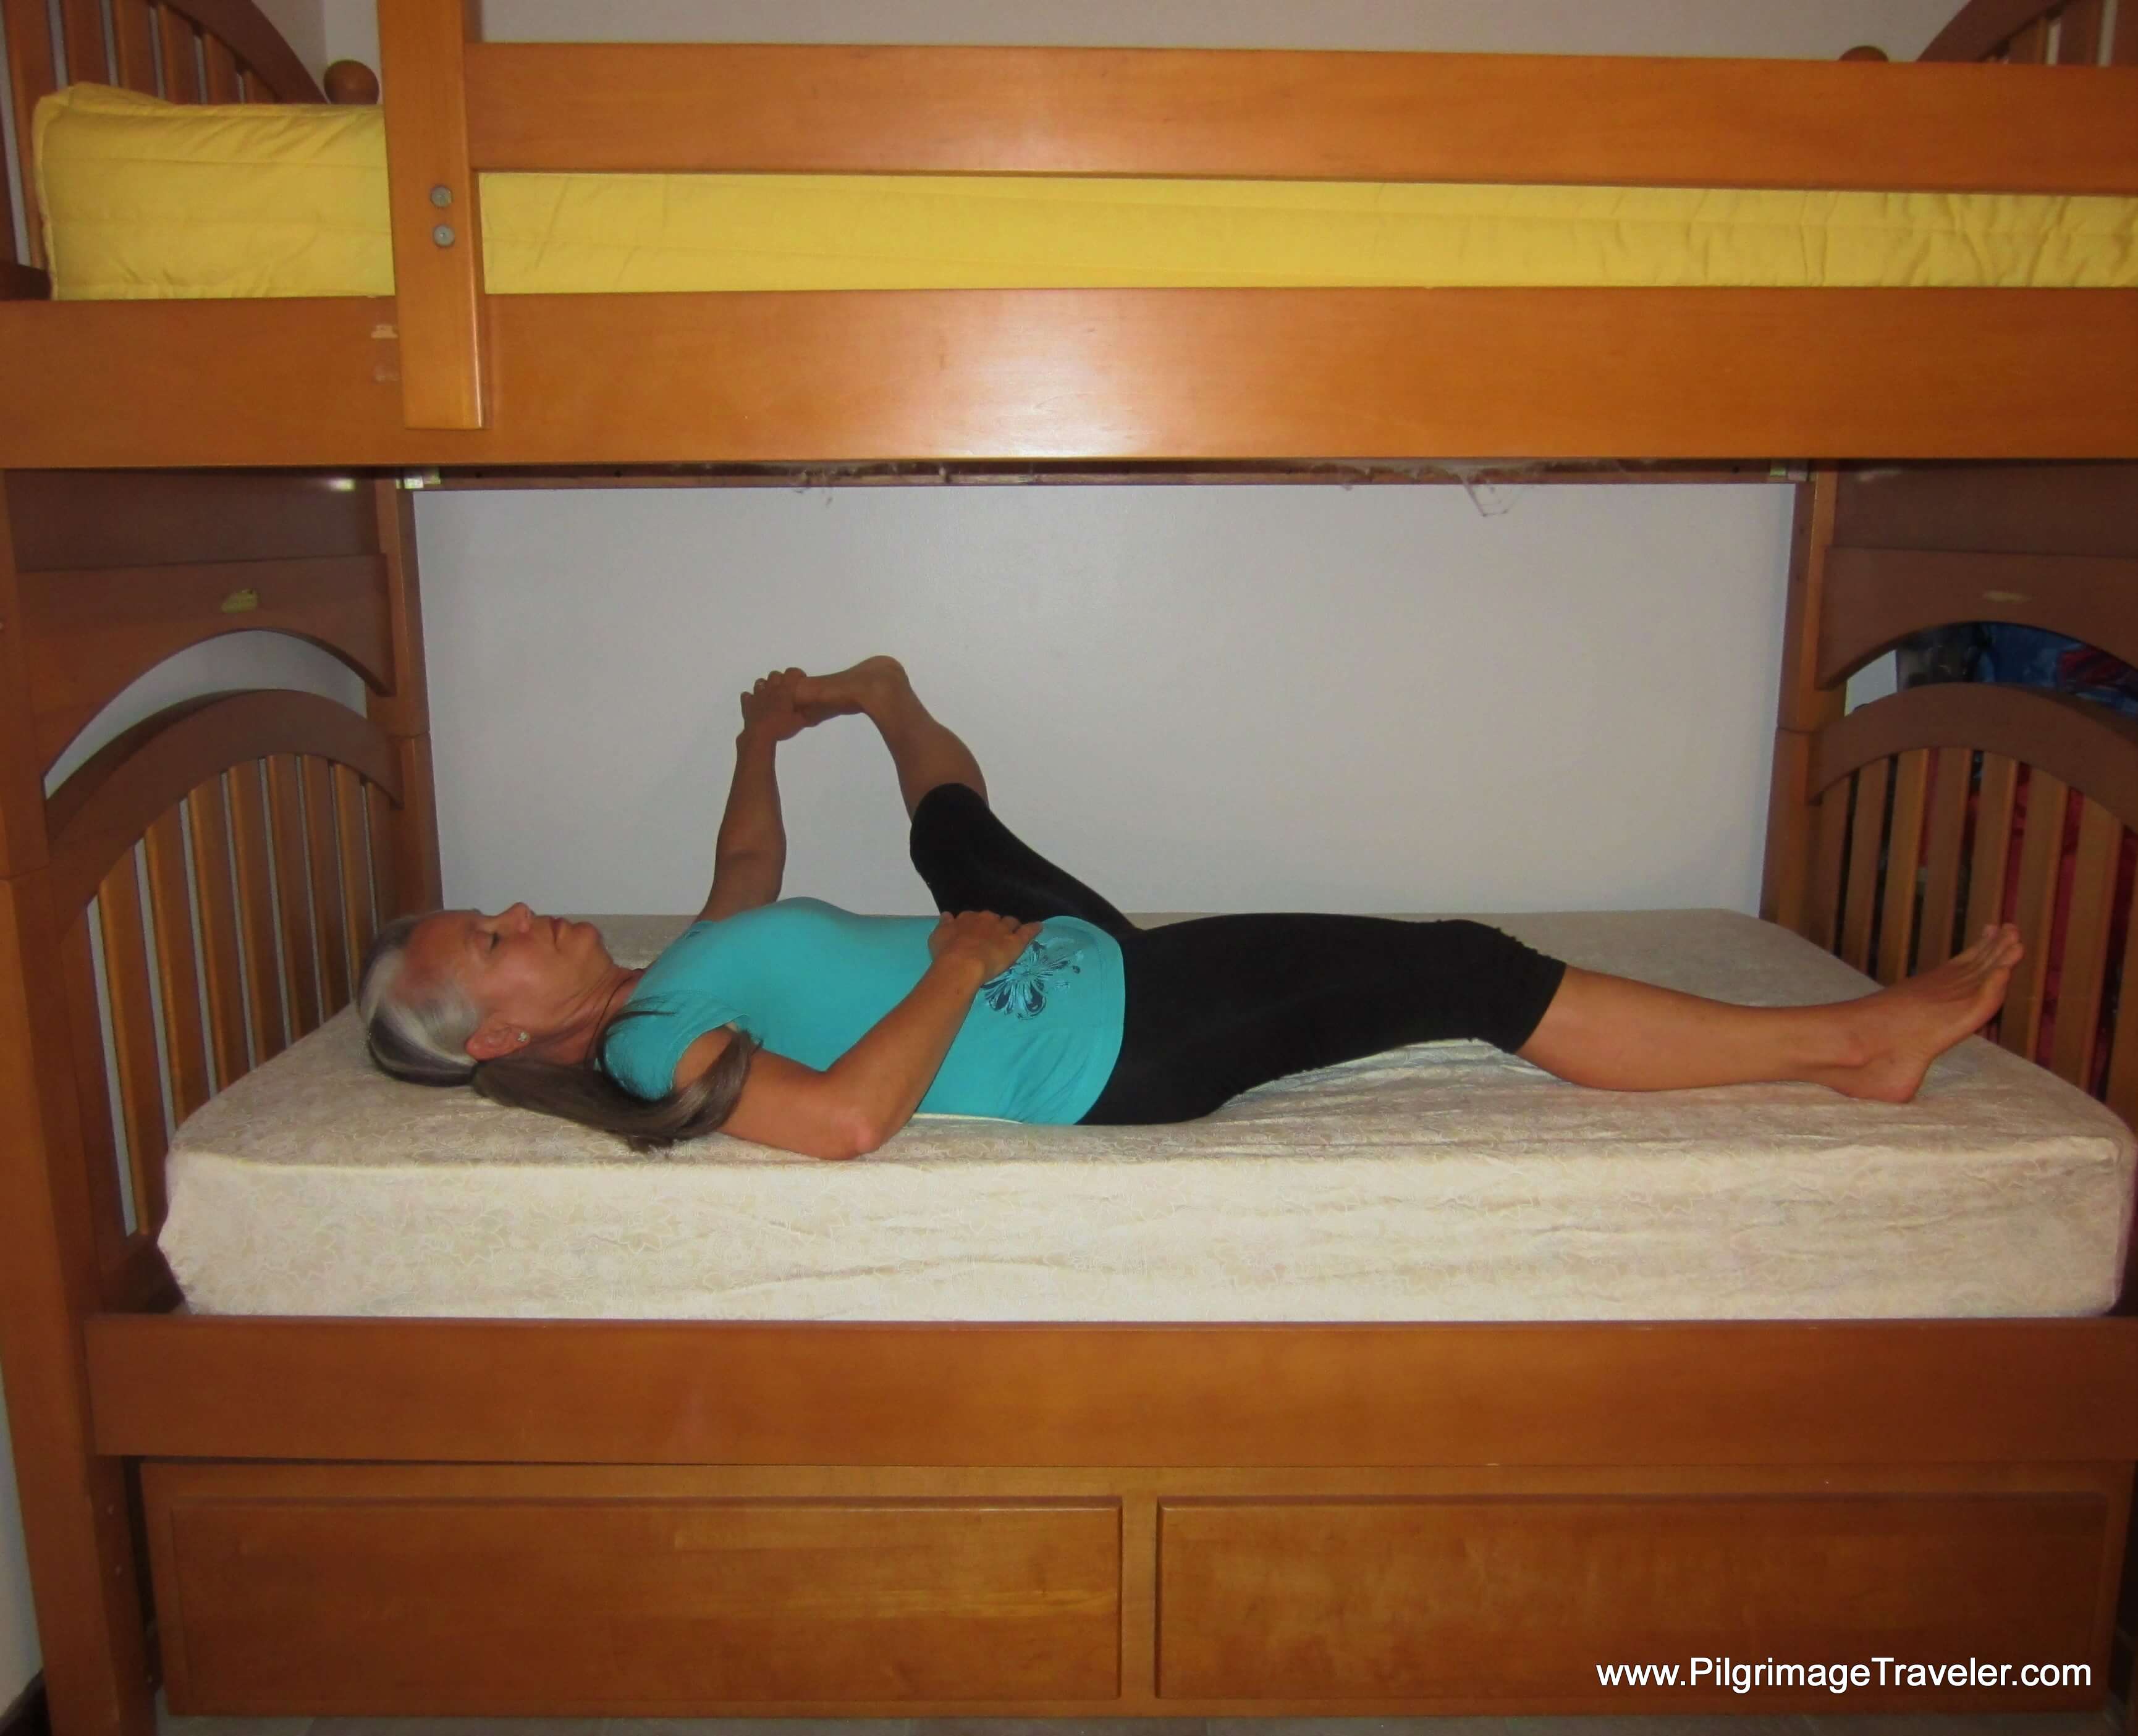
Tight hamstrings are the bane of the walker's existence. I offer the Lying Leg to Side Extension Pose. In this pose simply extend your leg out to the side until you feel a nice pull in the groin area.
If your groins and/or hamstrings are tight, place your hand on your knee as shown in the first photo, below. It is OK to use the wall to assist if you like, to extend the leg farther and straighten at the knee.
If you use the wall and flex the ankle, the back of your calf will also be stretched - a feature that you may find you need a lot!
Just remember that your aim is not to push hard and force yourself into any pose, but breathe deeply and hold it for 3-5 minutes. It is better to hold a pose at a mild edge for a longer period of time, than to bounce into a hard edge and only hold it for seconds. It is only the long-held, bed yoga poses that change tissue most dramatically over time.
If the back of your legs are more open, place your hand on your foot to increase the stretch. Don't go farther than you can comfortably hold it for several minutes, while breathing deeply.
Whenever any stretch feels too intense, back off a bit.
Don't forget to do both sides on the Lying Leg to Side Extension. You may want to flip yourself in bed if you are using the wall to aid you in this pose.
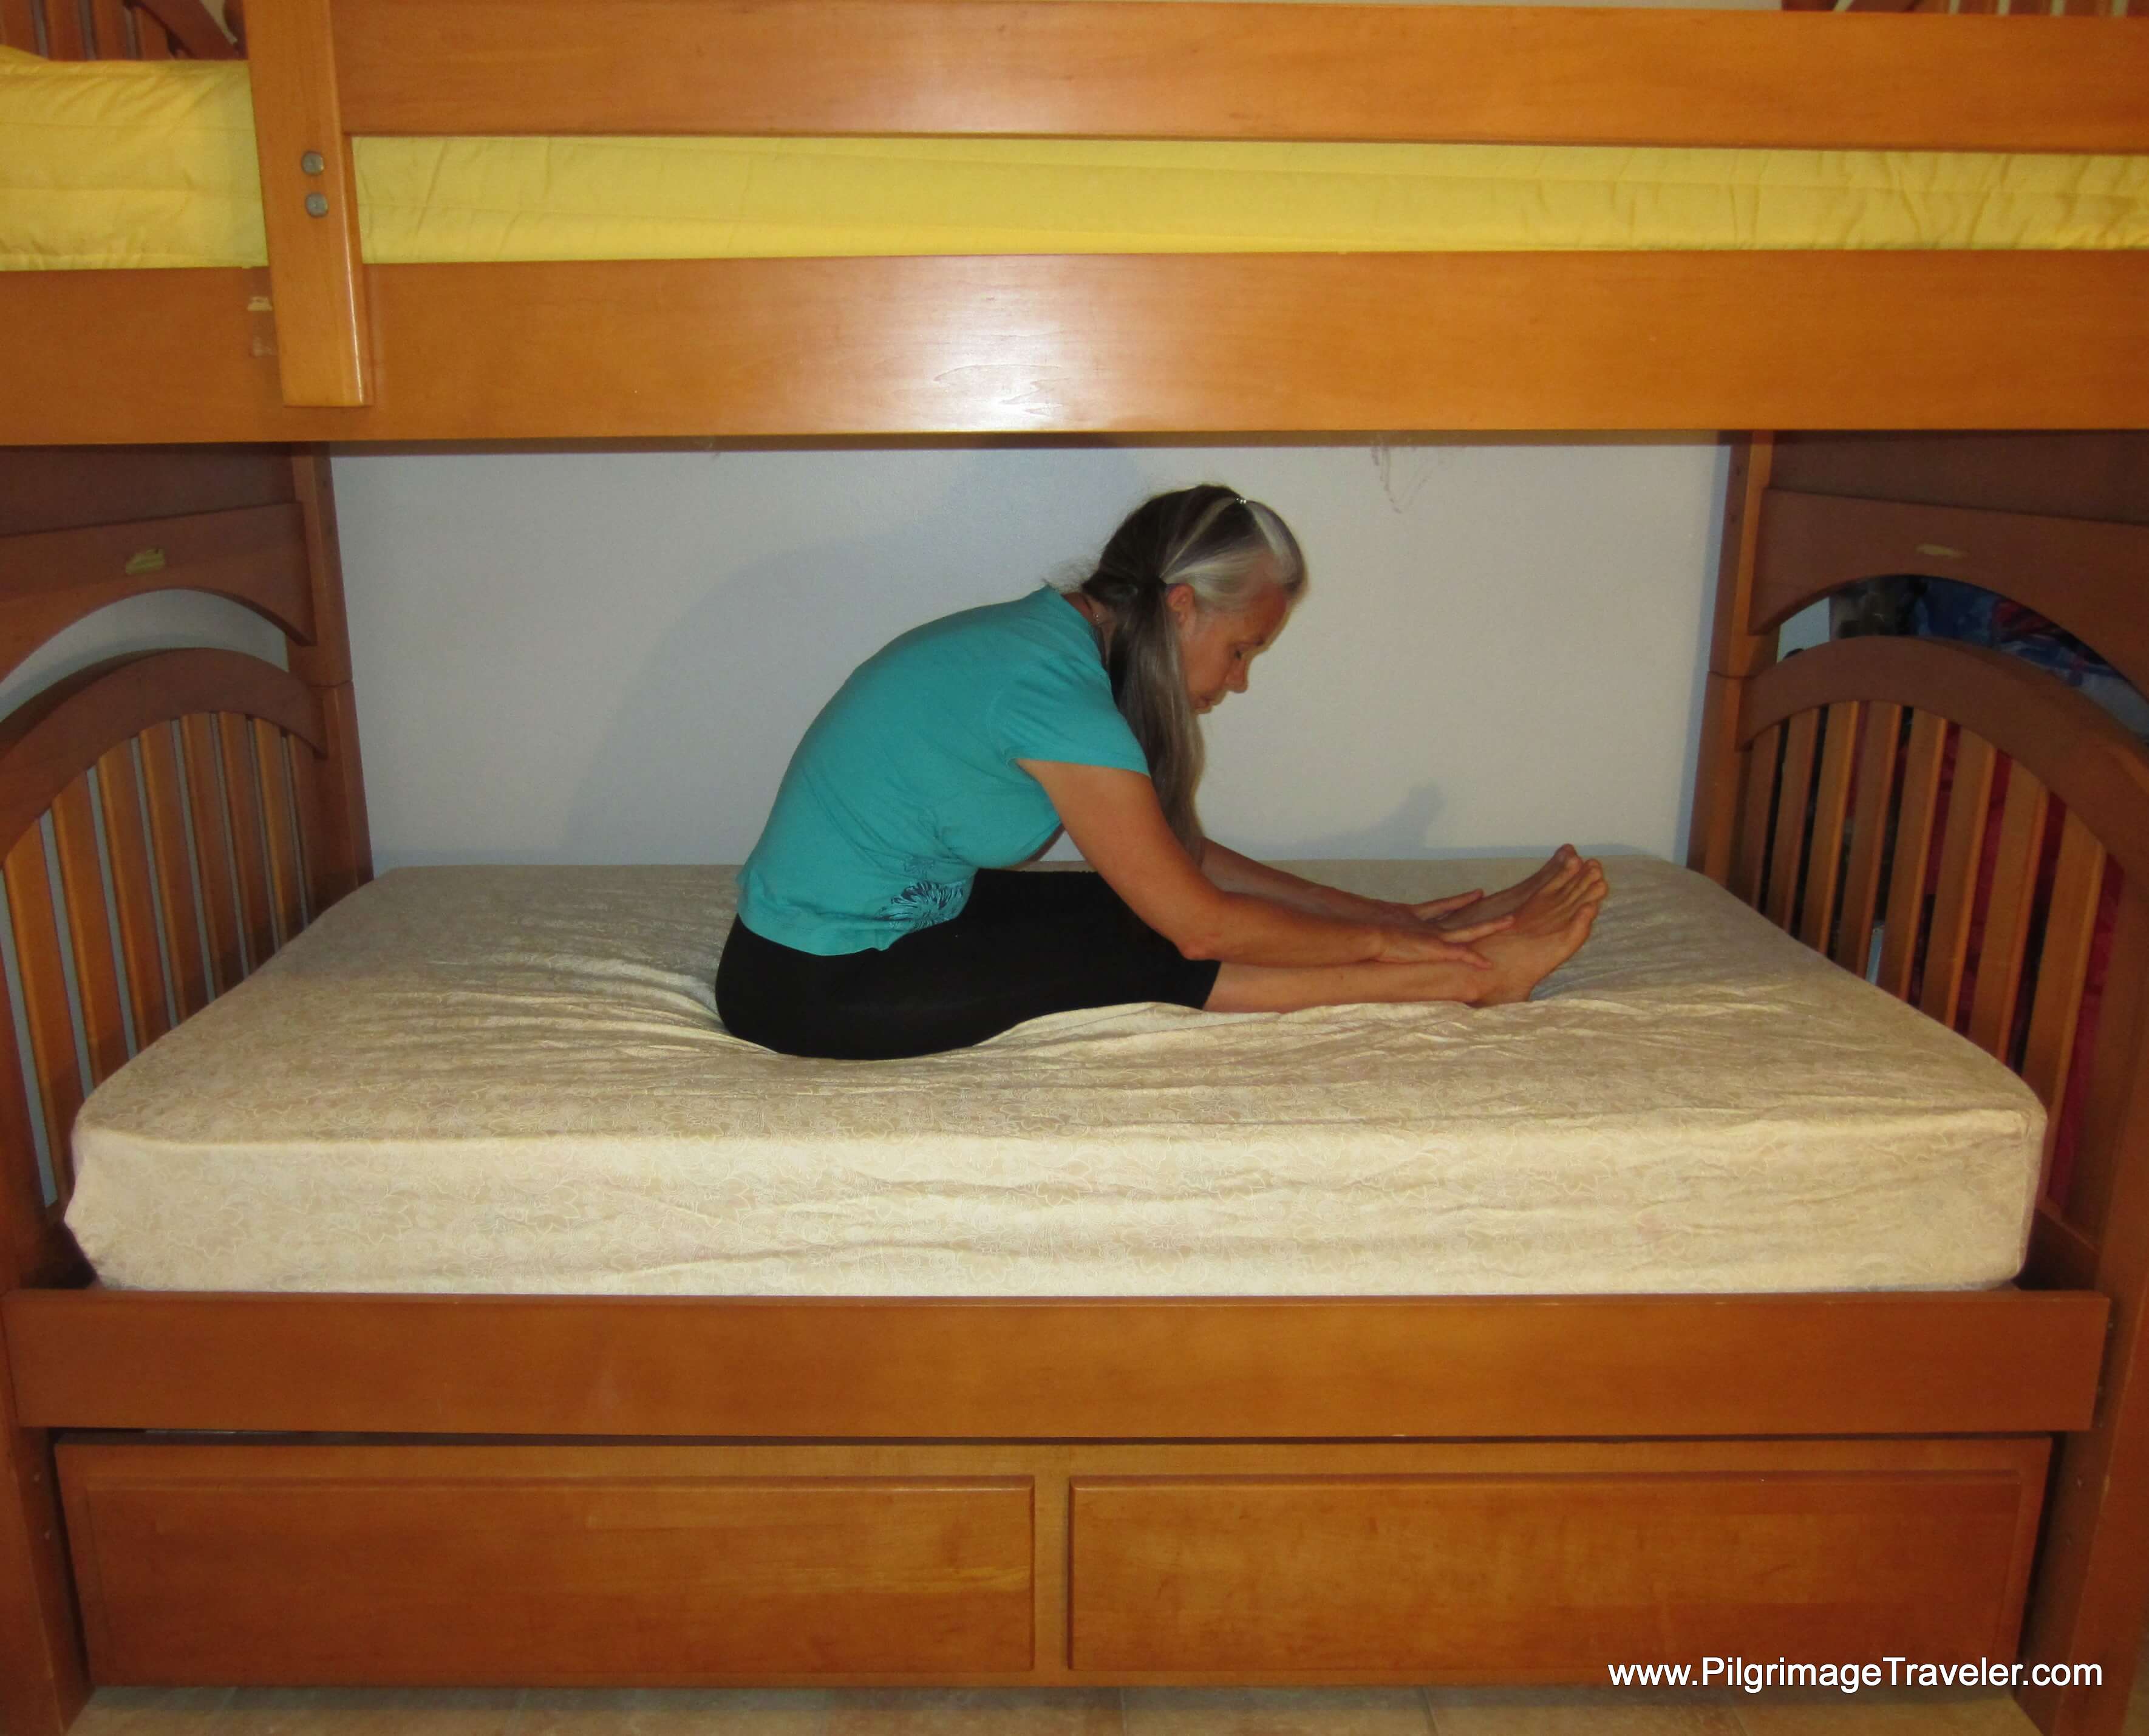
For a more focused hamstring stretch, there is nothing like the Seated Forward Bend Pose, shown below. Sit on the bed with your legs extended in front of you, and slowly fold forward. No need to elongate your back, but allow it to round along with your shoulders.
Do not pull with your hands to get lower - simply allow gravity to do its work as you breathe into the release.
You can add a calf stretch too (not shown), by pulling your toes gently toward your chest.
Go slowly with this one! This stretch can be quite intense after a long day of walking! Don't forget to breathe deeply and slowly!
May the back of your legs and groins stay healthy throughout your pilgrimage when you do these leg stretches!
4. Releasing the Quadriceps
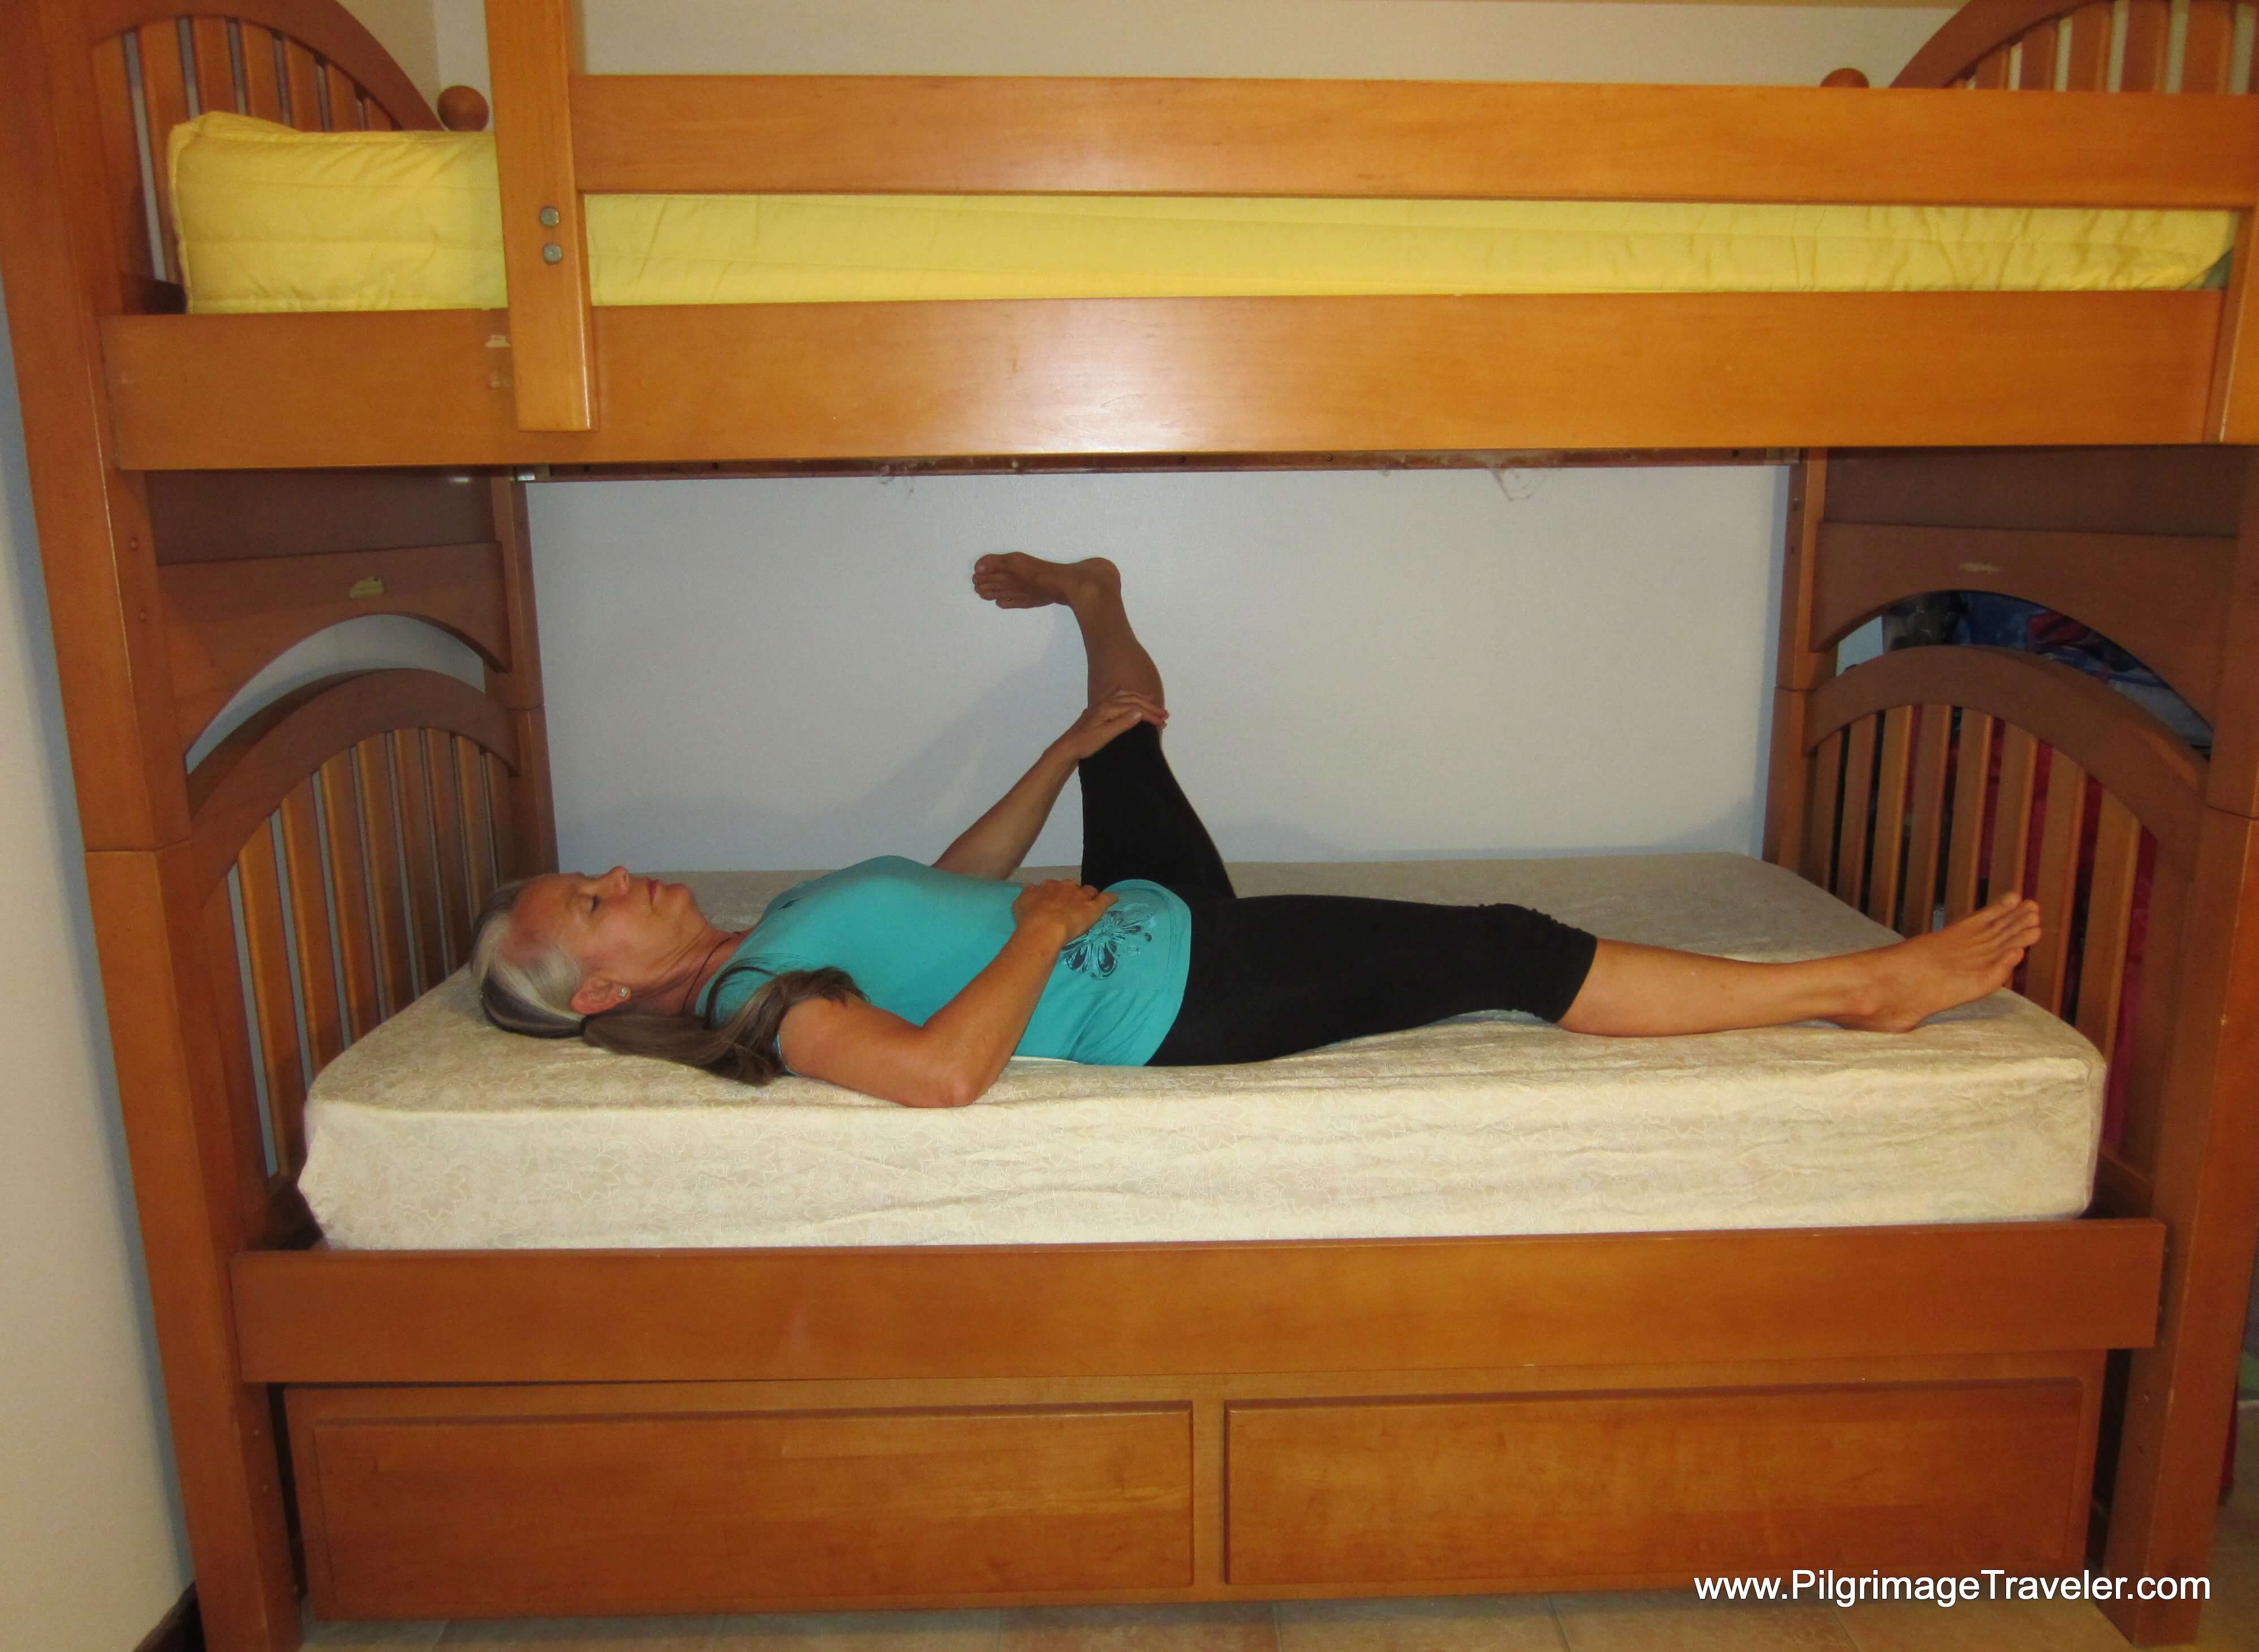
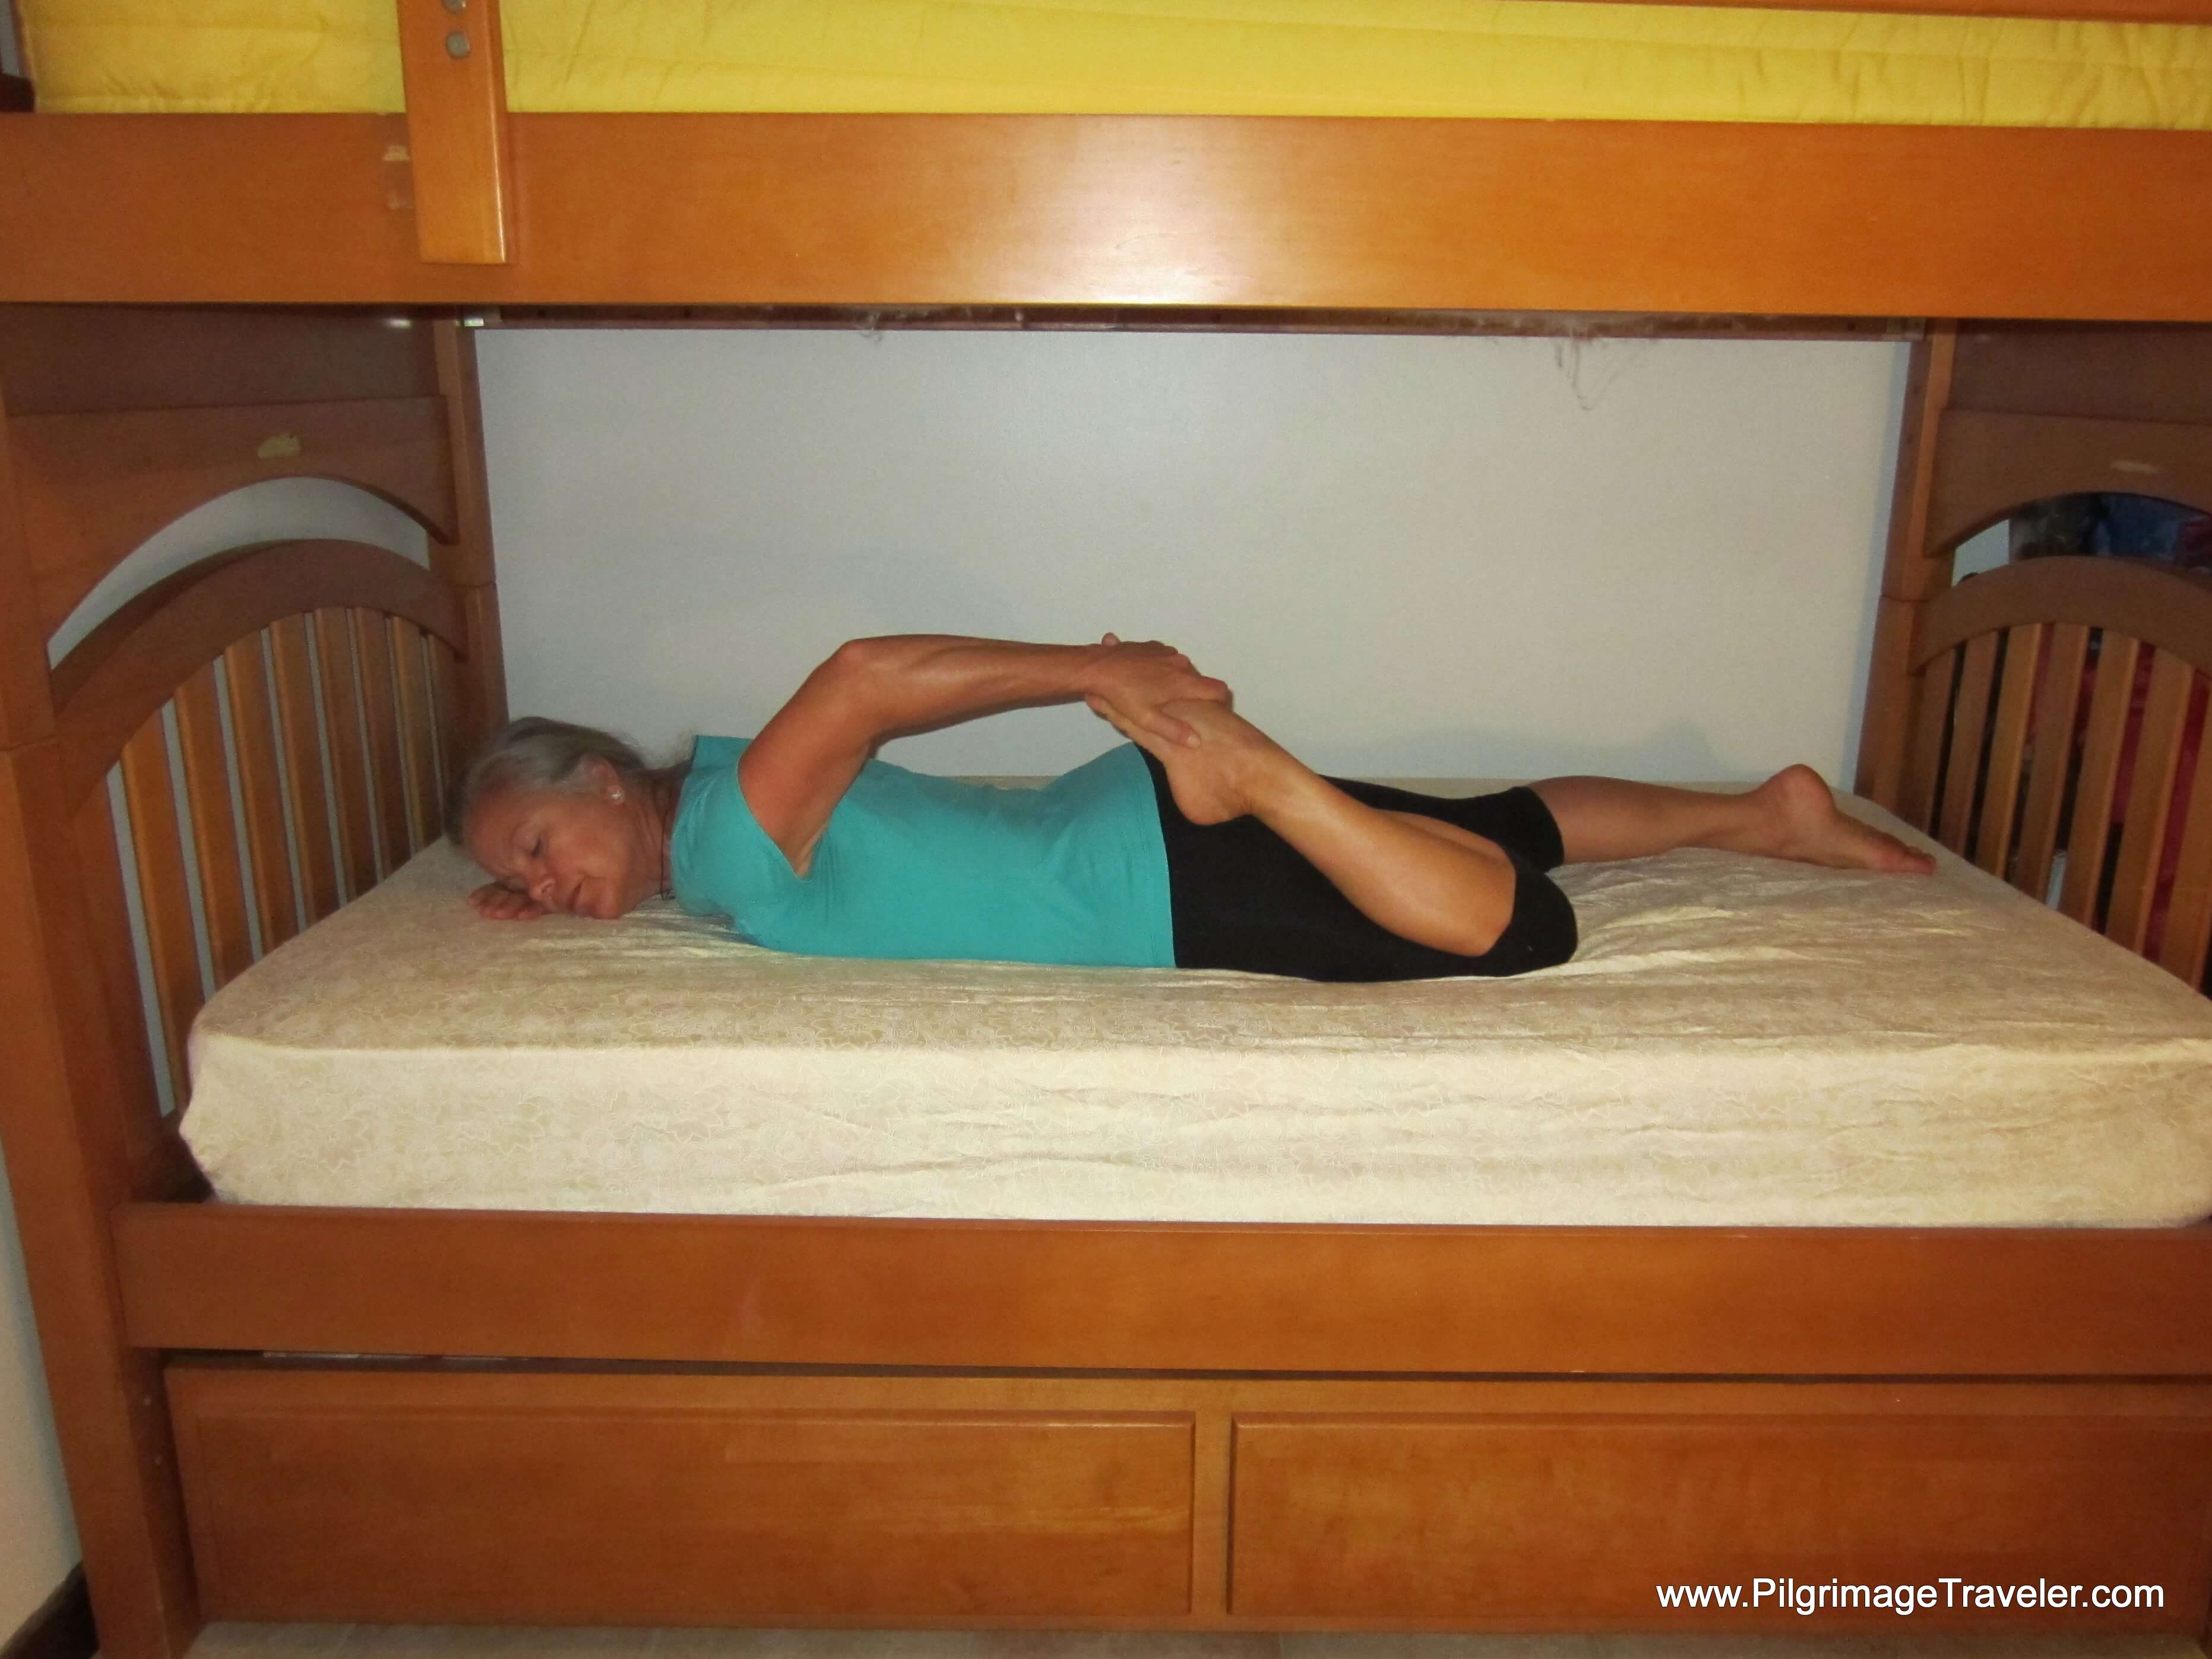
Everyone knows this stretch, the Quadriceps Stretch. You see runners and walkers in the park, standing around doing this stretch all the time.
The difference with the bunk bed yoga approach, is that you can easily do this stretch lying down! Make sure you do each leg for the same amount of time.
This quadriceps stretch is the mildest of the stretches in this section and should be your only choice if you have bad knees.
If you are short on time, you can do both legs at once, similar to the yoga Bow Pose. No need to take it into a deep back bend, like in yoga, if you are only stretching your quadriceps muscles. Do pull your feet towards your buttocks for a nice stretch through the front of your thighs.
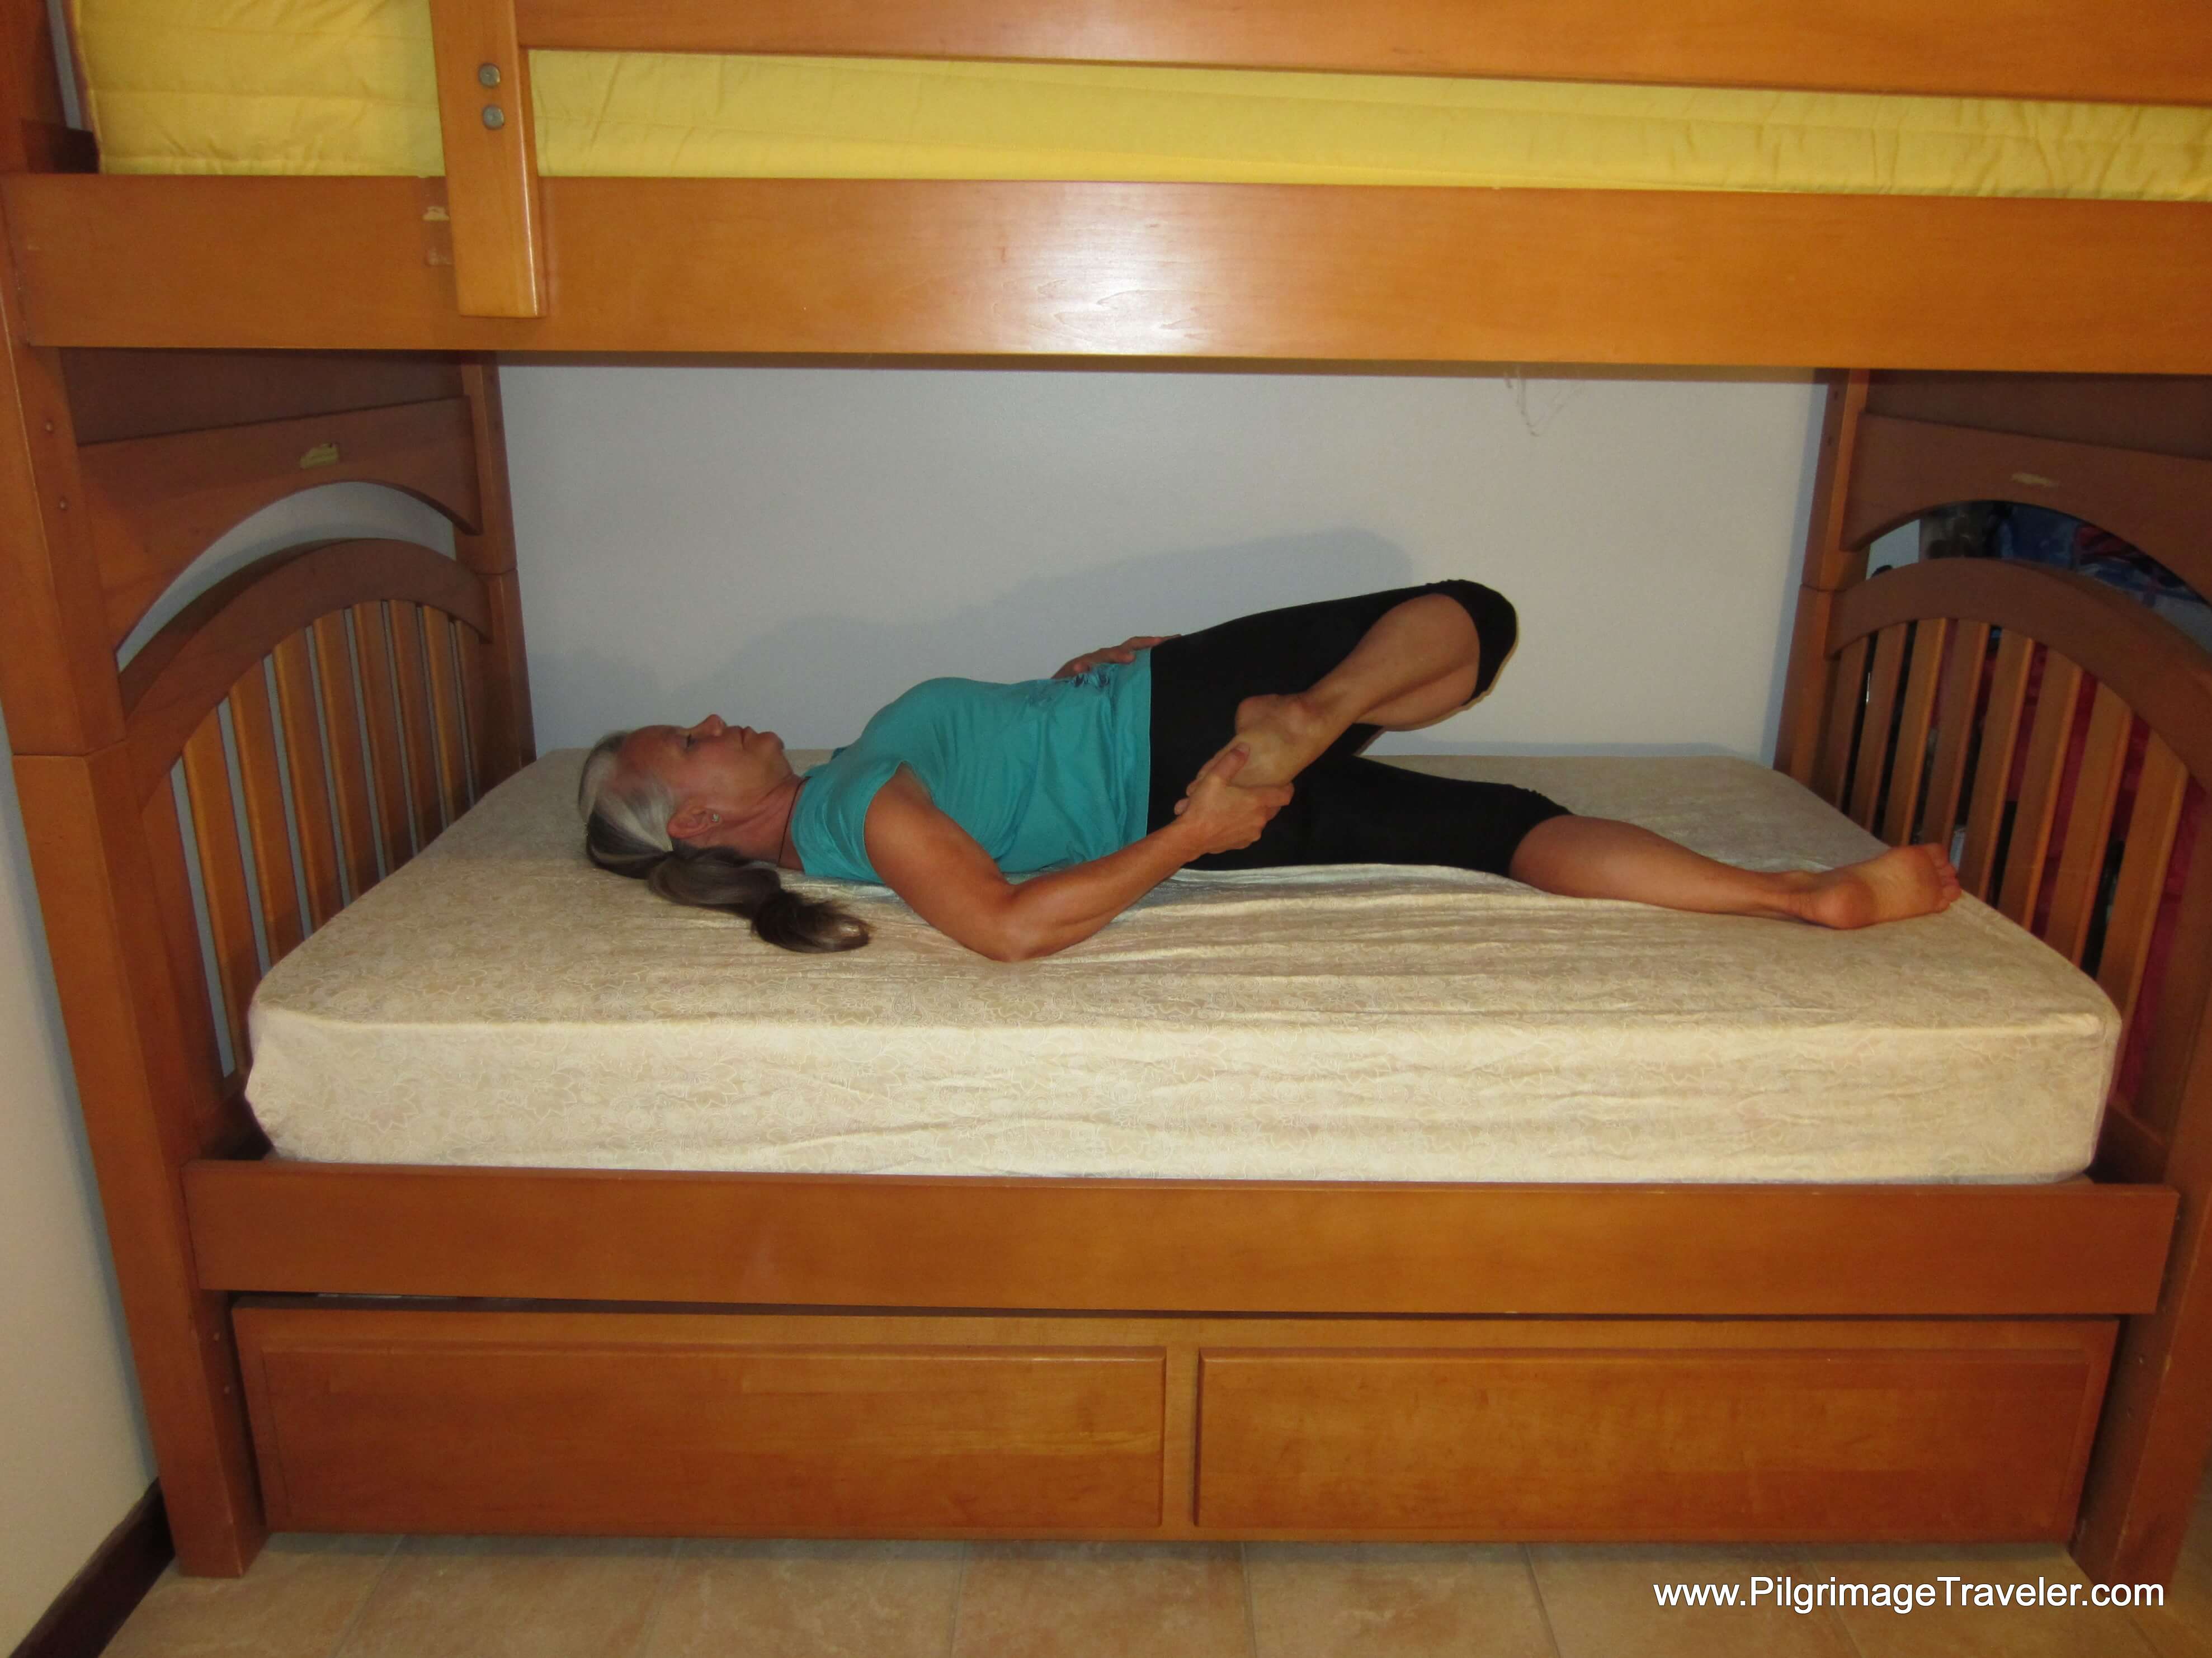
If the Lying Quadriceps Stretch doesn't give you a sufficient pull in the front of your legs, I guarantee that the Half Saddle Pose will! This bunk bed yoga stretch will make you cry maybe, but the therapeutic effects are enormous!
Do NOT do this pose if you have bad knees!!
This pose is a little trickier to set up from the lying position (click link above to see the set-up from the sitting position), but it can be done.
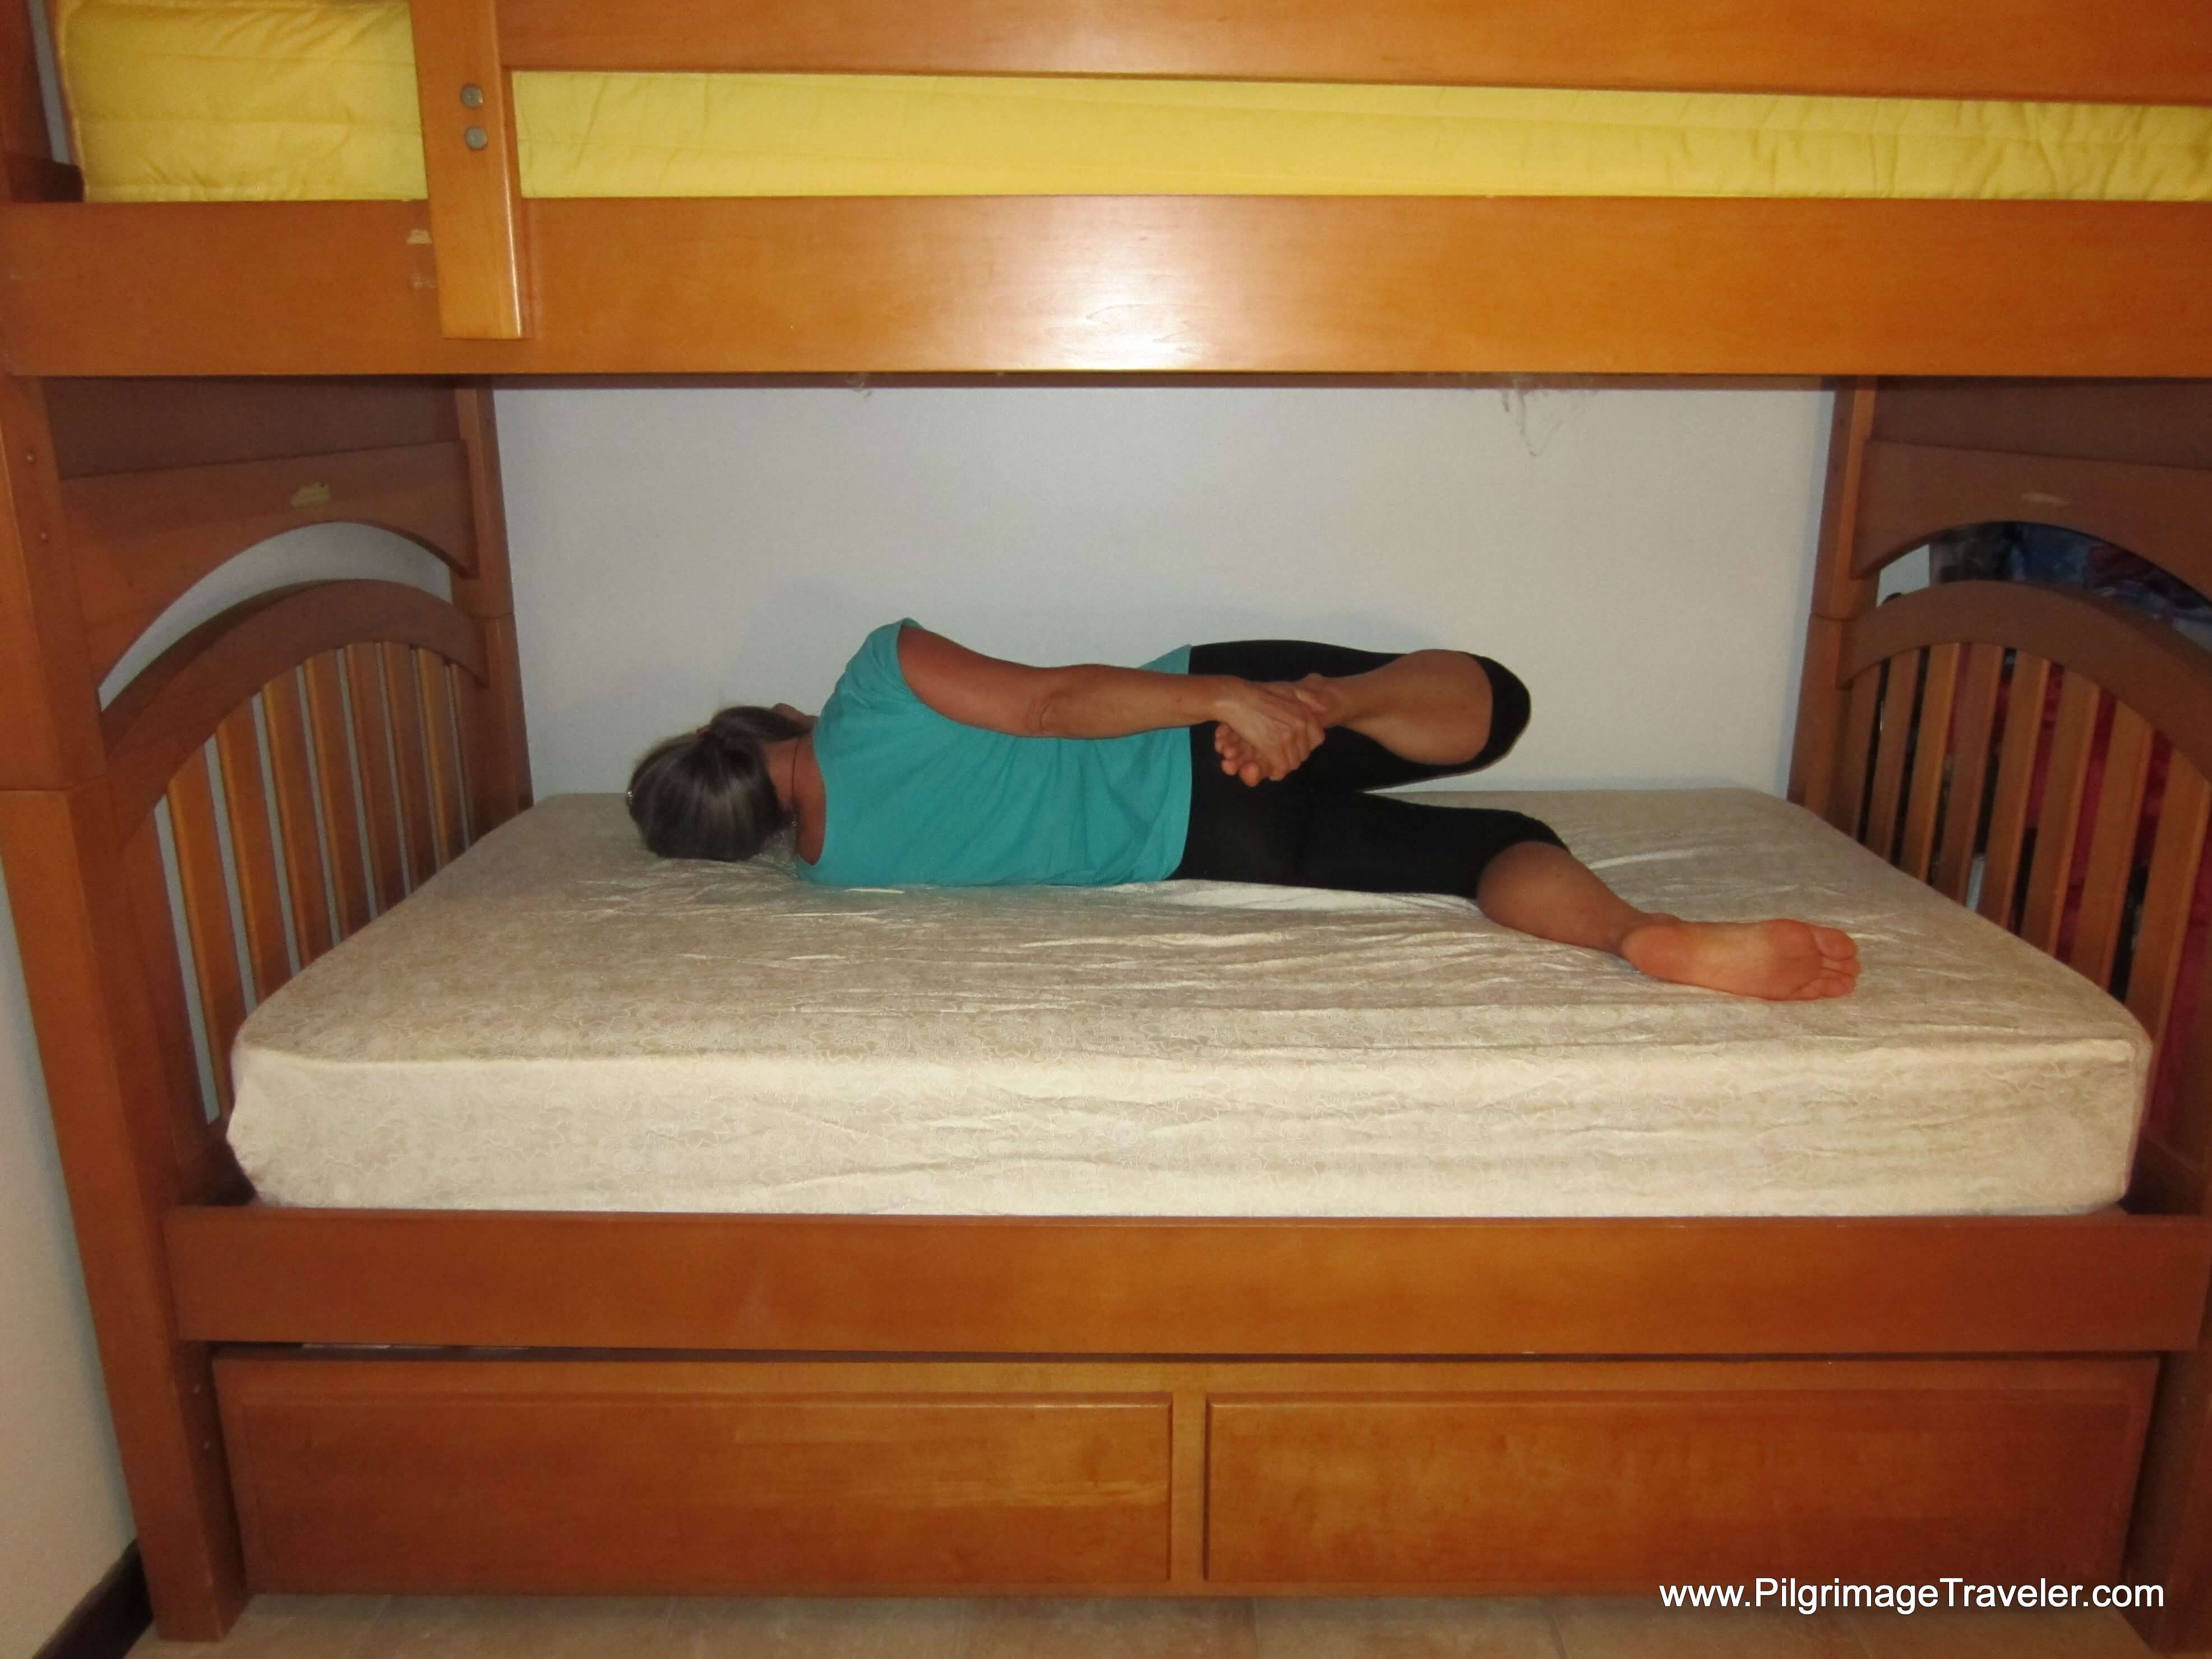
Lie on your side and reach for your foot as shown below.
Slowly rotate your body towards your back, until you are able to release your hold from your foot, until the top of your foot rests on the bed and you are lying on your back, as in the photo below.
Do both legs for equal amounts.
This is an intense front of thigh, quadriceps stretch, so make sure you go into the pose slowly and really relax by breathing deeply and into into the belly.
The deep breathing is what truly allows your body to relax and let go!
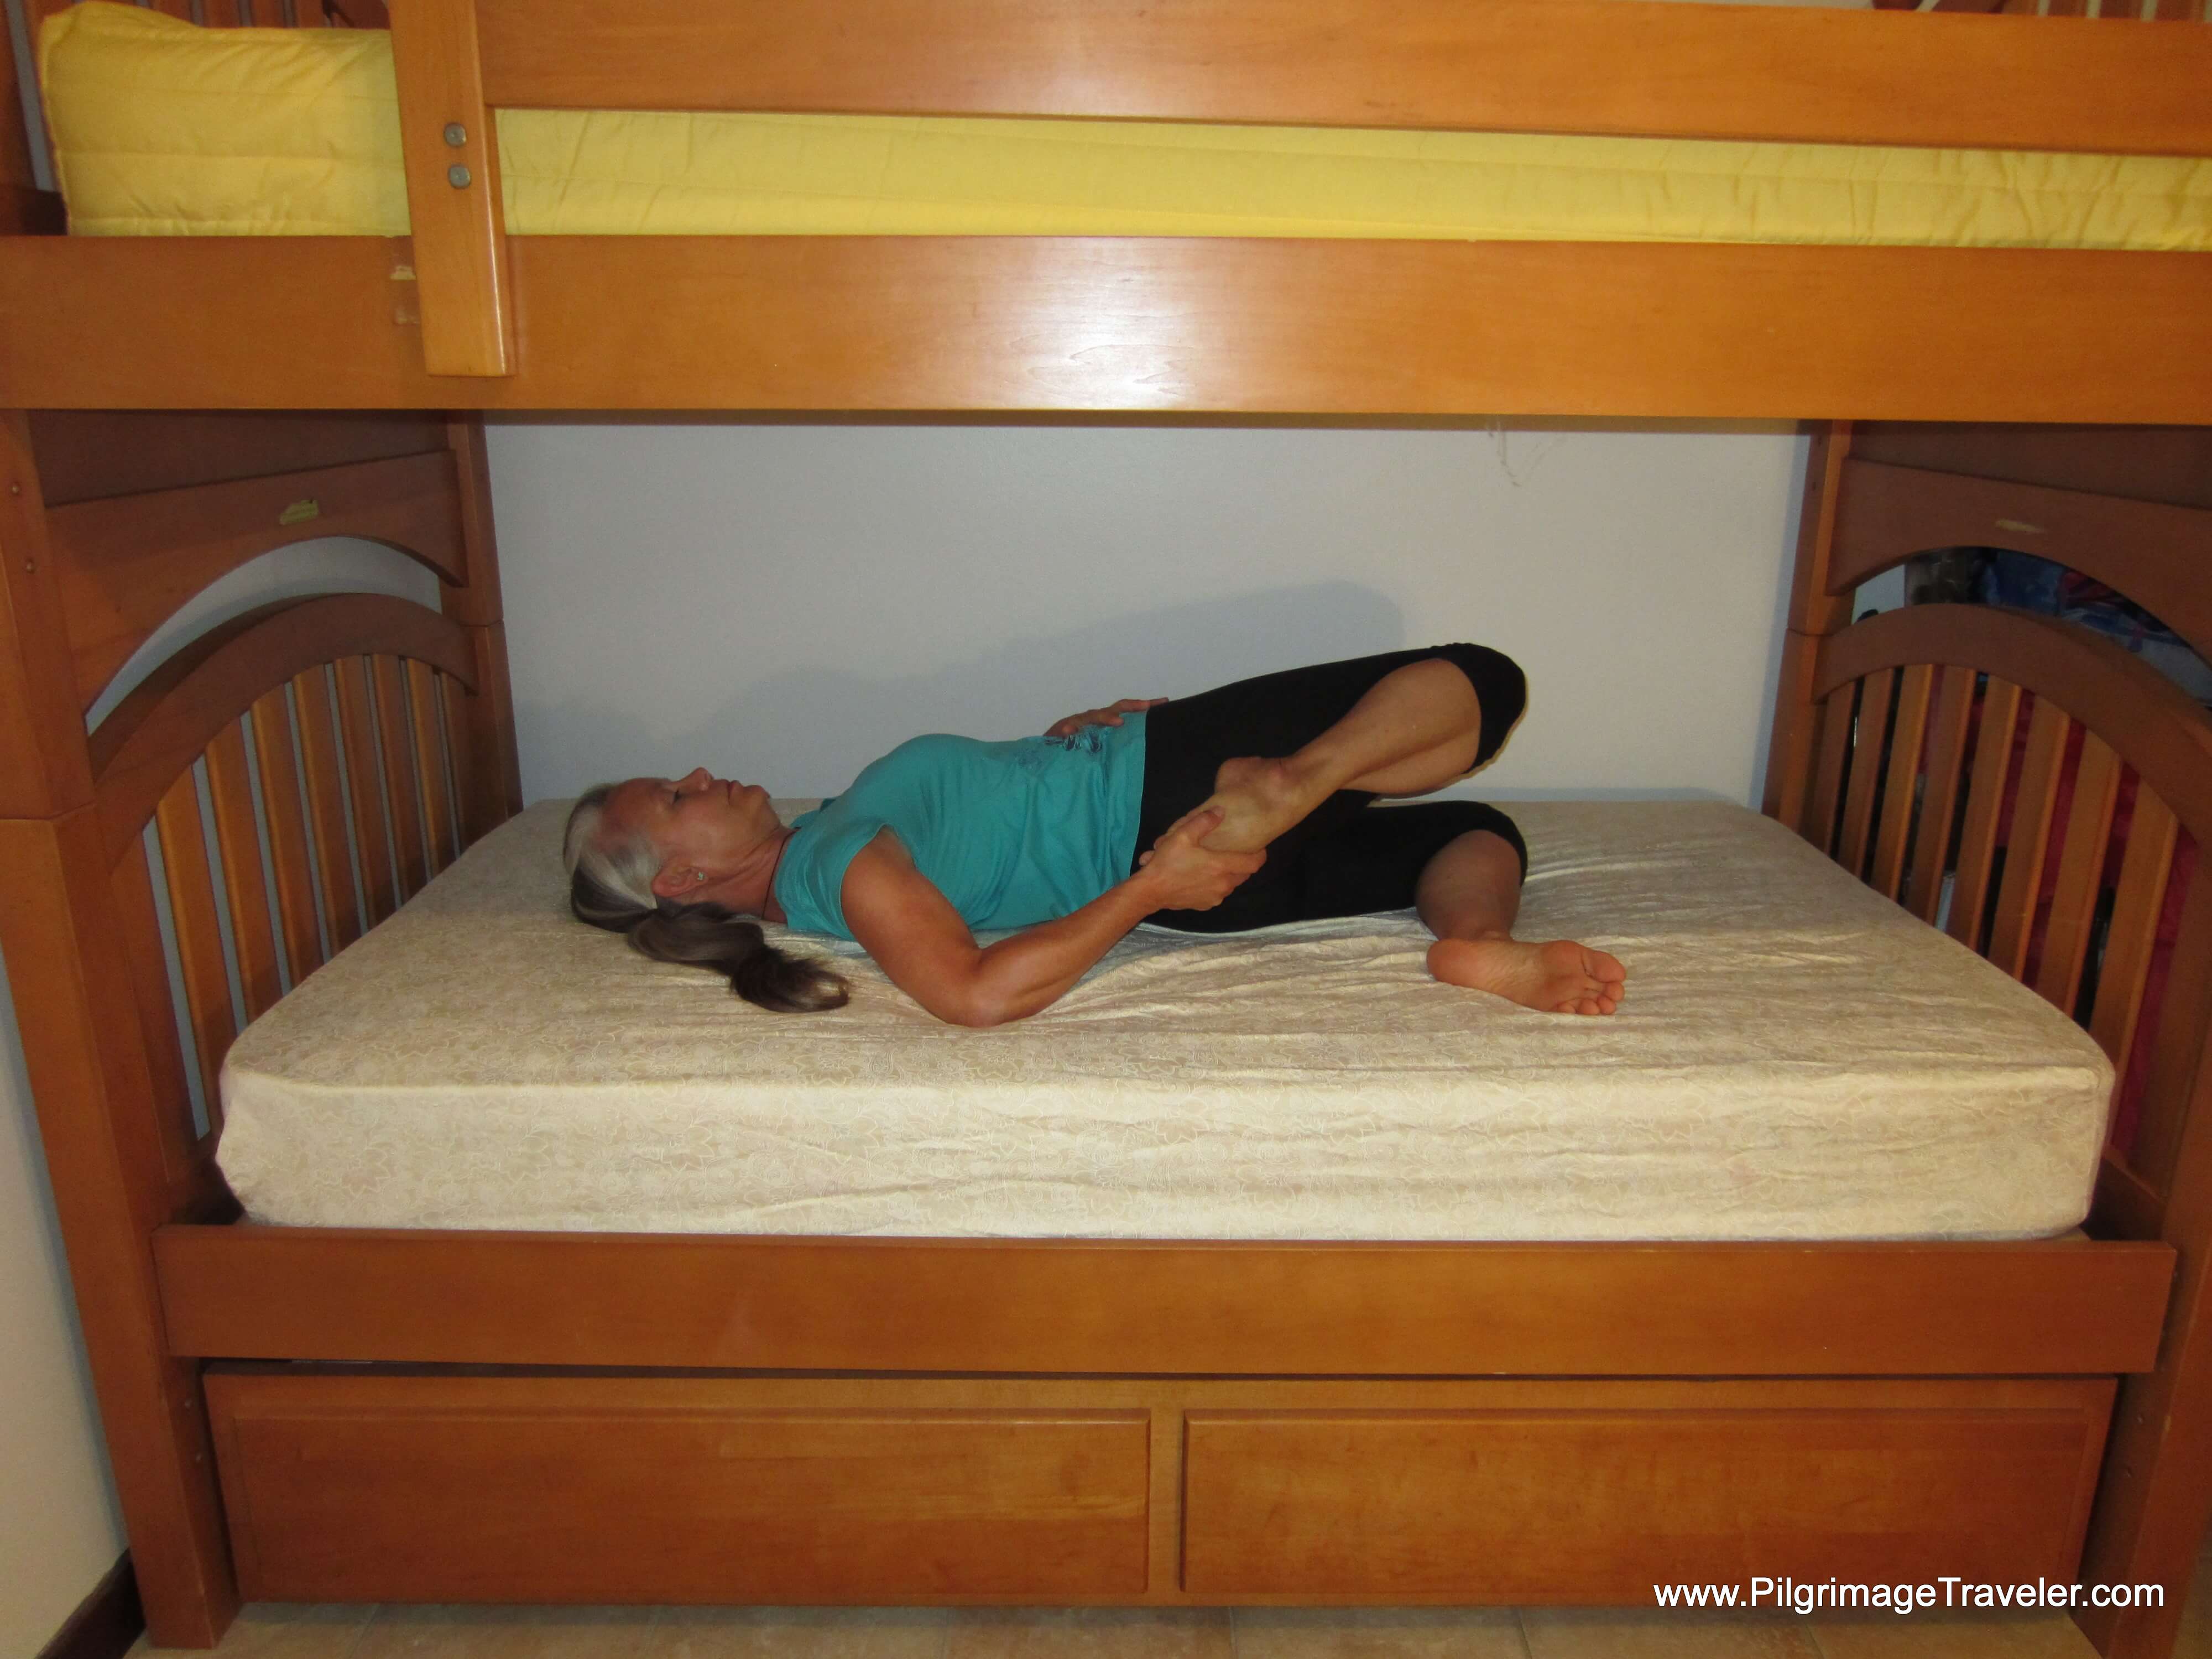
If the above full saddle pose is too intense for you, you can modify it, by bending the lower leg on the bed, 90 degrees, as shown in the start of the pose, below.
Very slowly, rotate towards your back as shown, carefully testing your tolerance to this pose. Do not go farther if at any time this hurts your knees or hips too much!
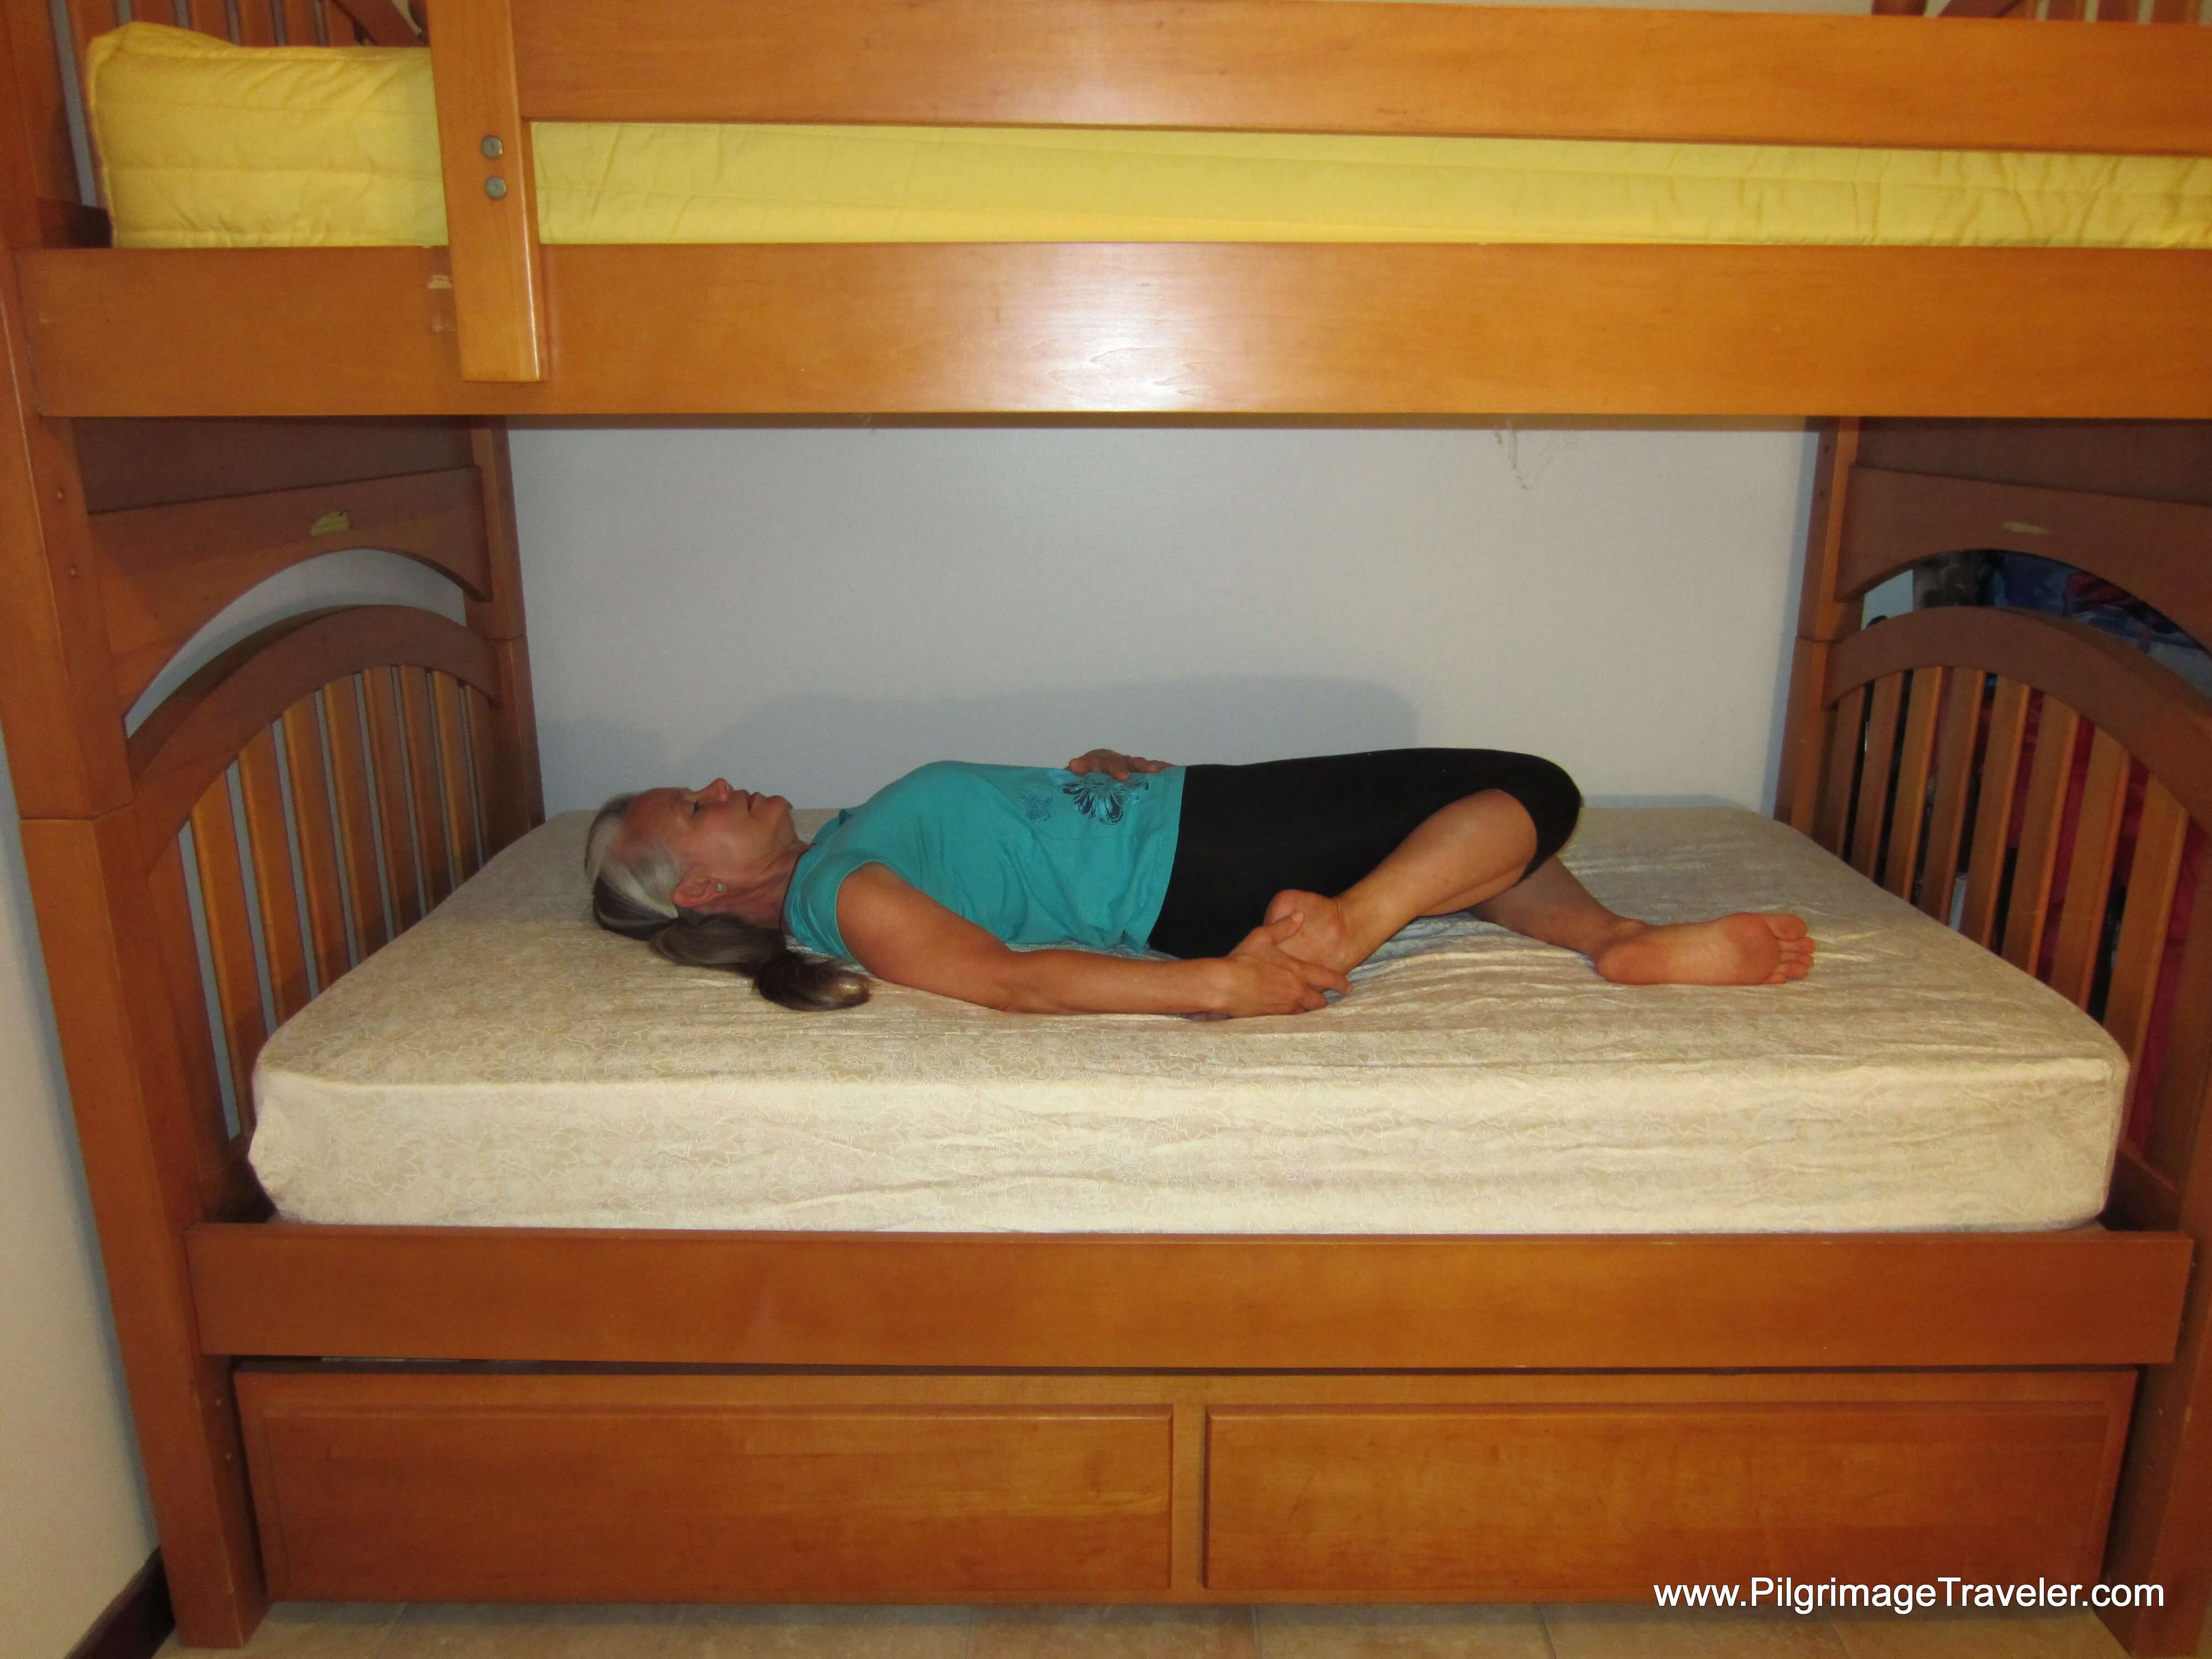
The left leg remains bent throughout as you end up on your back. You may have to continue to hold your foot as I show below, or adjust the position of the foot to find a comfortable position as you approach your back.
As you breathe and relax into the modified Half Saddle Pose, you should be able to let go of your foot, rest your hands on your belly, and rest your right calf on your left foot as shown in the final photo, below. Isn't this a fantastic modified bunk bed yoga stretch?
Don't forget to stretch both sides.
This is an intense, but very, very releasing pose for your quadriceps if you get it right! As far as I know, this modification is my own unique creation, and I created it when I was testing this pose on my own bed. It is truly, bunk bed yoga at it's finest!
Enjoy, and may your pilgrimage traveler's quadriceps remain healthy and happy when you do these quadriceps stretches!
After the strong back bends of the quadriceps stretches, once again, it feels really, really nice to go into the Child's Pose!
5. Hip Openers
While your initial reaction may be that a pilgrimage traveler doesn't need hip openers, perhaps when you do these bunk bed yoga poses and see how tight your hips are, you will change your mind!
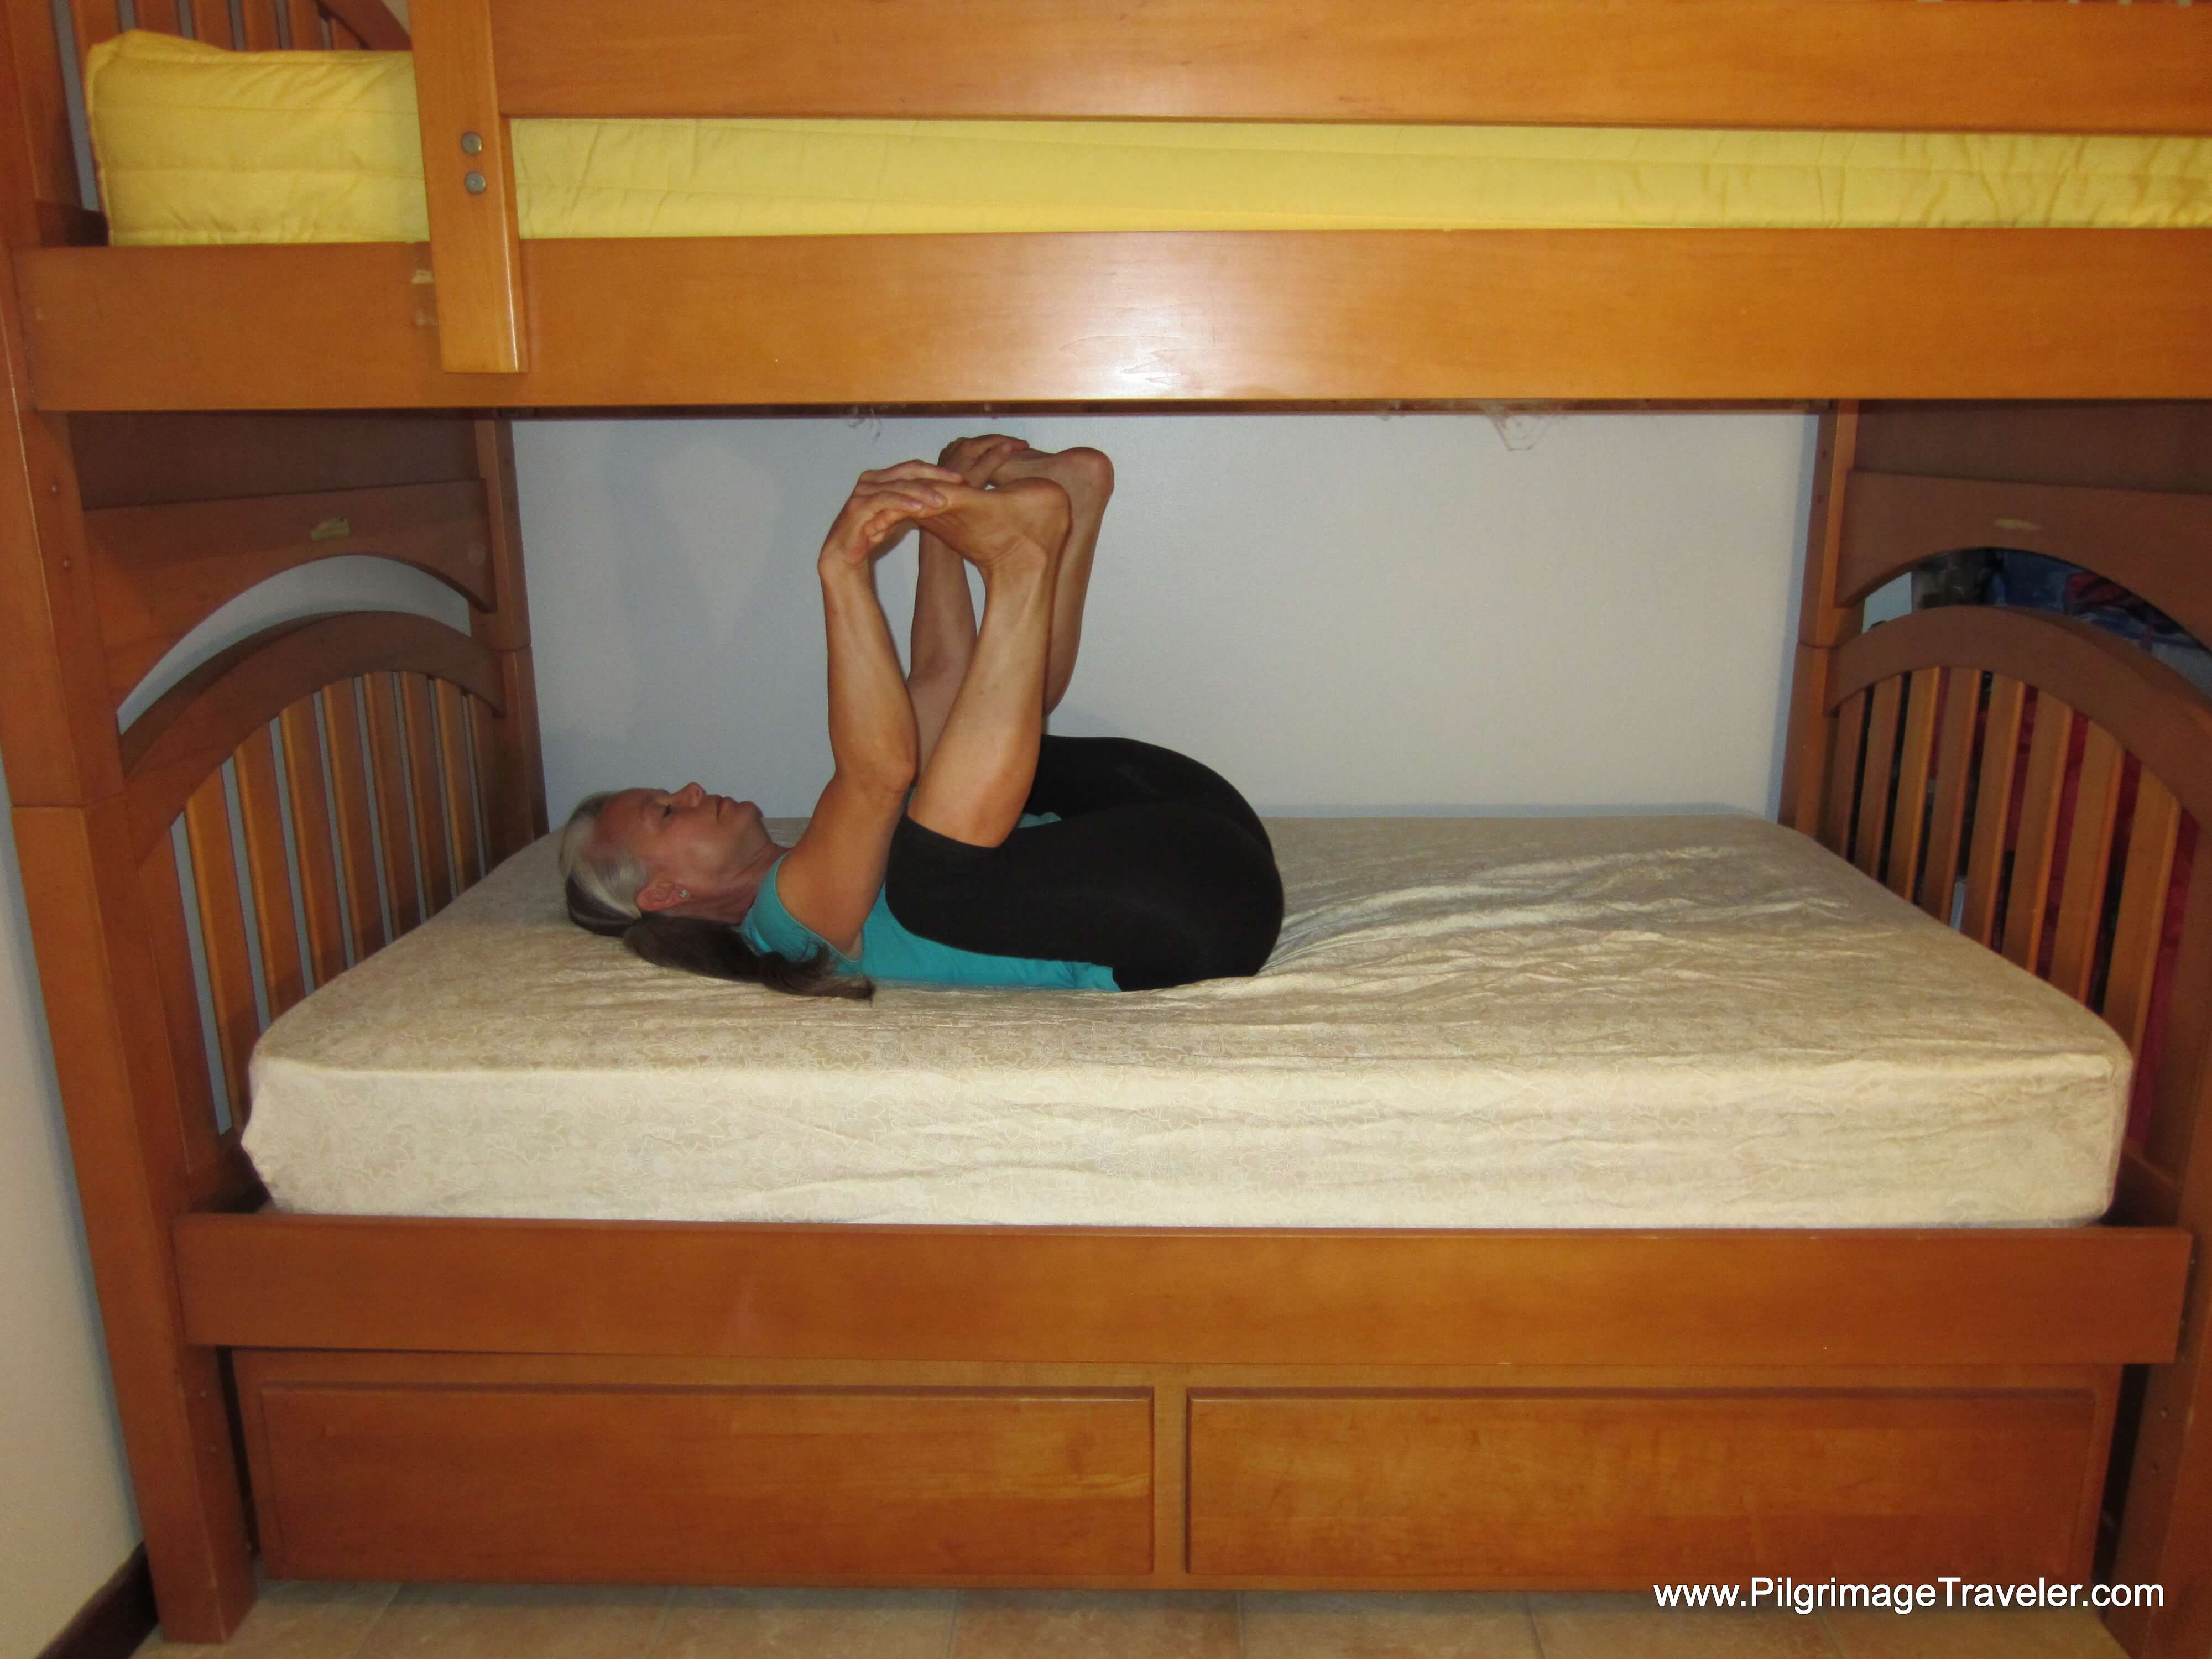
The easiest and most fun hip opener is the Happy Baby Pose or the Stirrup Pose in Yin Yoga. When done in the Yin Yoga fashion, instead of rocking from side to side, hold still in the pose, and focus on dropping your knees deeper and deeper towards the bed.
The hands can be placed inside the feet to give a gentle pressure downward to aide in the opening of the hips.
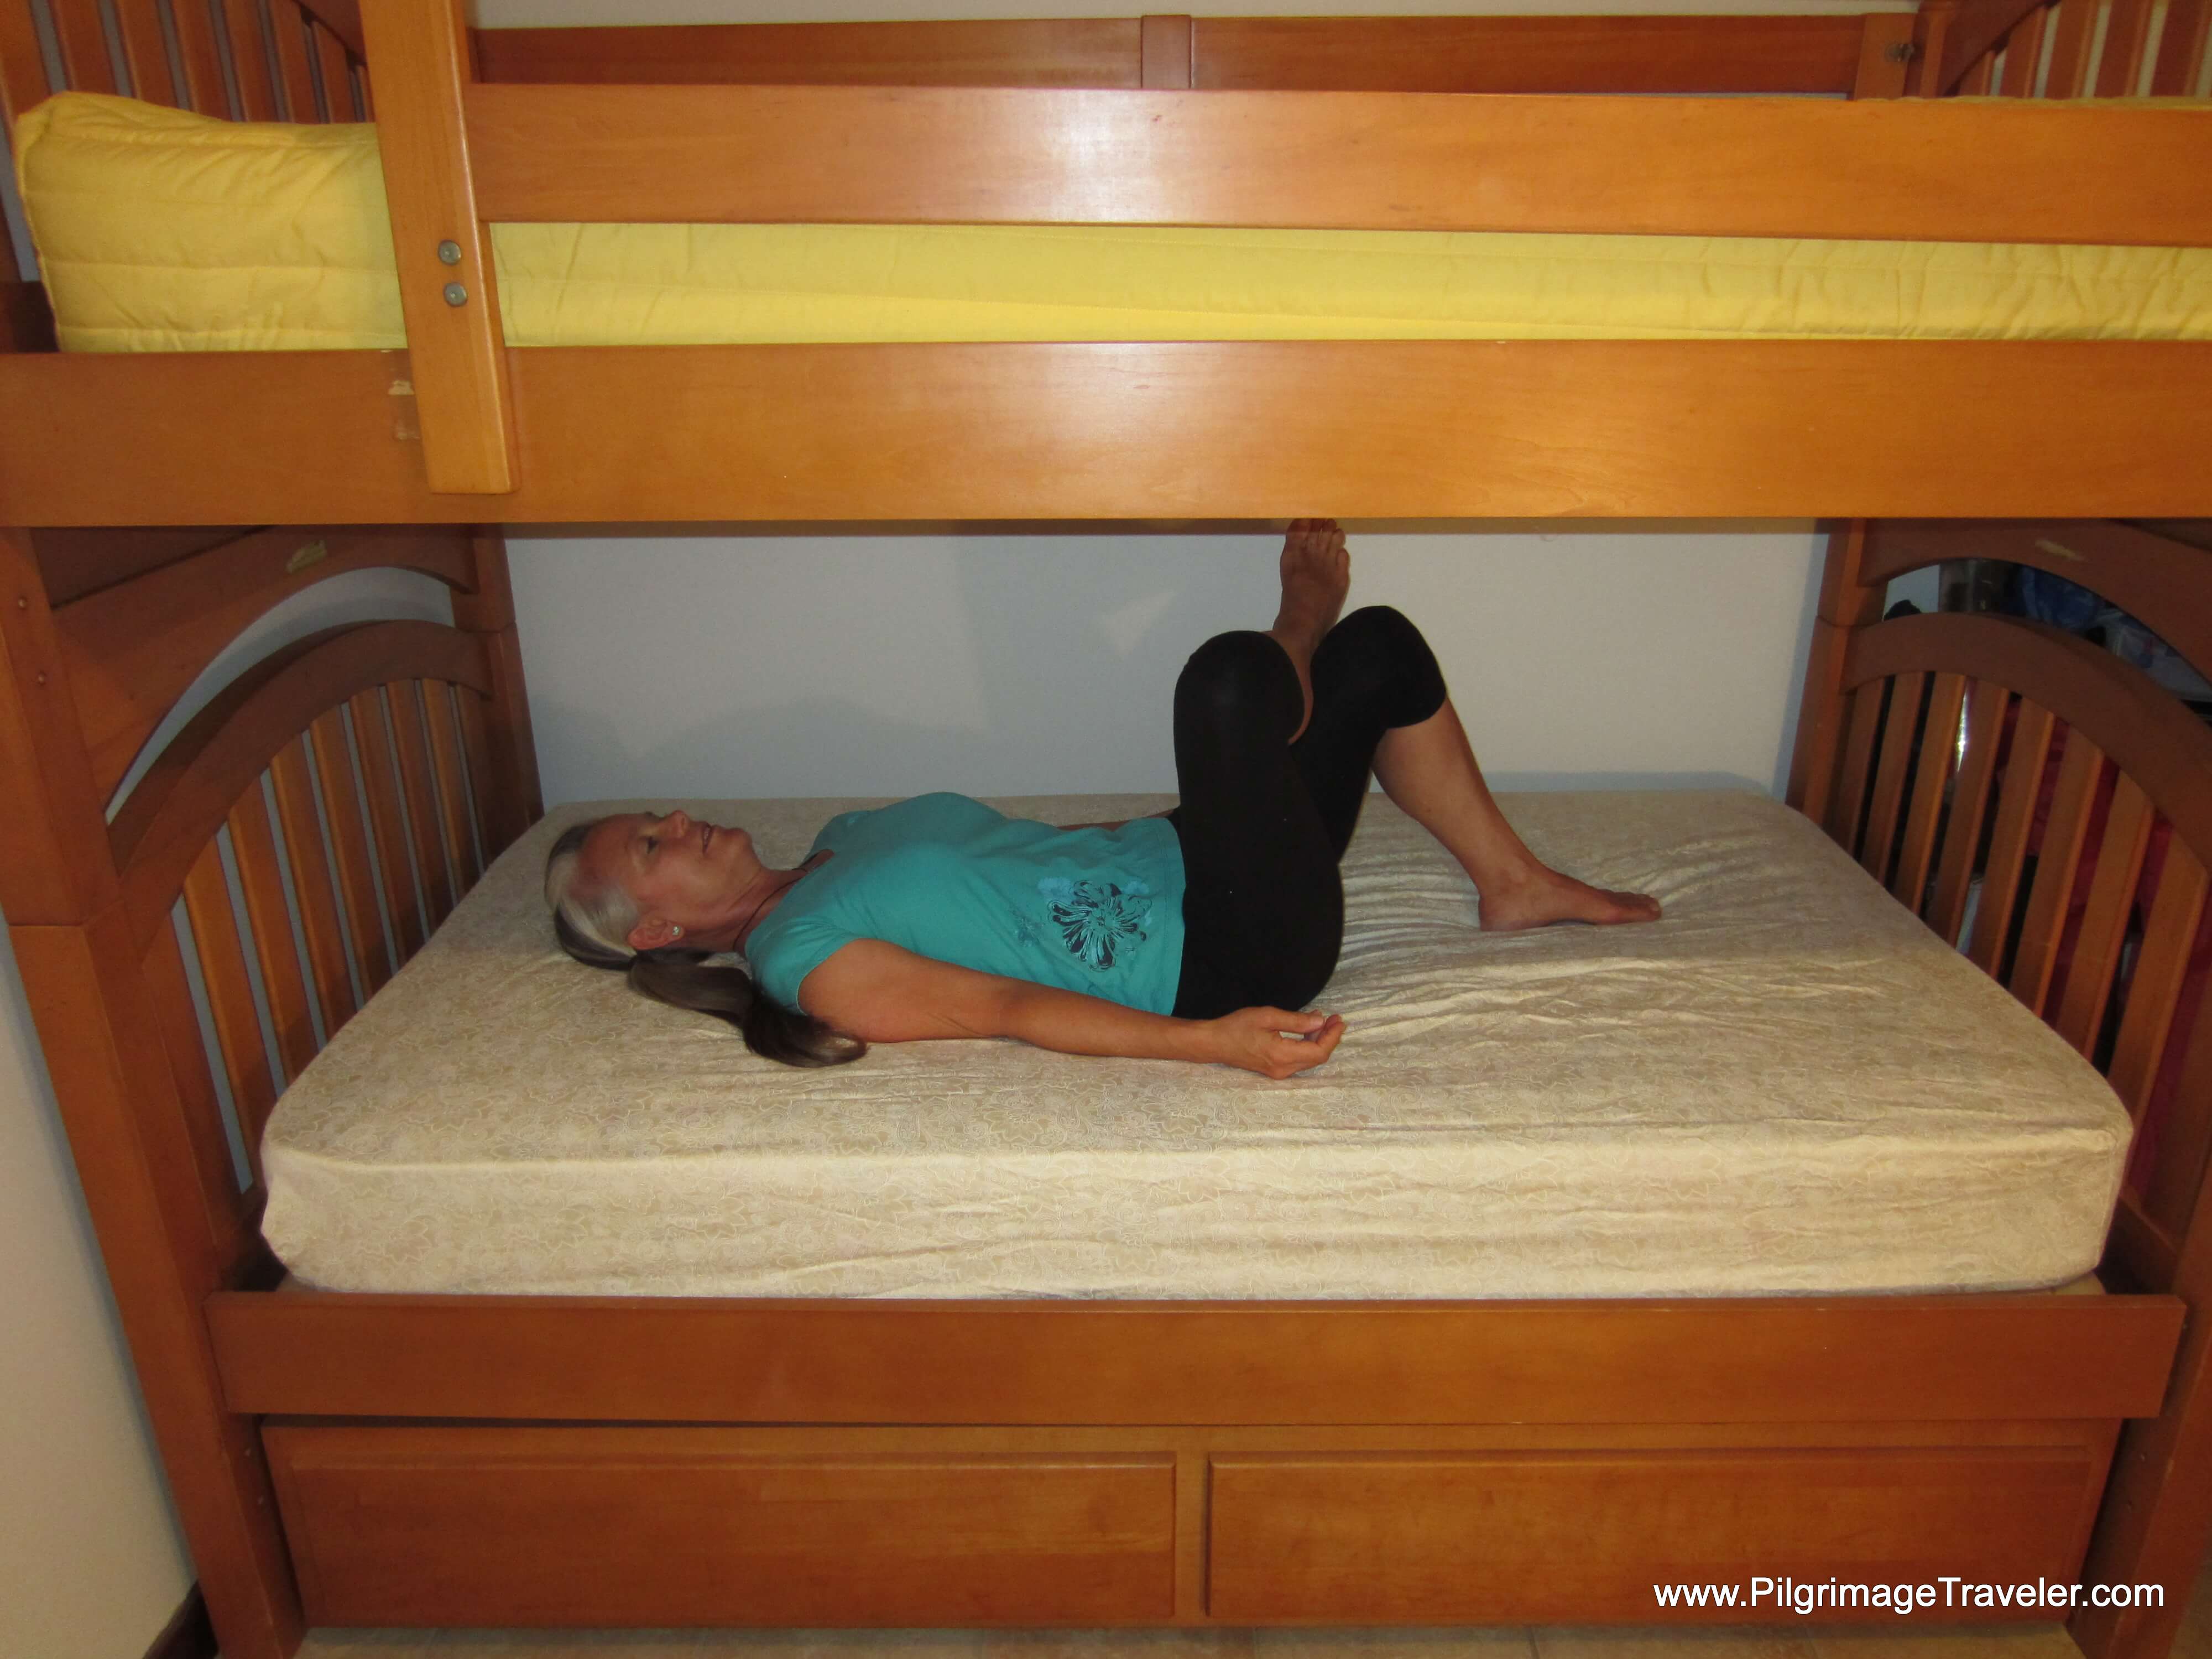
In the bunk bed yoga poses that I offer, the next in intensity is the Eye of the Needle. This one is my favorite, because you can really open the hips after a long day on your pilgrimage travels, but it is not so intense as the next, Pigeon Pose.
Begin this bunk bed yoga pose in the starting position that I show below.
Next, place your right ankle on the left knee as shown:
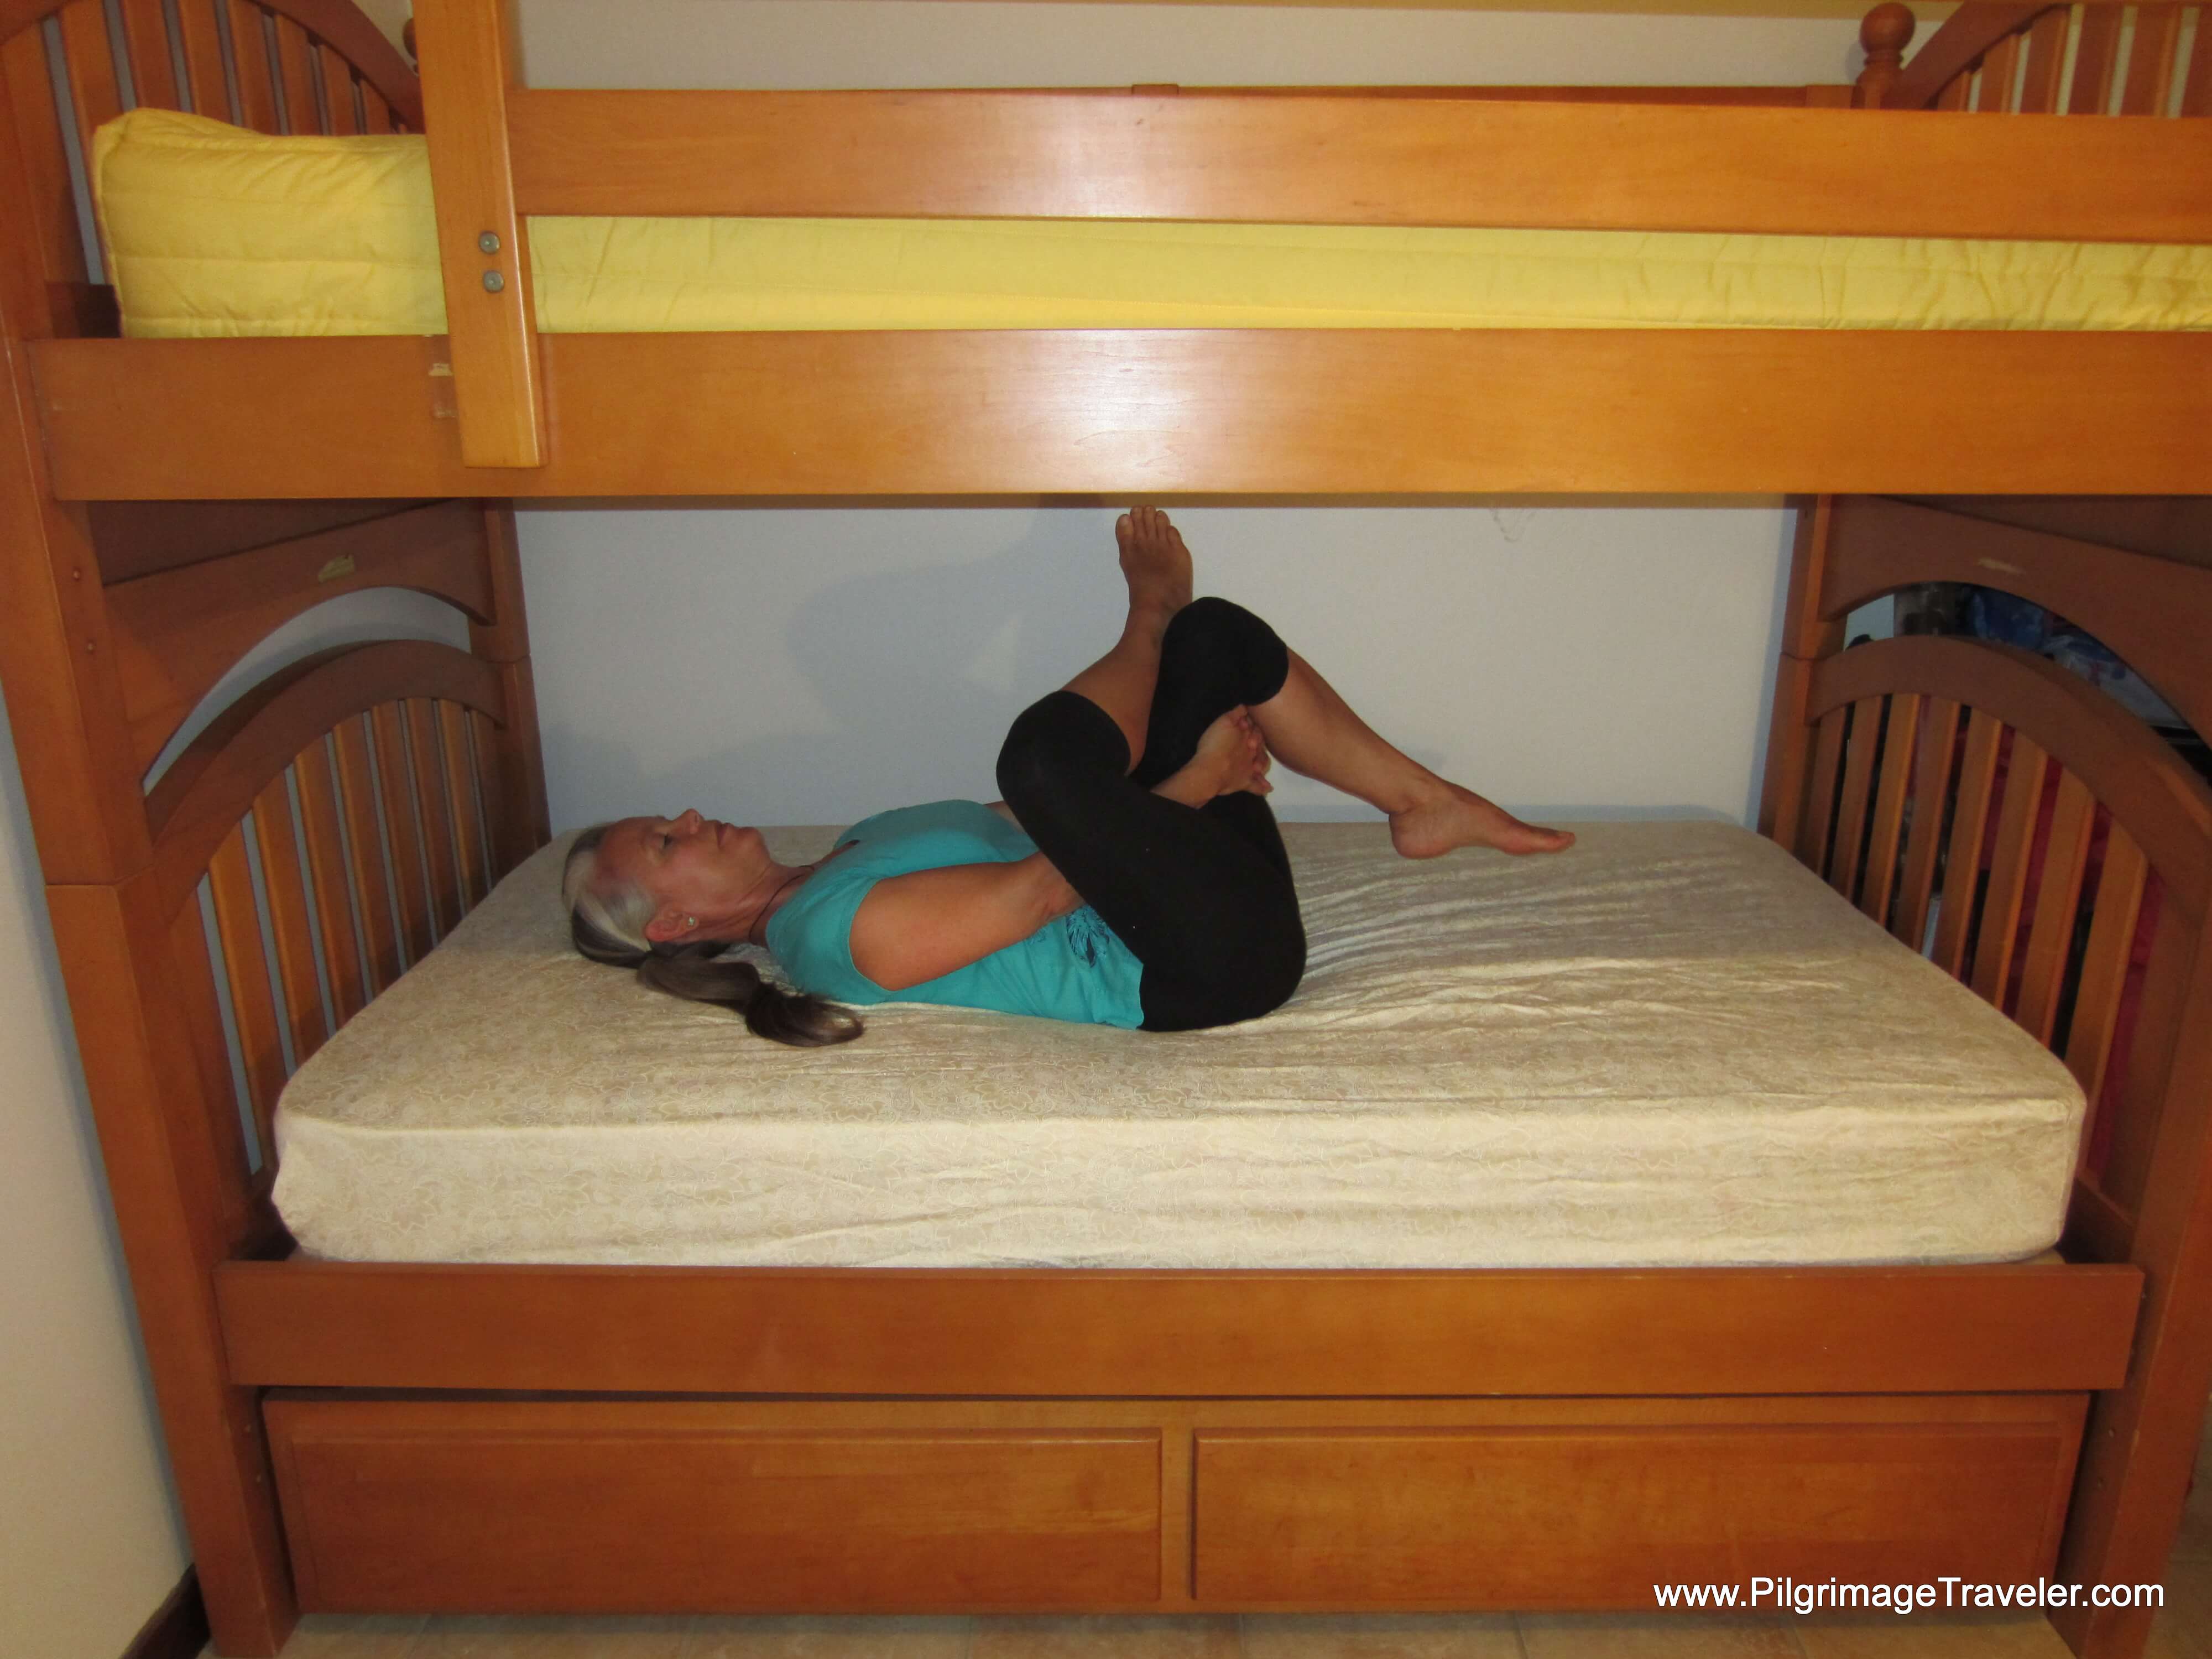
Now take your right hand, thread it through your thighs to join the left hand in grasping the back of your left thigh. Don't crunch up through the waist. Keep your back on the bed, and keep the back of your neck long. This is not a core exercise nor a neck exercise.
If step two is too intense, go back to step one. Just crossing your ankle to the opposite knee may be enough for you if you have tight hips.
If you have more space in your hips, gently pull your thigh towards your chest to increase the stretch. Keep your back and neck long.
If you have even more space in your hips when you try this yoga stretch, place your clasped hands on the front of your left shin for the deepest stretch of all!
You can gently pull toward your chest here too! I love this bunk bed yoga pose because it is truly adaptable to all types of hips - tight and open! In fact, my Camino partner on the Camino Inglés loved this pose most of all! It was the only pose she did every night! (Despite my best efforts to get her to do more).
Remember to do both sides equally. Notice which side is tighter! This is the side that you chose to do second, and it is the side that you overuse the most!
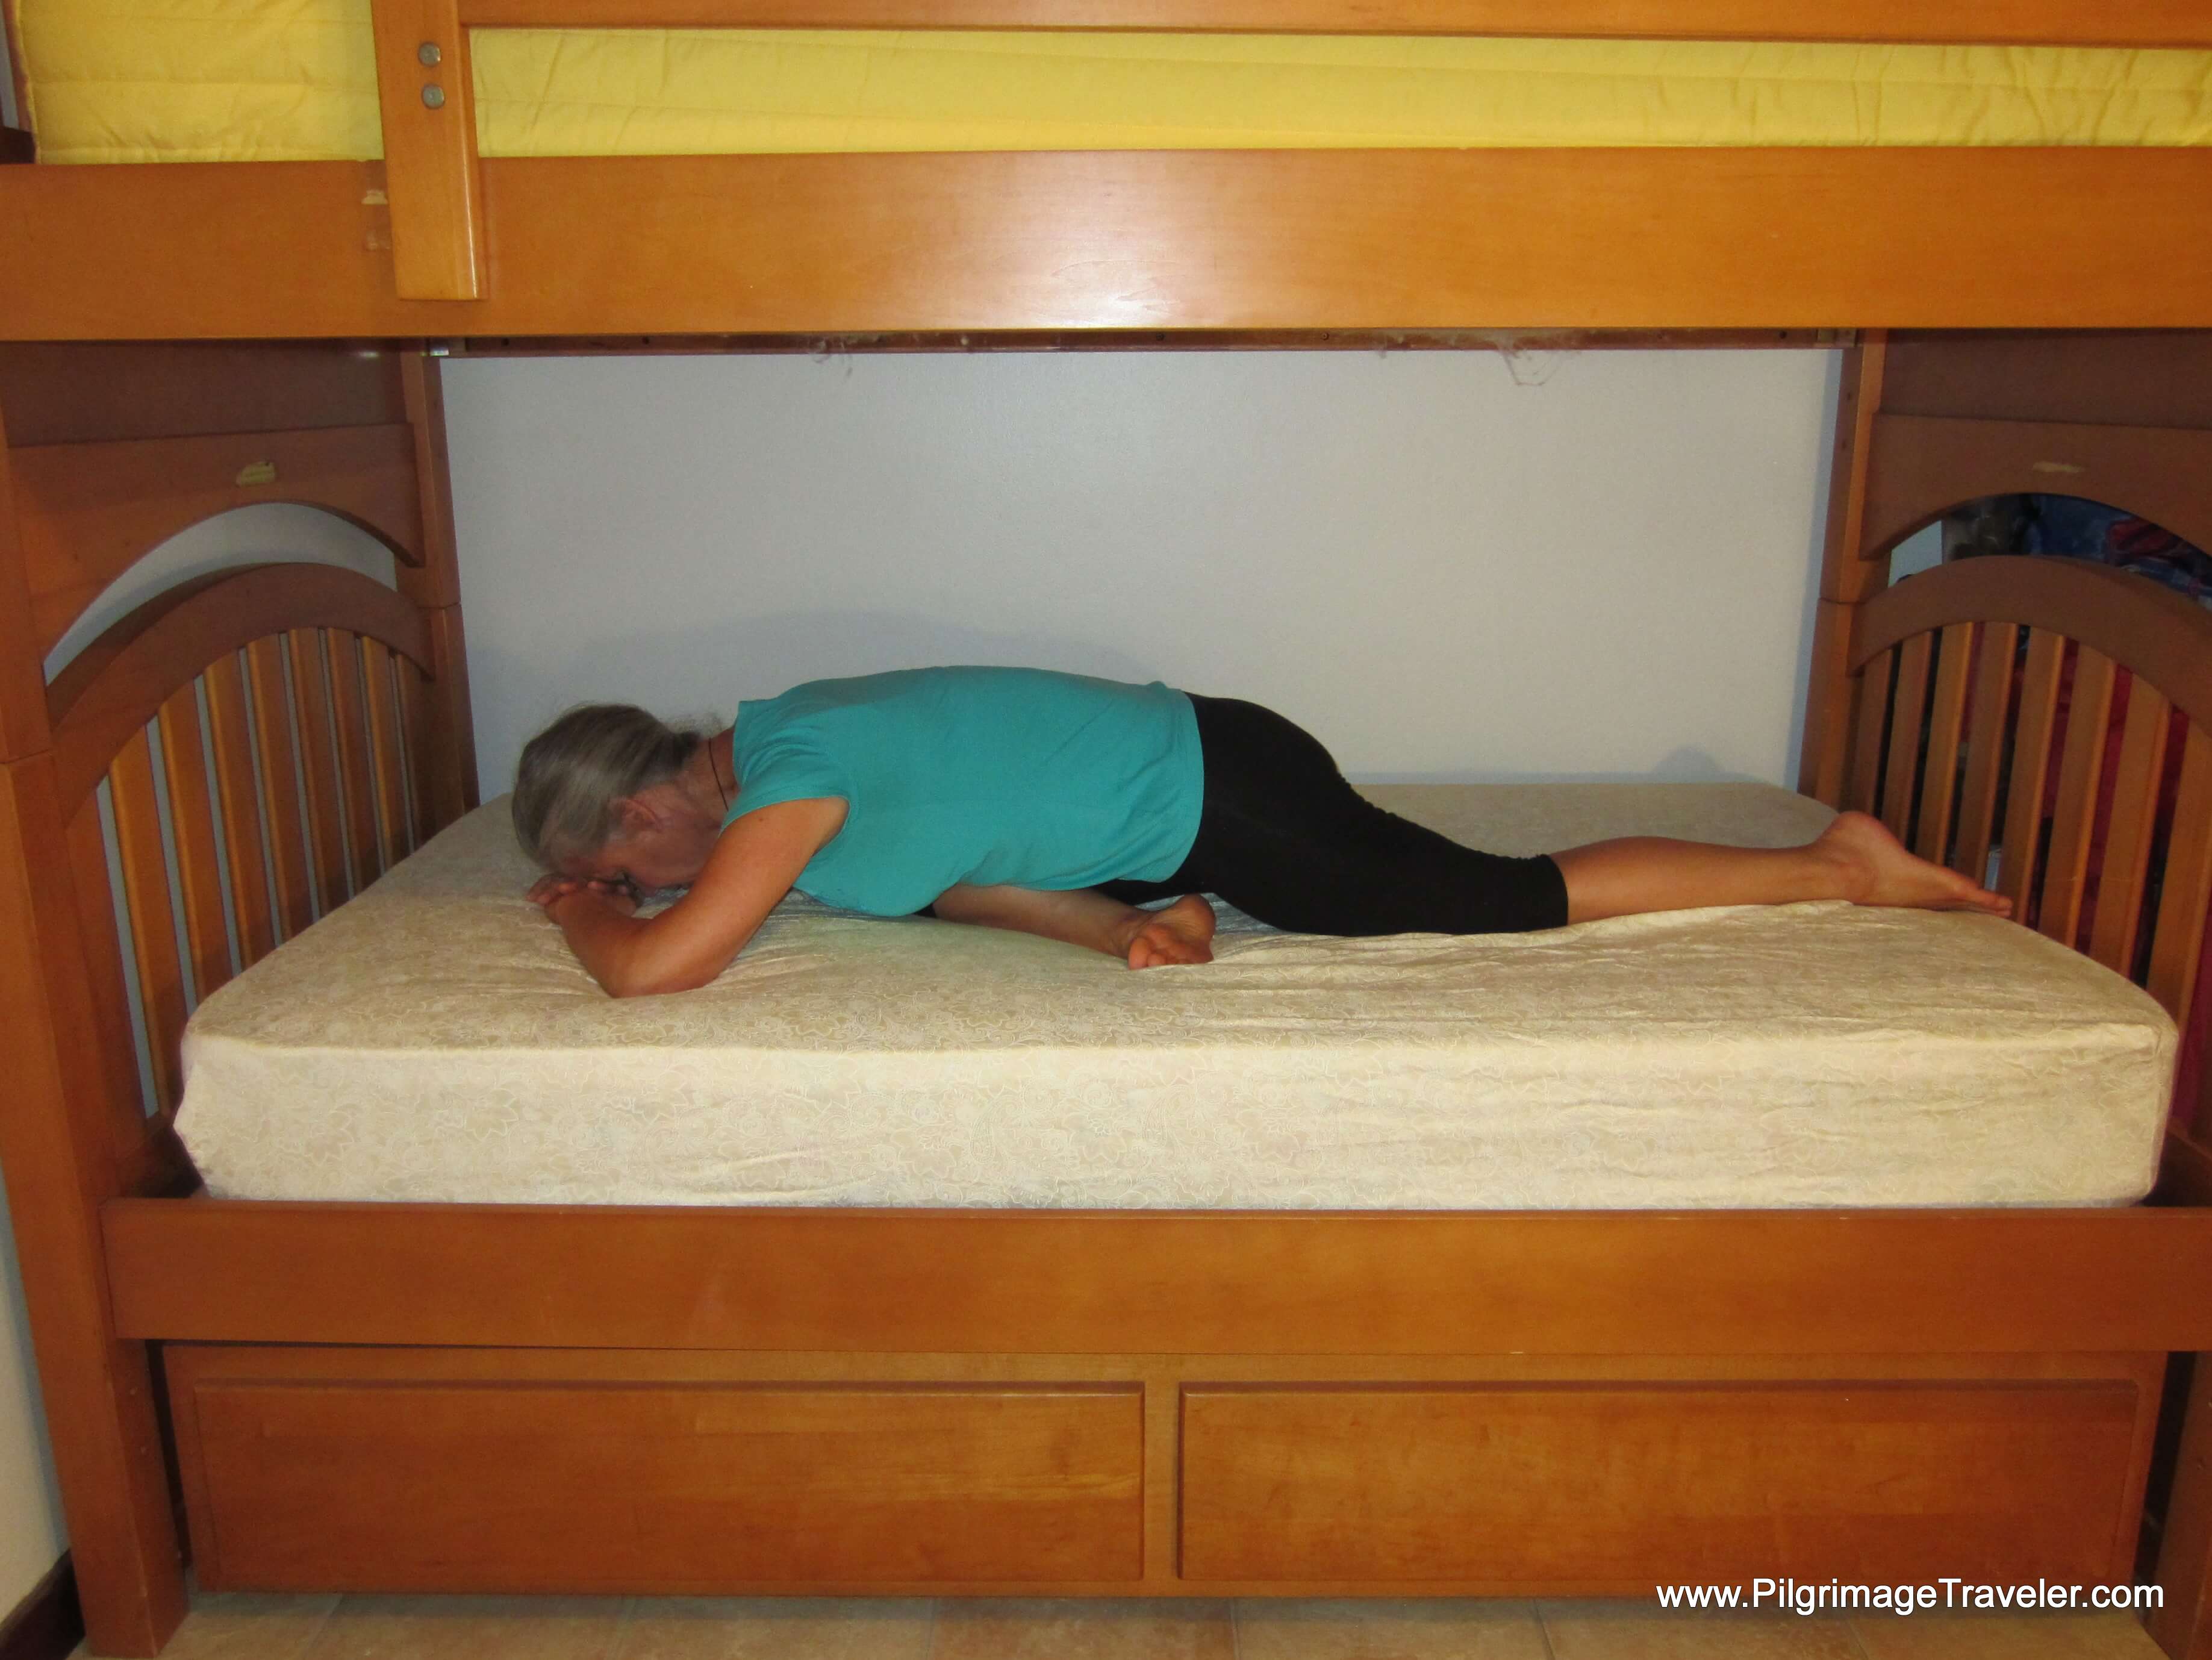
The final, and most intense bunk bed yoga pose that I offer for the hips, is the Sleeping Swan (the Pigeon Pose). In Yin Yoga we call it the Sleeping Swan because the action is different than in regular, Yang Yoga.
The intent for this pose is to more deeply relax and sink into the hip for a full 3-5 minutes. If you do not know this pose, click on the link above to see a full explanation. It is not an easy pose to get into and most people with tight hips are unable to lower the upper body all the way to the bed like I show below.
If you already know this pose and choose to do it, make sure your right knee is farther out to the right than your hip. Breathe deeply into this one for a full release! The bed yoga version may feel differently and be easier to do than on a hard floor.
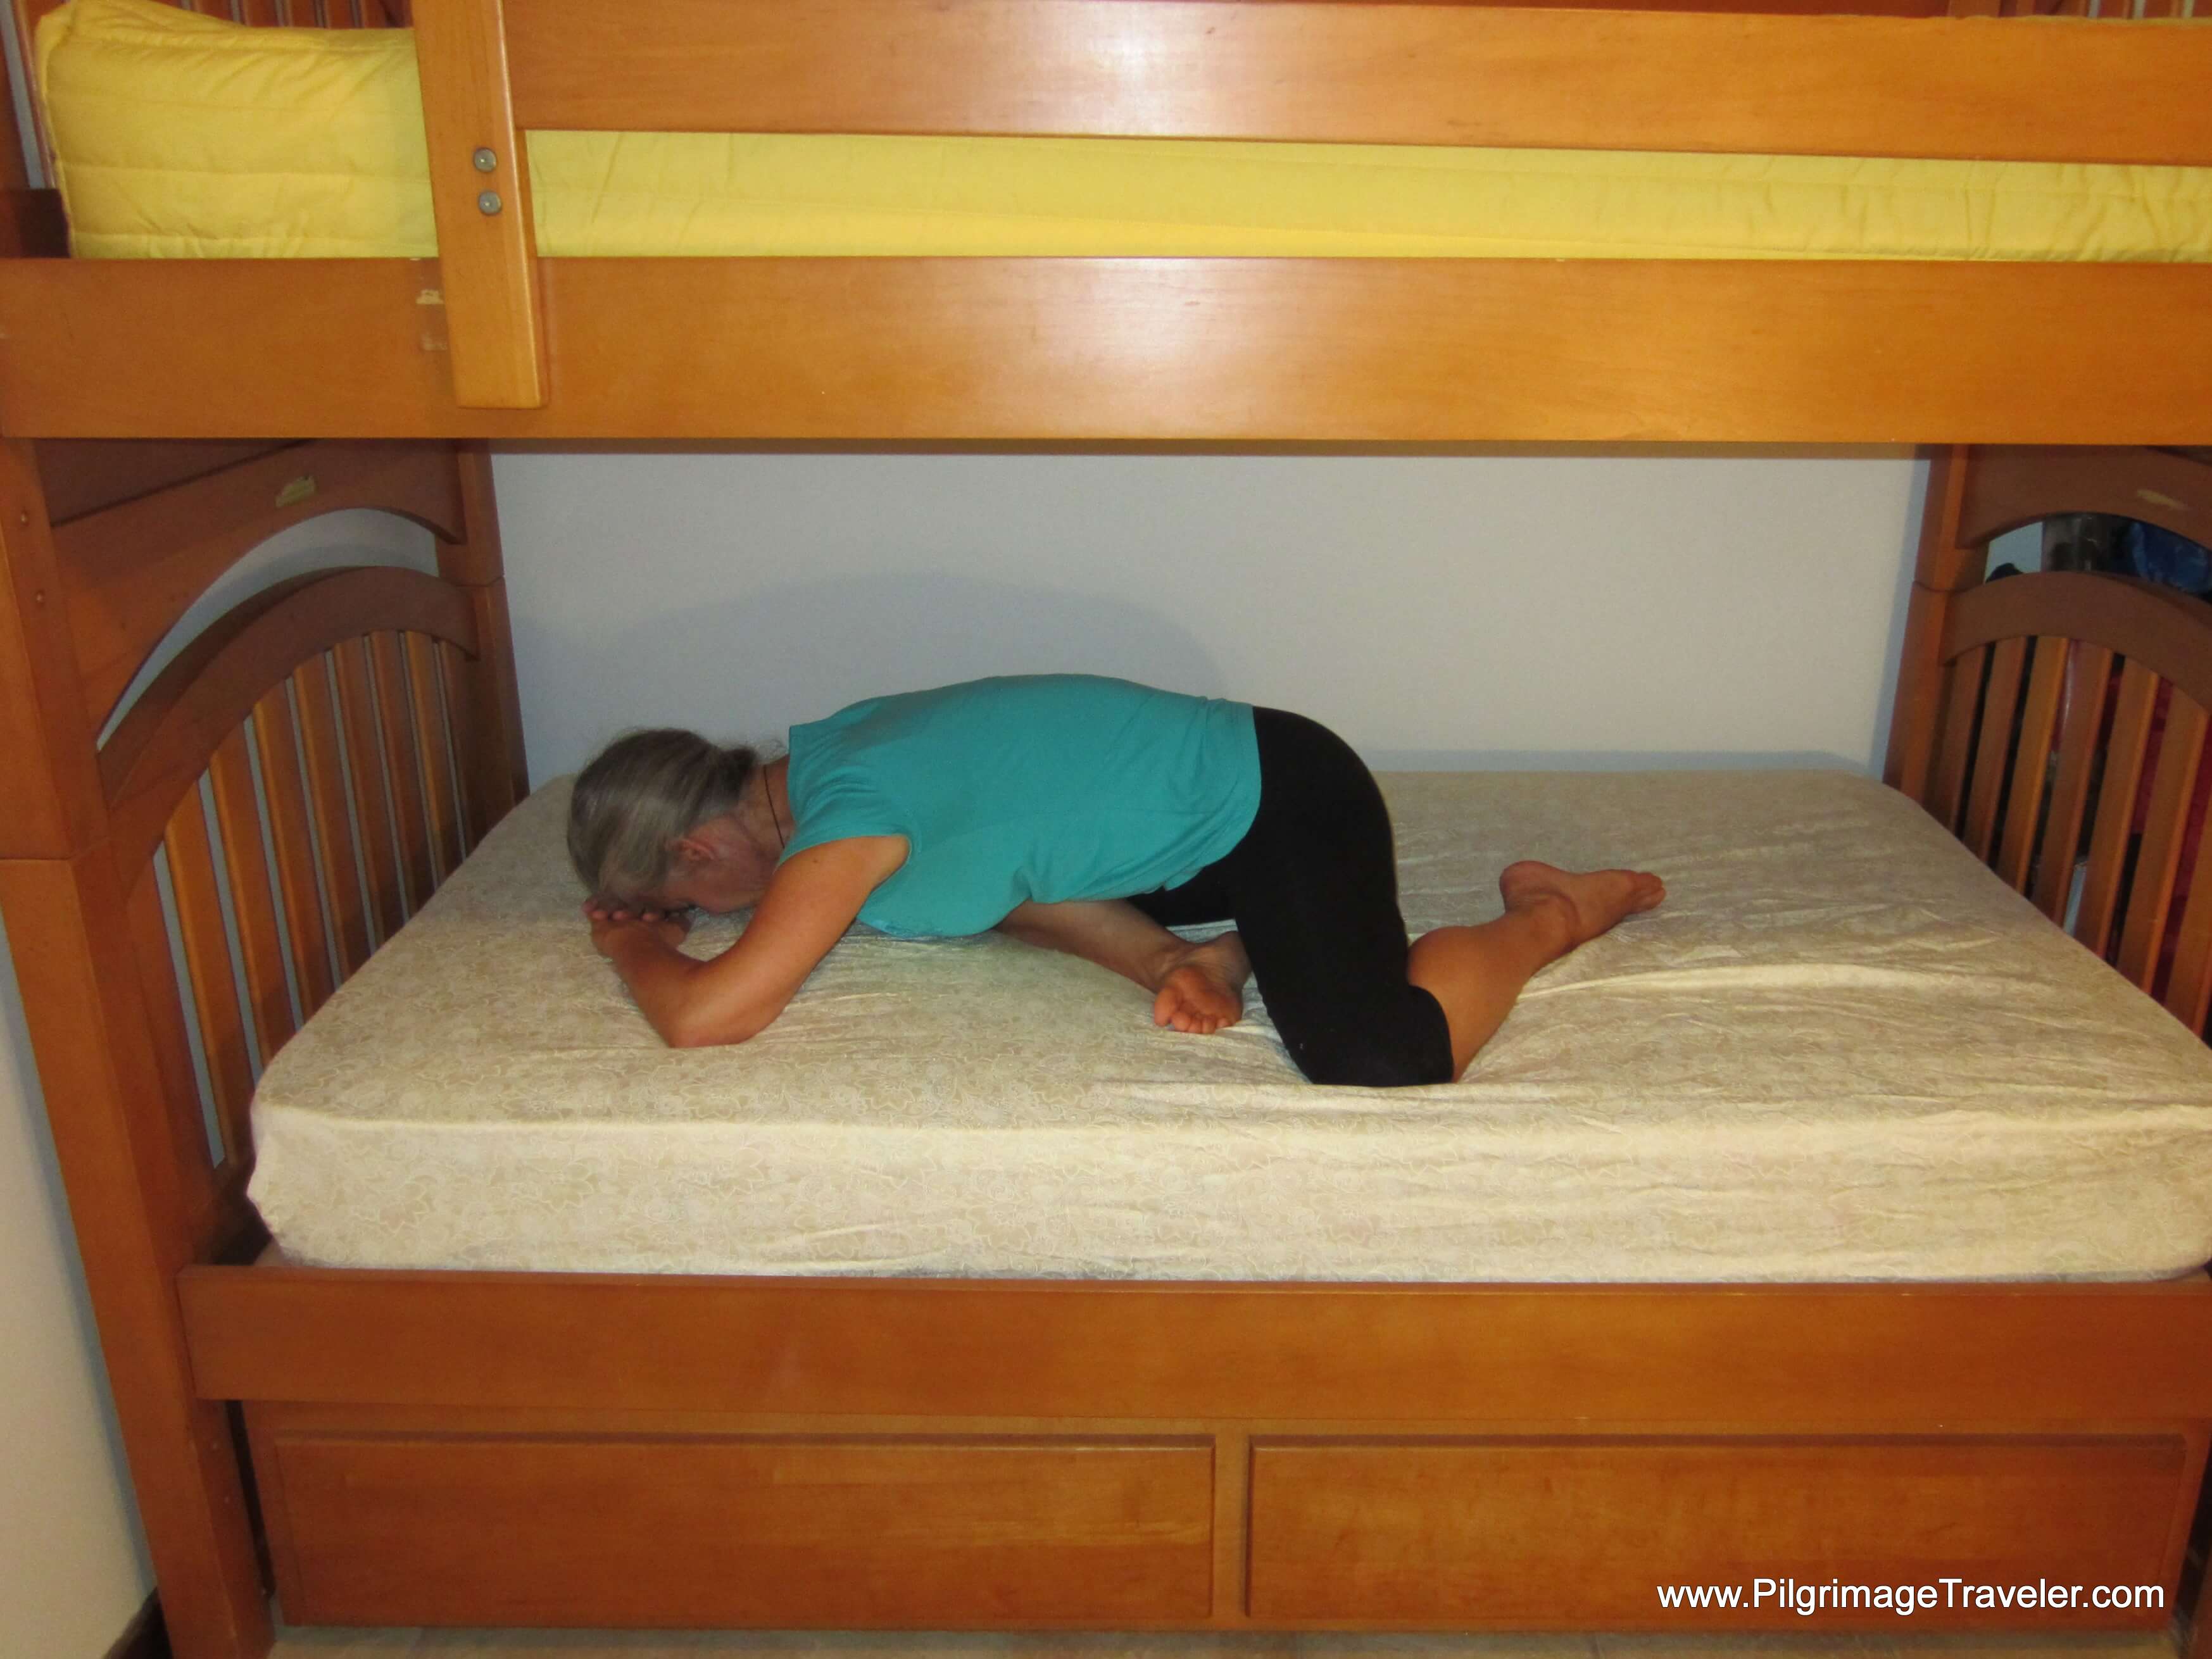
If you have done the Sleeping Swan pose, and know that it is too intense for you, you may try the modified Sleeping Swan, also known as the "Broken Pigeon" shown below. In this one, you bend the left leg as shown. This will greatly reduce the stretch on the right hip!
Again, do both sides for equal amounts of time.
May your entire lower half of your body remain healthy and whole when you do these bunk bed yoga, hip openers!
Again, the Child's Pose is a counter-pose to the hip openers and feels so good! You can keep your arms above your head as shown, or tuck them down and in by your sides.
In this bunk bed yoga pose, if you keep your arms above your head, you will also release the backside of your shoulders. This might feel really sweet after carrying your pack all day.
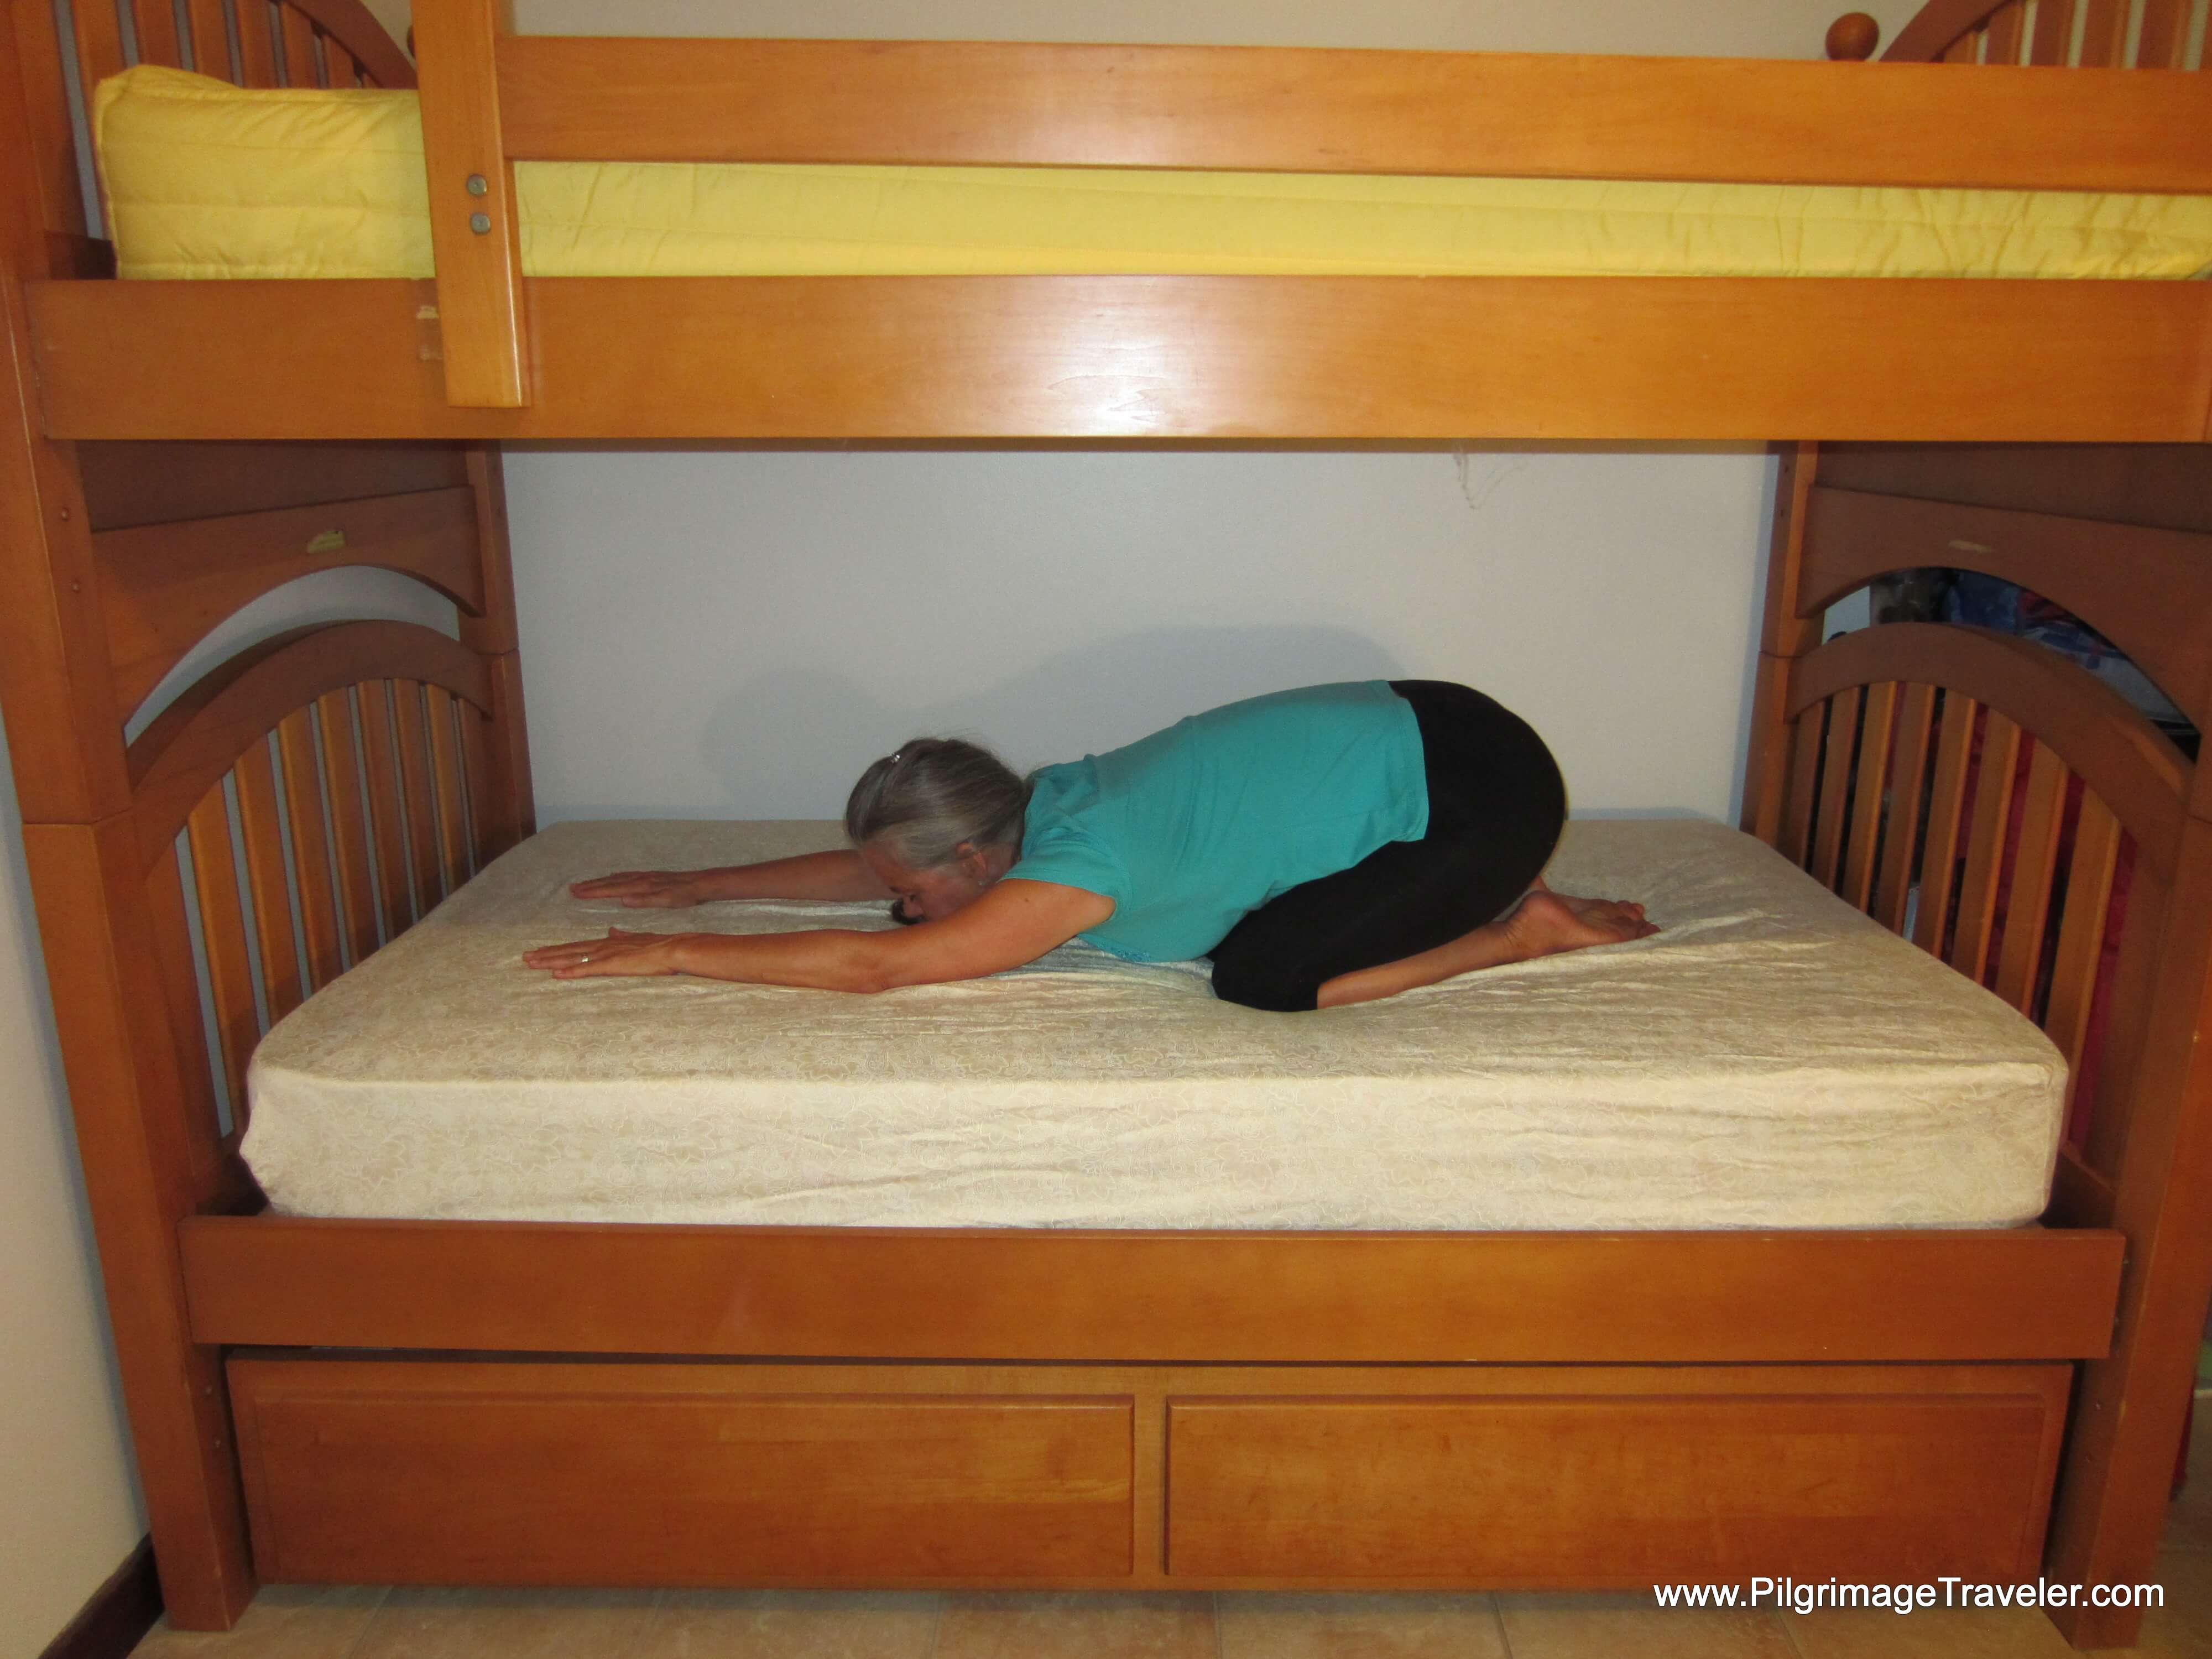 Repeat the Child's Pose
6. Final Resting Pose
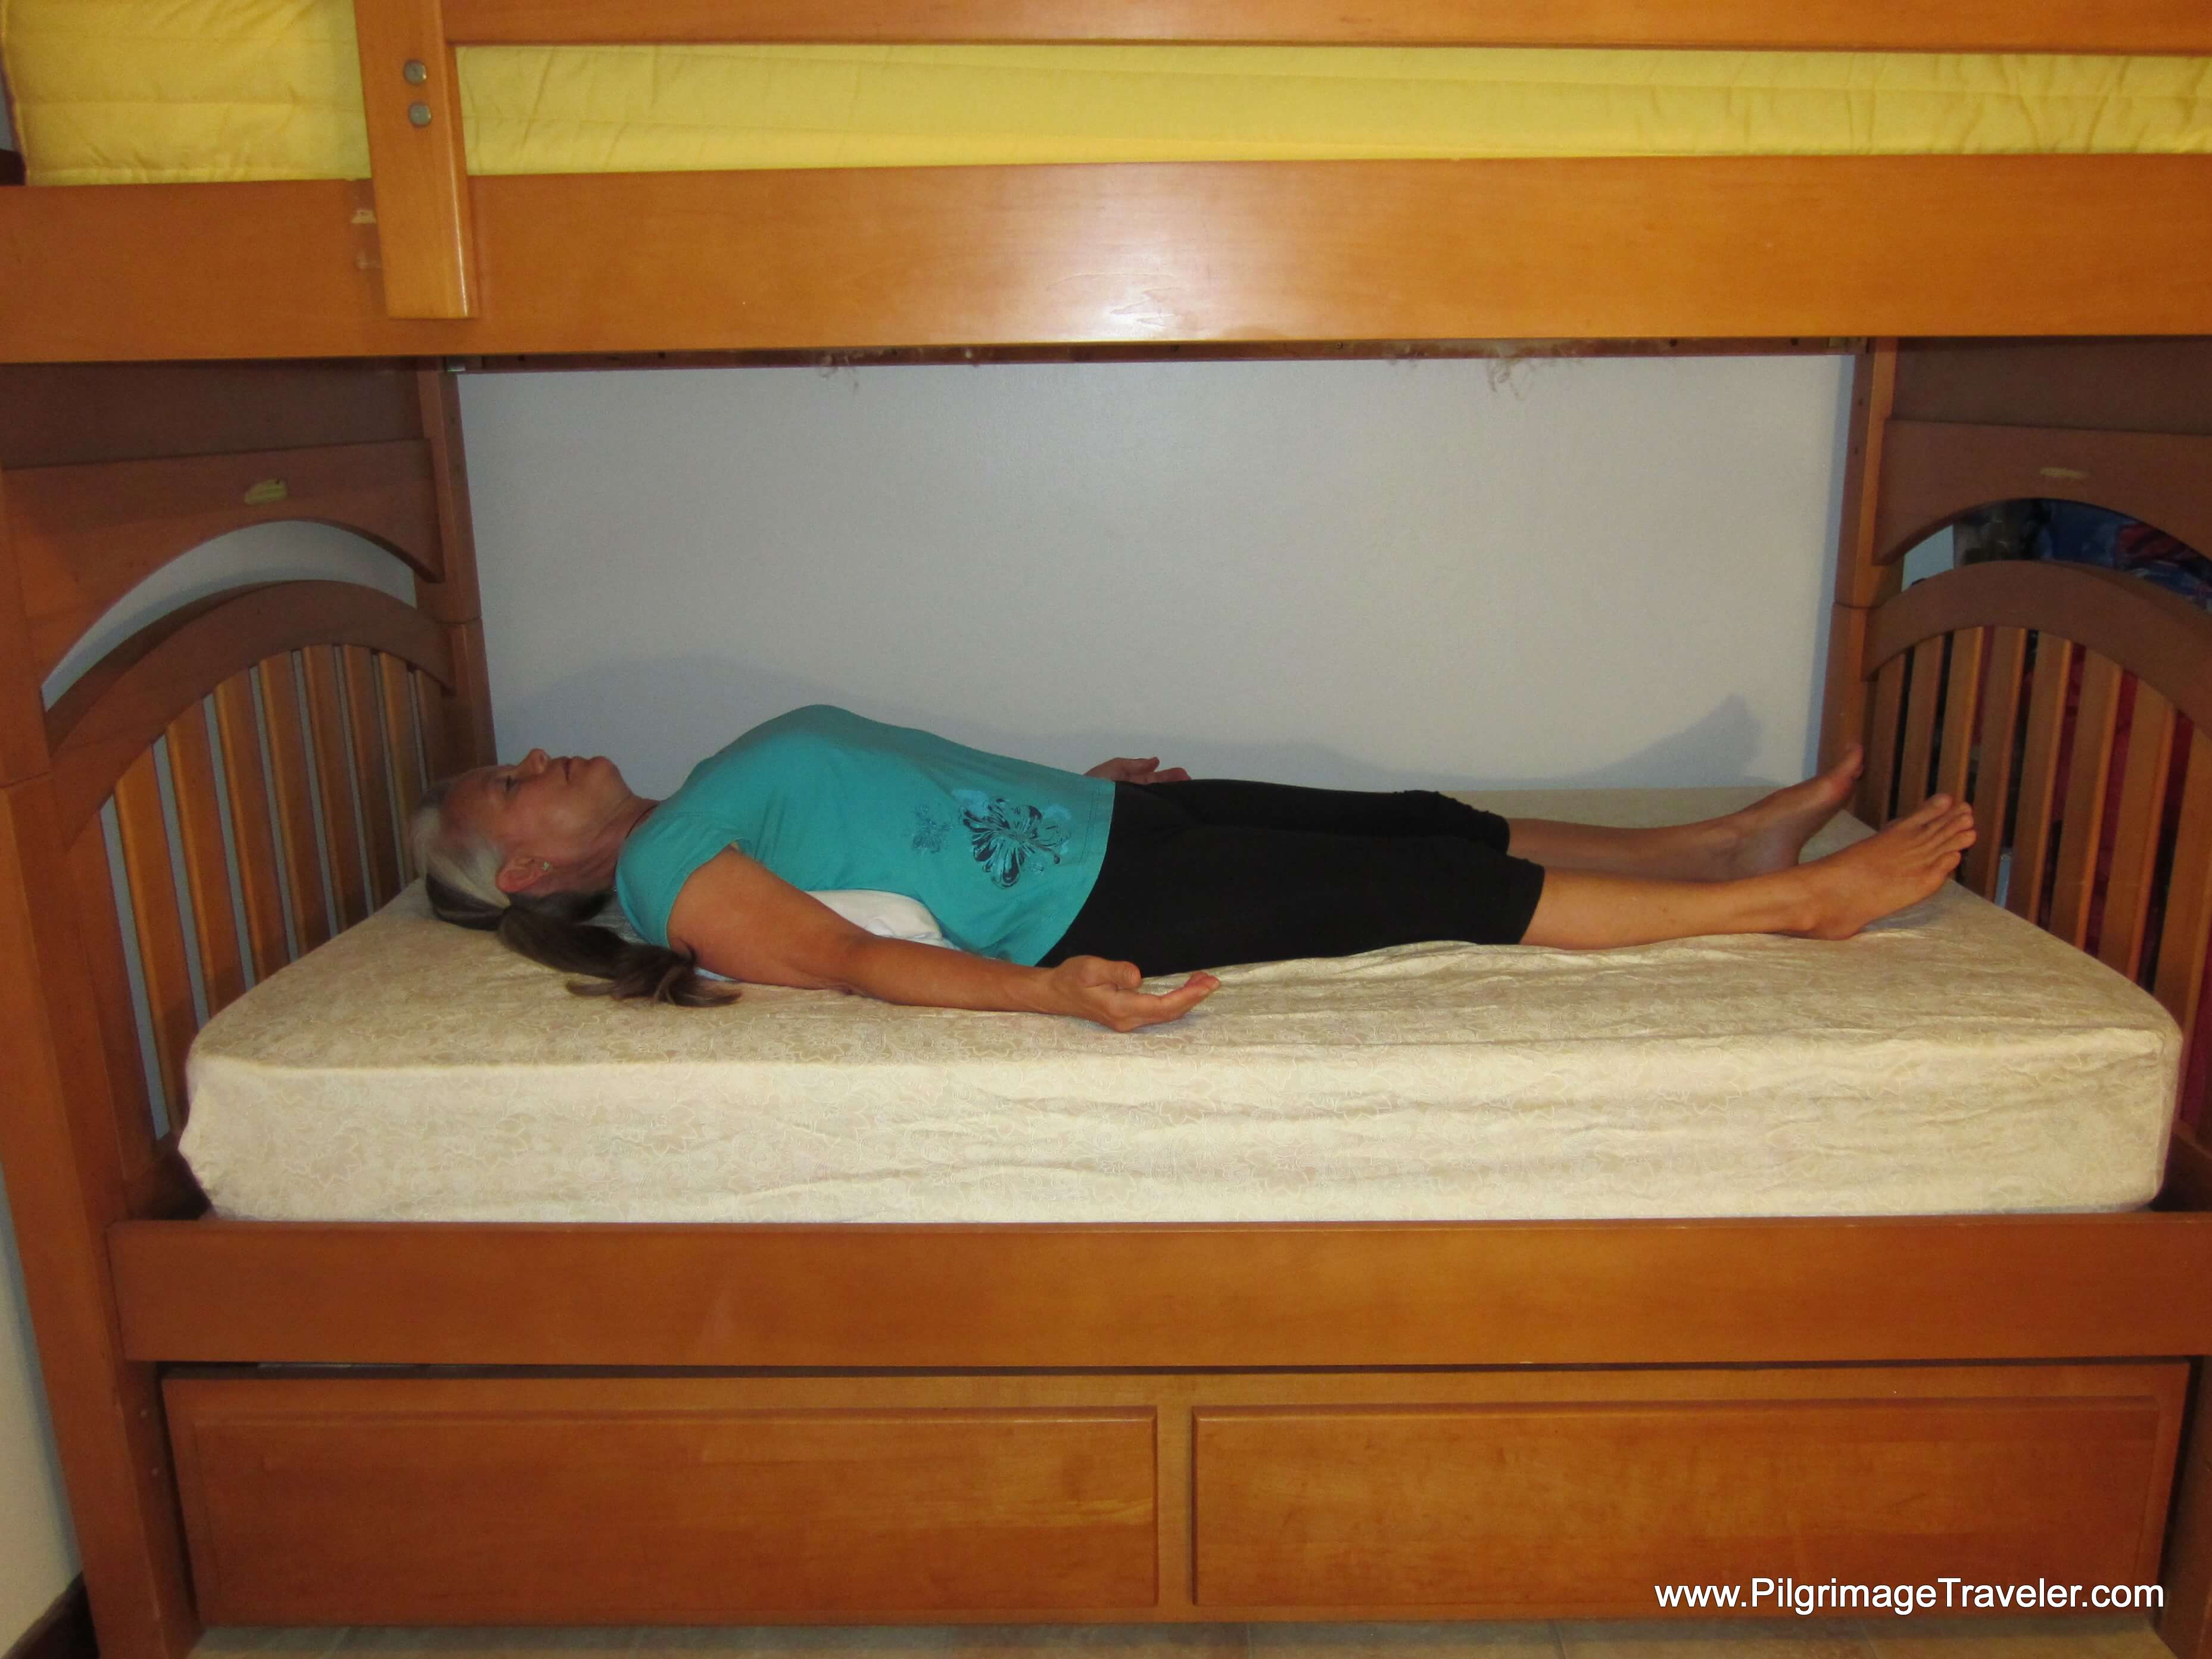
If you do the Child's Pose and the Supported Fish Pose, below as your final two bunk bed yoga poses, it will help you wind down your day to get a restful sleep.
Both poses will help you move into a meditative state, especially the Supported Fish Pose, with its deeply supportive nature. This bunk bed yoga pose should be your final pose, to replace the traditional Savasana, done at the end of every yoga class.
The Supported Fish Pose will give you the time to integrate the bodywork of the prior poses. Plus, when you put a pillow, long-wise under your back at the shoulder blades, as shown below, this will raise your chest higher than your hips. In this posture, you will also release the pectoral muscles in your chest, releasing the hunched forward shoulder posture that you created all day long, carrying your pack!
This is an intensely therapeutic pose, especially if you add the deeply relaxing, belly breathing!
I hope you enjoyed the therapeutic poses that I have presented to you! May your entire being stay healthy, happy and without stress when you do these bunk bed yoga poses! It is my wish that you will be the most in-tune pilgrimage traveler of all!
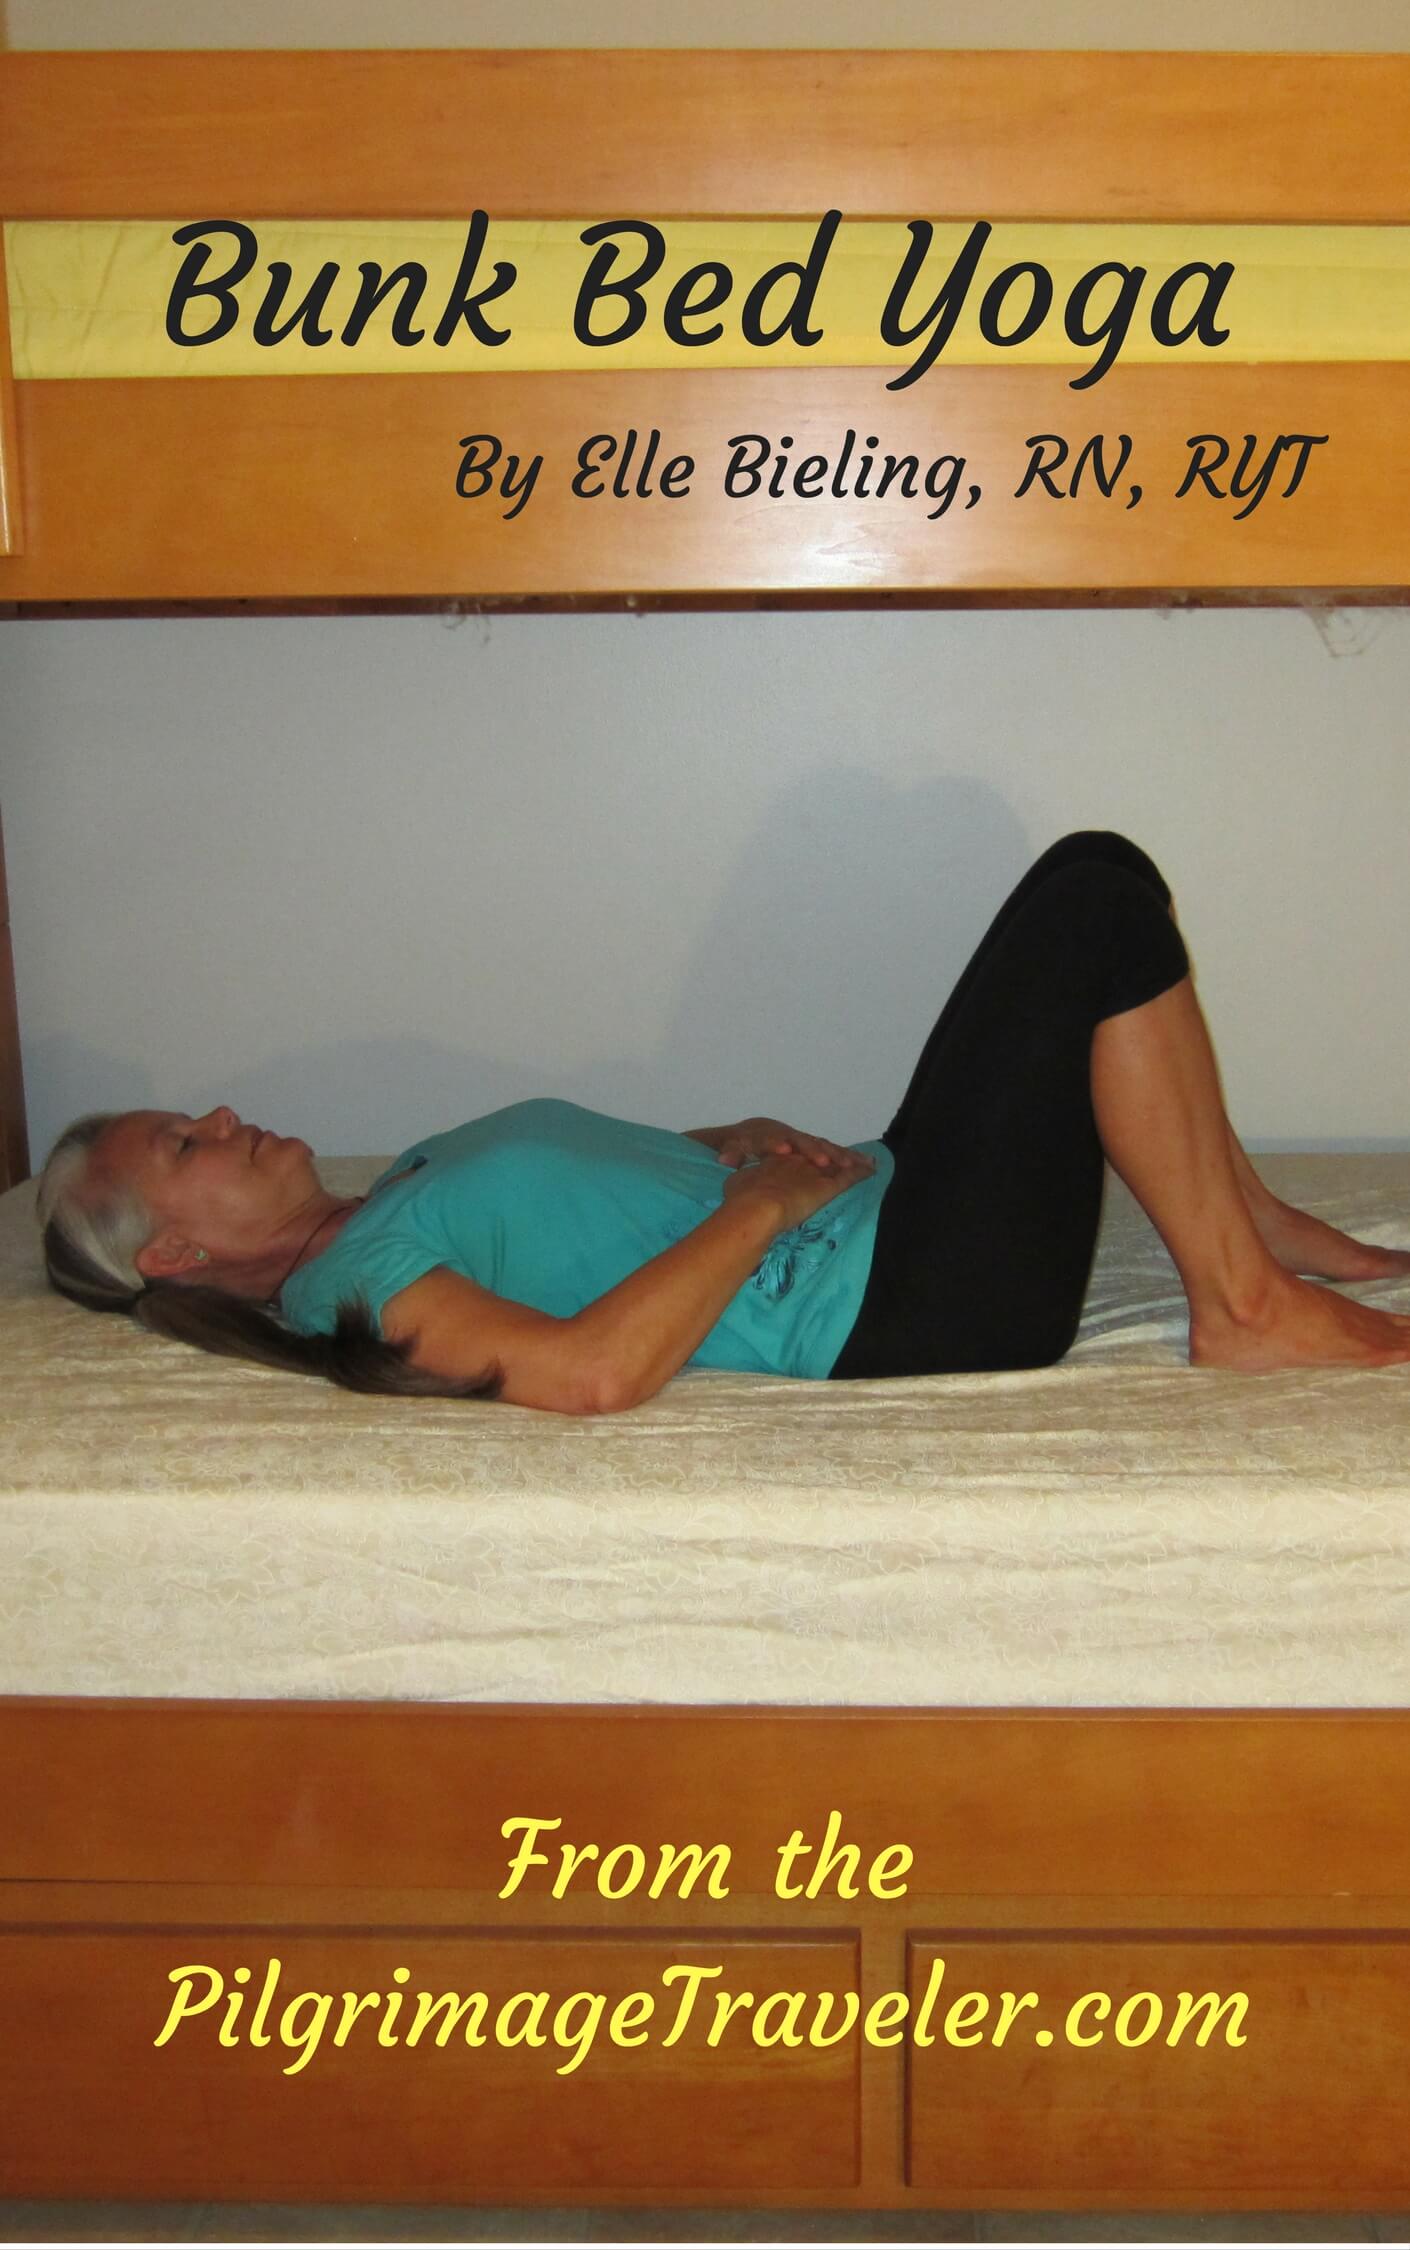
If you liked my Bunk Bed Yoga article, you may also like downloading it as a PDF file, for offline use (when on your pilgrimage). It is my free gift to you! All I ask in return is that you "recommend" and "share" this article on Facebook (see blue buttons just above), to say "Thanks Elle!" Just click on the book, below, to download your free copy! You may freely share this with anyone and everyone!
**By downloading this ebook and practicing any yoga postures or physical movements contained therein, you are agreeing that you are in good health, cleared by your healthcare professional to participate in physical activities and you release The Pilgrimage Traveler from any liability involved in the practice.
Please Consider Showing Your Support
Many readers contact me, Elle, to thank me for all the time and care that I have spent creating this informative website. If you have been truly blessed by my efforts, have not purchased an eBook, yet wish to contribute, I am very grateful. Thank-you!
Search This Website:
Follow Me on Pinterest:
Follow Me on Instagram:
Find the Pilgrimage Traveler on Facebook:
Like / Share this page on Facebook:
***All Banners, Amazon, Roamless and Booking.com links on this website are affiliate links. As an Amazon associate and a Booking.com associate, the Pilgrimage Traveler website will earn from qualifying purchases when you click on these links, at no cost to you. We sincerely thank-you as this is a pilgrim-supported website***
PS: Our guide books are of our own creation and we appreciate your purchase of those too!!
Shroud Yourself in Mystery, along the Via de Francesco!
Walk in the Footsteps of St. Francis, and Connect Deeply to the Saint and to Nature in the Marvelous Italian Countryside!
Recent Articles
-
Day One on the Camino Portugués, Lisbon to Alverca do Ribatejo
Apr 15, 25 08:19 PM
Our Day One on the Camino Portugués was much more beautiful and enjoyable than we had heard. -
Hiking the West Highland Way
Apr 11, 25 08:51 PM
Hiking the West Highland Way is a representation of all things Scottish, traversing 96 miles from the lowlands of Milngavie to Ft William, in the highlands. -
Way of St Francis eBook Guide (Via di San Francesco)
Apr 11, 25 08:49 PM
Our Way of St Francis eBook Guide, a digital guidebook is full of current information to assist you in finding your Way. In downloadable, digital, PDF format.
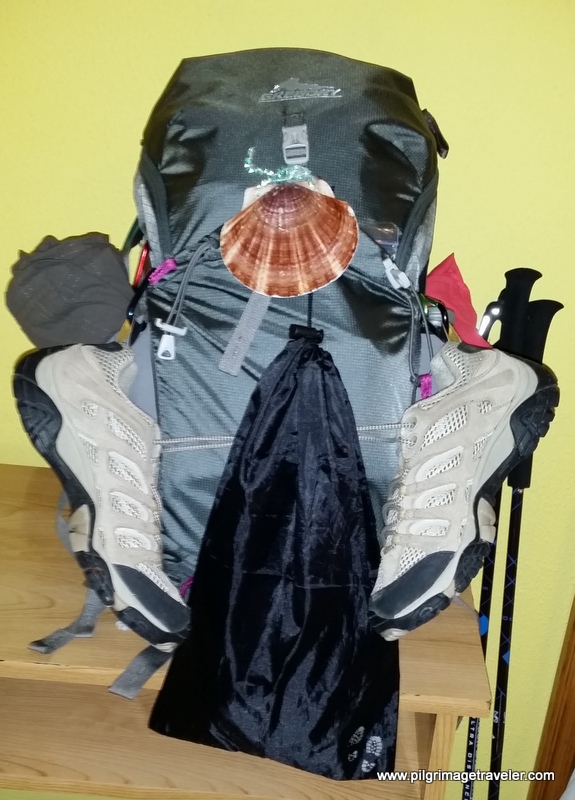
Need suggestions on what to pack for your next pilgrimage? Click Here or on the photo below!
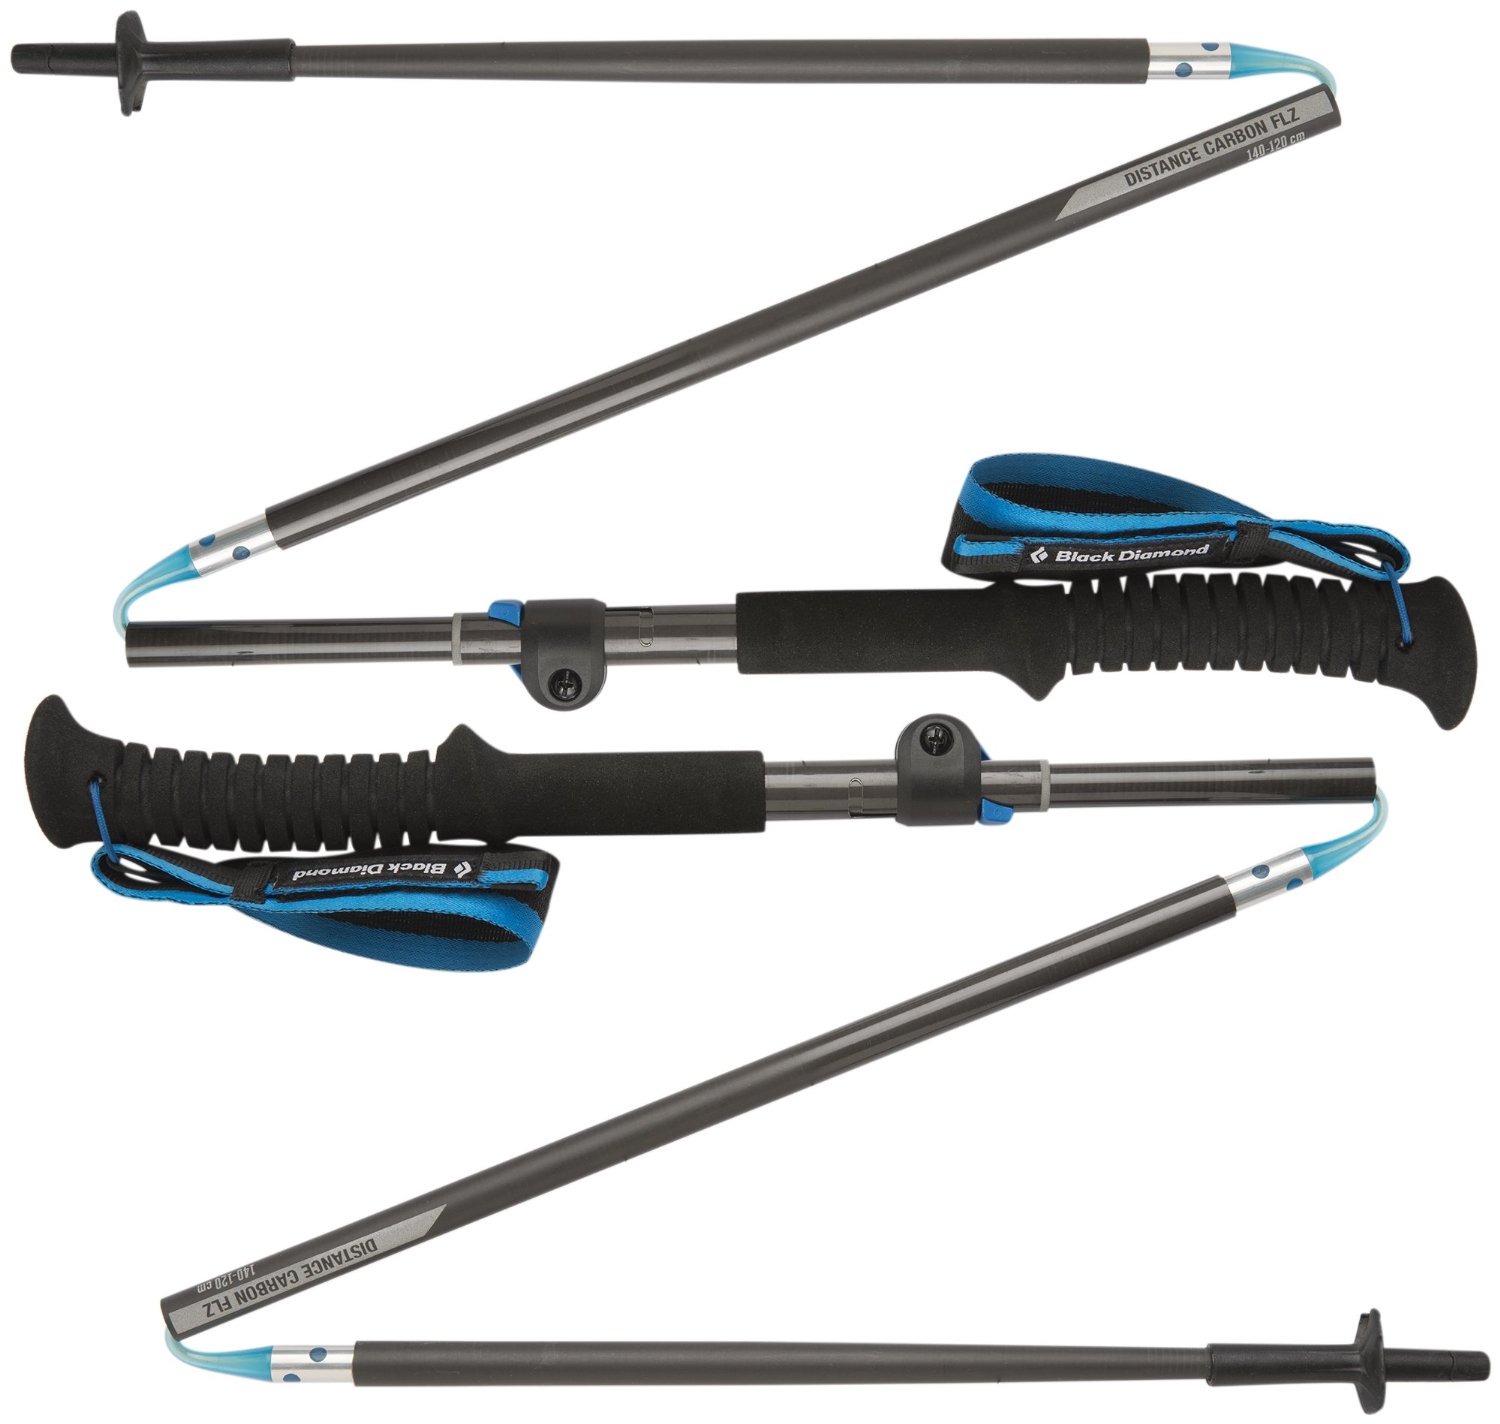
Carbon fiber construction (not aluminum) in a trekking pole makes them ultra lightweight. We like the Z-Pole style from Black Diamond so we can hide our poles in our pack from potential thieves before getting to our albergue! There are many to choose from! (See more of our gear recommendations! )
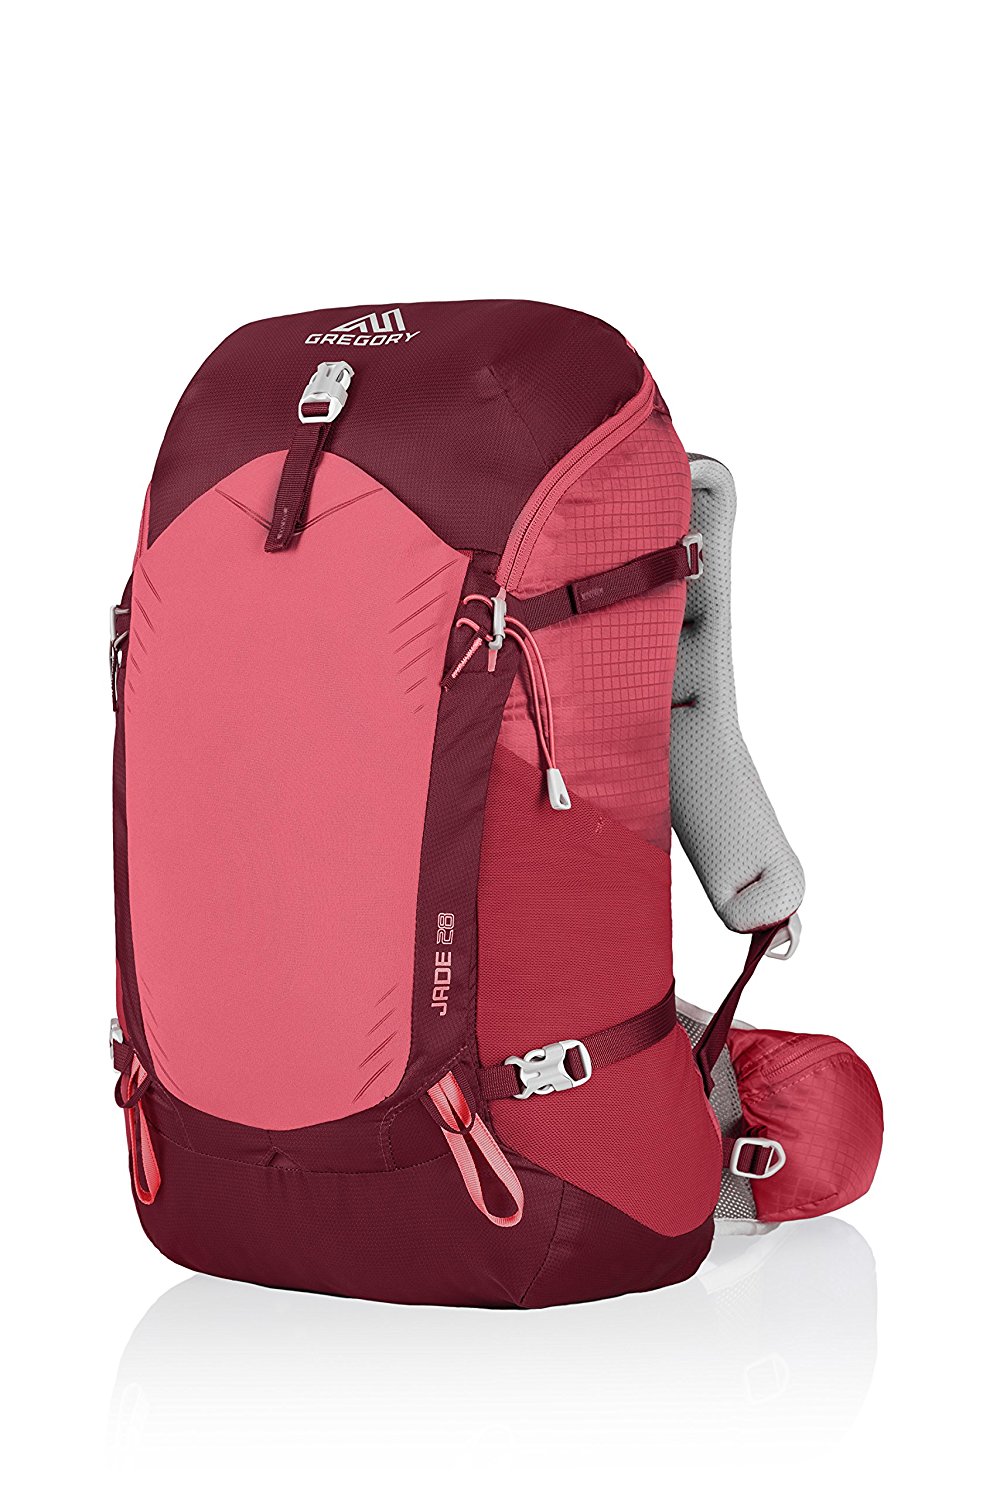
Gregory BackPack - My Favorite Brand
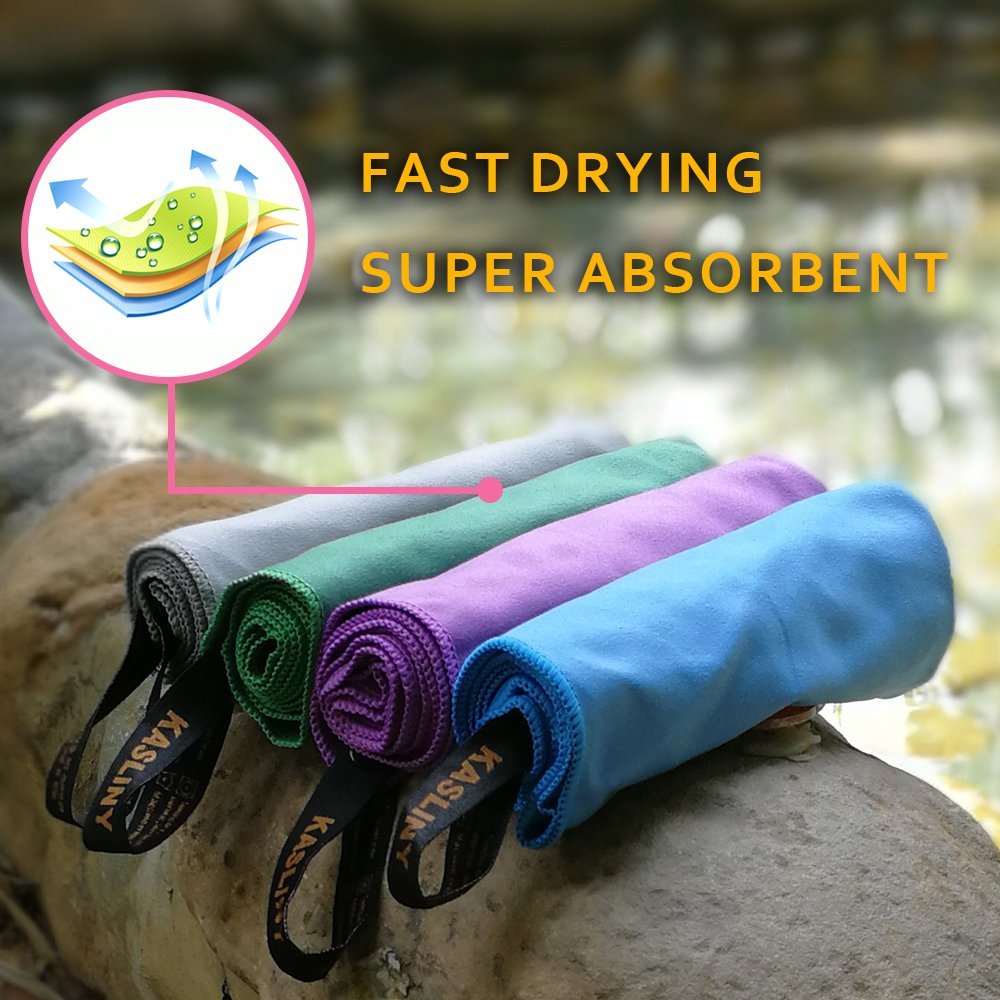
Do not forget your quick-dry microfiber towel!
Booking.com
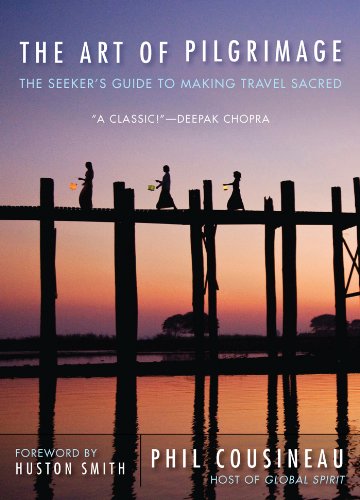
My absolute favorite book on how to be a pilgrim:











Your Opinion Matters! Comments
Have you had a similar experience, have some advice to give, or have something else you'd like to share? We would love to hear from you! Please leave us a comment in the box below.